LinkBack URL
 About LinkBacks
I'm using PLAOriginally Posted by Tumble

http://en.wikipedia.org/wiki/Polylactic_acid
3mm PLA filament in grey to be exact.
I will try ABS one day but I don't fancy breathing the fumes, my lab's still my bedroom after all.


I'm using PLA
http://en.wikipedia.org/wiki/Polylactic_acid
3mm PLA filament in grey to be exact.
I will try ABS one day but I don't fancy breathing the fumes, my lab's still my bedroom after all.
Tumble (27-03-2014)

When 3D printers first hit the mainstream press I wasn't too bothered. But I am about to spend about £60 getting some stuff printed for my quadcopter. RC aircraft is one of the places where 3D printing has really taken off, ranging from small parts up to full frames and camera gimbals.
Update
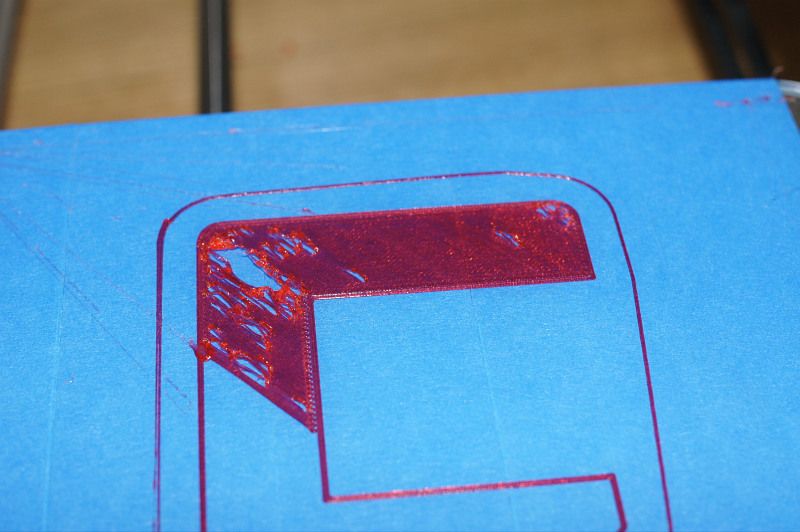
My very first successful print!
A good use for grey filament huh? It's far from perfect, there's lots of fine calibration left to do but I'm glad to have reached this milestone.
I've updated the printer's firmware to Velleman's stock version 2 and the print host to Velleman's customised version of Repetier 0.95, either one of both updates seems to have fixed the translation error.

Awesome choice of your first successful print.
Are you planning a more permanent mounting mechanism for the mirror? I would be bothered by using clips to hold it together like that.
Perhaps the idea is to test the original surface again which is why the removable mounting is required. I look forward to more updates on your 3D printing adventures.

Win!! PRINTER WORKING

I guess you waited for your companion cube
Looking pretty good.
throw new ArgumentException (String, String, Exception)
I think you're confusing rules of ABS with PLA
ABS needs a clean/heated bed
PLA doesn't need a heated bed (and that causes more problems IMO)
I did have adhesion problems at the start, and solved it with blue painters tape
(http://www.amazon.co.uk/gp/product/B00004Z4DU and you use hardly any of it)
In fact not had any adhesion problems since that.
I've had better quality prints since I installed an 80mm fan blowing on the bed.
especially when printing with faster settings / fast layer times.
I noticed slic3r had a setting in filament/cooling that slowed printing down way too much.
Also I never clean the bed - I could replace the painter's tape if it gets too uneven,
but only had to do that once in months.
While I generally use cheap PLA filament, you should order a rainbow pack from faberdashery
at least once, just to play with different colours
http://www.faberdashery.co.uk/produc...nbow-fun-pack/
Last edited by mikerr; 25-03-2014 at 11:48 AM.
I'm aware that PLA doesn't require a heated bed but many have recommended heating and Velleman's own configuration file for PLA sets the bed to 50°C. Right now the heated sheet of glass is working wonders, the filament sticks to it like glue. I noticed blue painters tape was highly recommended but the sheet of glass also solves the unevenness of my K8200's print bed.
I don't plan on replacing the clips for the mirror, there's no way the mirror's going to budge. The clips also allow me to easily remove the print bed for what ever reason.
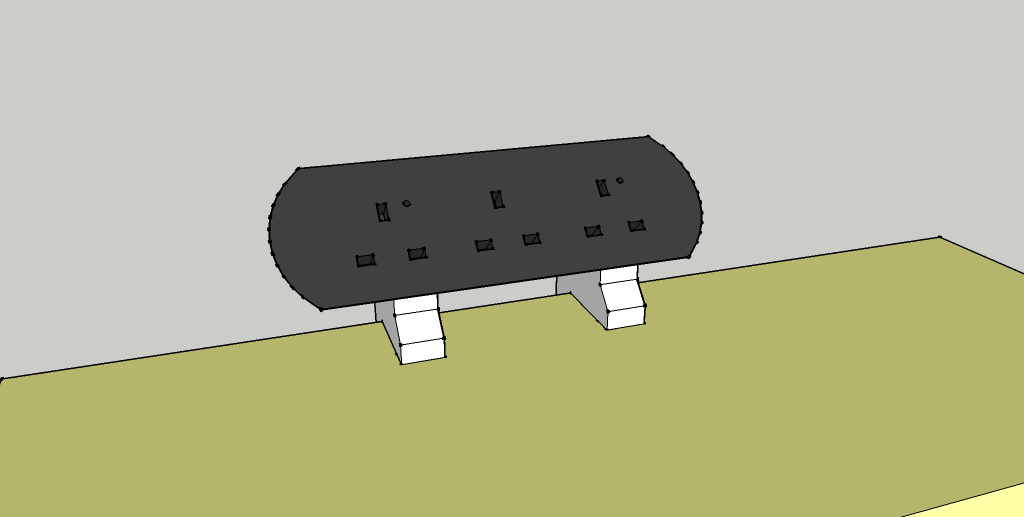
Next, I'll be designing and printing a desk clamp for a trailing extension lead, for quick and easy access to mains sockets on my workspace.
Last edited by DDY; 25-03-2014 at 07:33 PM.
Update.
Firstly, a warning. Getting in to 3D printing can be a very good way of wasting a sunny weekend.
The issues continued:
The first layer
That. first........... layer...
I still had immense trouble with the first layer, getting the thing to stick consistently took many hours of trial and error, much wasted filament and many cups of coffee.
It's doing much better now and I've narrowed down my method for PLA filament to:
- 50°C heated bed, room temp causes the first layer to curl and 60°C doesn't do much.
- Pre-heating bed for a while before a print, I guess the glass' surface takes a long time to reach temperature.
- Blue painters tape, suggested by many for good reason! The sheet of glass was a huge improvement over the bare bed but the tape makes it even better.
- Cleaning the nozzle exterior before every print, molten filement can sometimes catch the print and eventually cause filament to ball up on the nozzle tip. I'm using an old cotton sockto wipe away filament on a pre-heated nozzle.
- Reducing nozzle height to sub 0.2mm
- Leveling the bed, again, again and again!!!
Getting past that first layer is key, as of now I don't have too many problems after that.
Shifting mid print
Despite the firmware update I still had a problem with the print shifting on layer 4 or beyond. I think I've fixed it, now, by;
- Increasing power to the stepper motors by increasing the current limit on the stepper controllers.
- Decreasing the carriage acceleration values.
- Made sure the belt and pulleys weren't slipping by making sure the belts were well tensioned and pulleys secured to the motors.
Other niggles
Not show stoppers but there are a few things that I'm thinking of improving:
- Z motor mount, the Z motor is jiggling around a bit and leaving Z banding on the prints. There are 3D printable brackets on the web which address this very issue.
- Filament reel feeding, while it hasn't yet been a problem, the reel doesn't roll as easily as I'd like it to. I'll be looking in to building a bushing to allow the reel to feed more easily.
- Remote monitoring, I'm thinking of setting up an IP cam so I can remotely monitor the progress of a print and kill it if nessecary. Faliures are usually catastropic, with prints lasting many hours and with the printer unable to detect failures; a lot of filament can be wasted and potentially cause damage to the printer if I'm not keeping an eye on it.
Complaining aside, as for my side quest to mount some mains sockets on my desk.
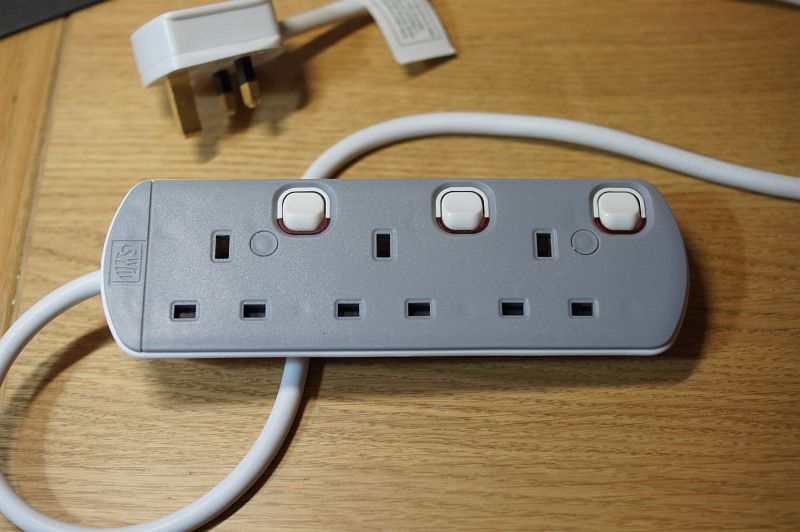
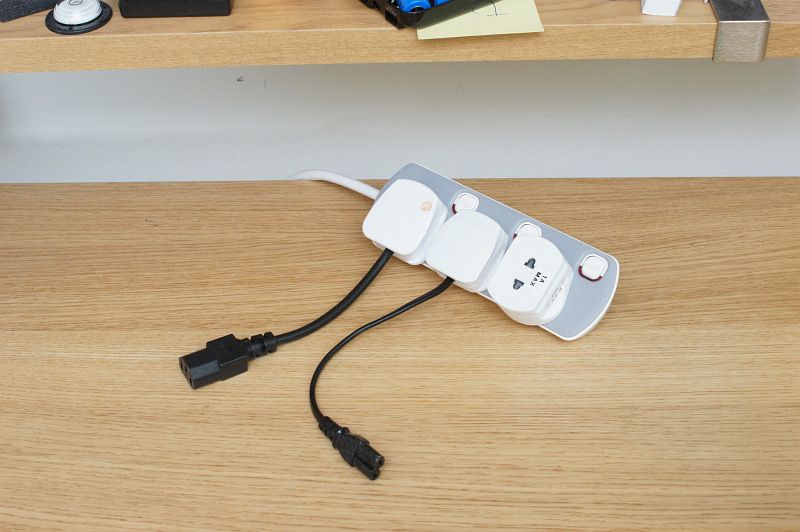
Here's a three way 1 metre switched trailing socket extension I'll be using, there are removable panels that reveal mounting holes that go straight through the unit making it ideal for this mini-project.
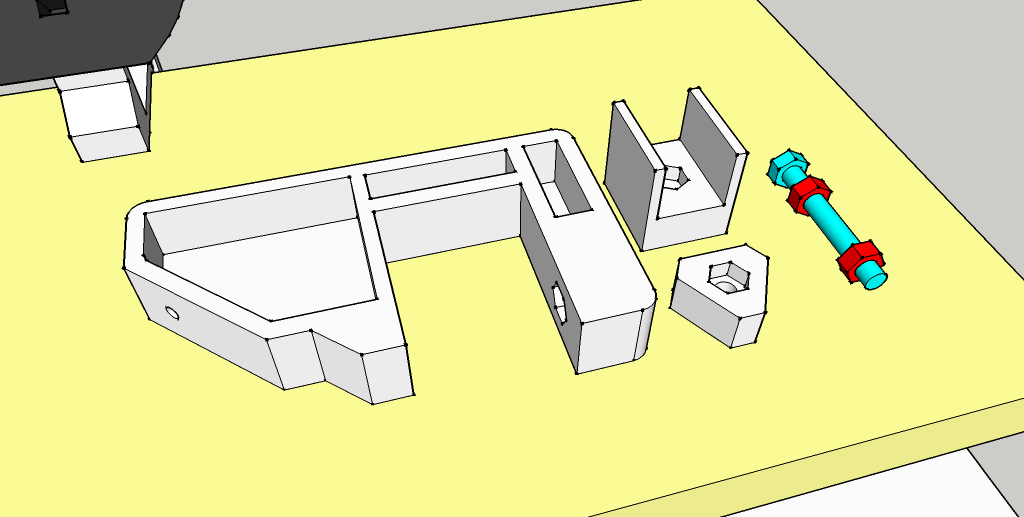
SketchUp is my favourite CAD program, free, quick and simple, yet very capable. It also boasts a large library of plugins including one which gives it the ability to export .STL files that are commonly used for 3D printing. This makes SketchUp my go-to CAD package for 3D printing.
The light blue component represents a bolt, the red a nut. These I won't be printing because perfectly good ones already exist!
The STL file churned out by SketchUp can then processed (or "sliced") by software to code which then in turn can be sent the printer. The process also does a lot of magic that optimises the model, too much to explain here, but it does have neat function that hollows out internal solid spaces filling it with low density filler, e.g. honeycomb mesh.
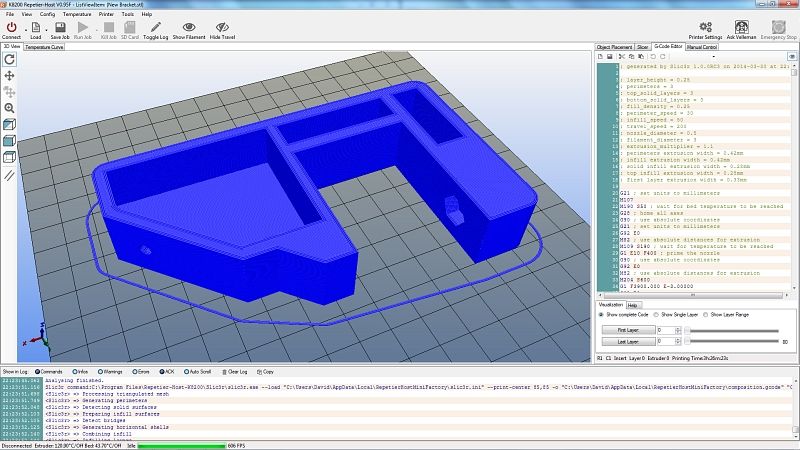
I'm using Repetier as a printing host and Slic3r to process the STL to GCode.
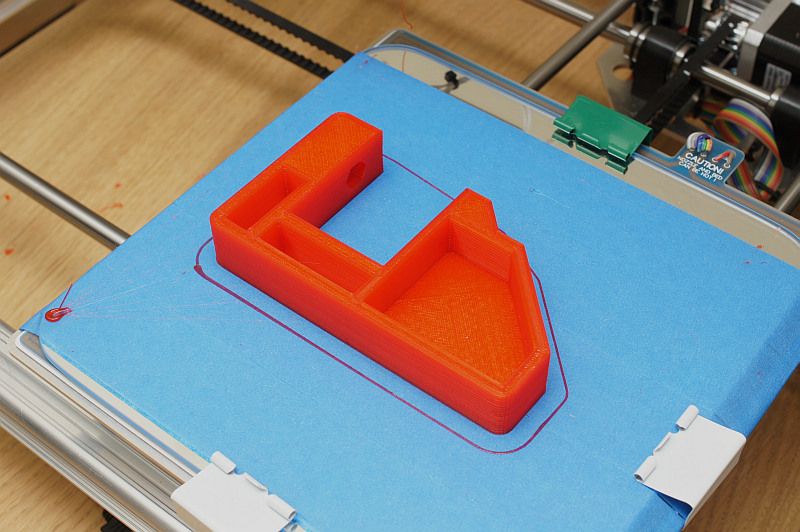
Then start the print, wait four hours and hope this comes out the other end:
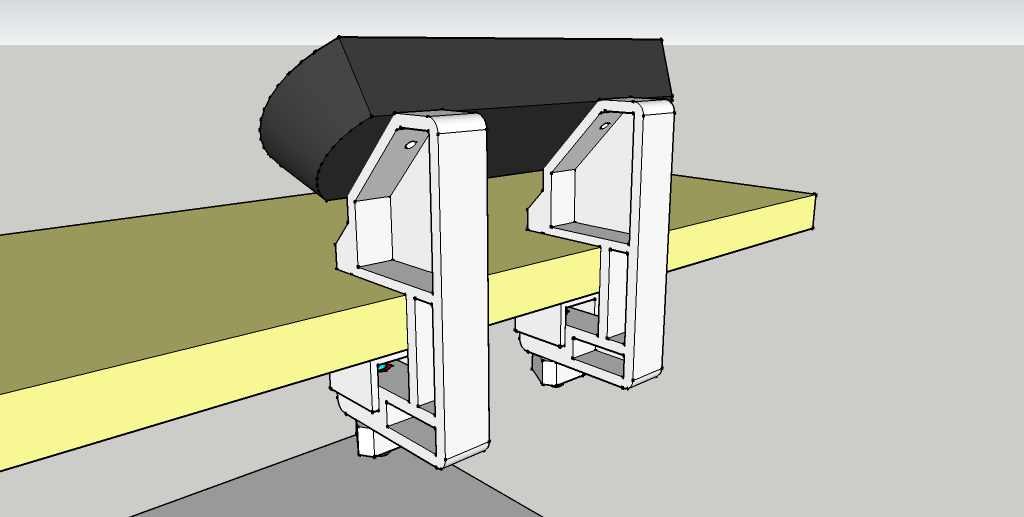
So that's one side down, one more to go. I'll print the other side some other day.
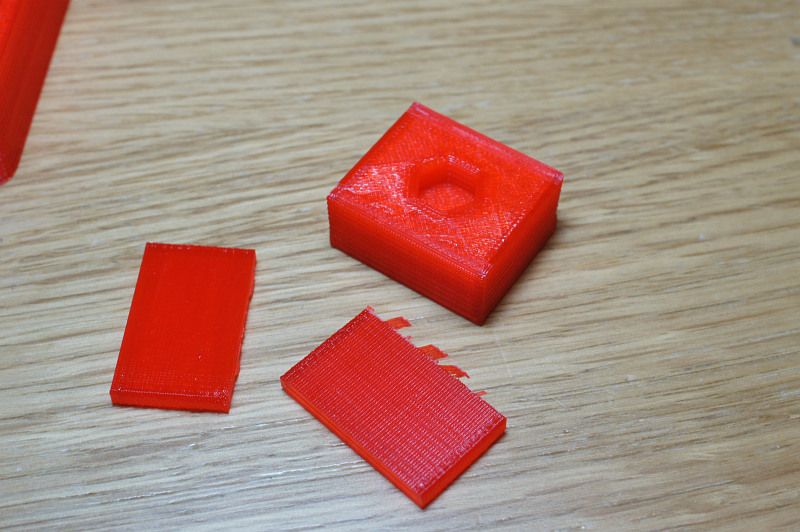
I'll also have to rethink the bit that sits on the desk end of the bolt... I'll probably just mount it as is.
Before I log out for today, here's another item on my quest log that I'll be tackling sometime later.
Last edited by DDY; 30-03-2014 at 11:32 PM.

That. Is. Effing. Awesome. If I could have a reliable one of those in the back of my car.... the possibilities are mind-blowing. Can you imagine the amount of small plastic bits that I have to replace on a daily basis fixing photocopiers? Wow.
what are you gonna do with them?
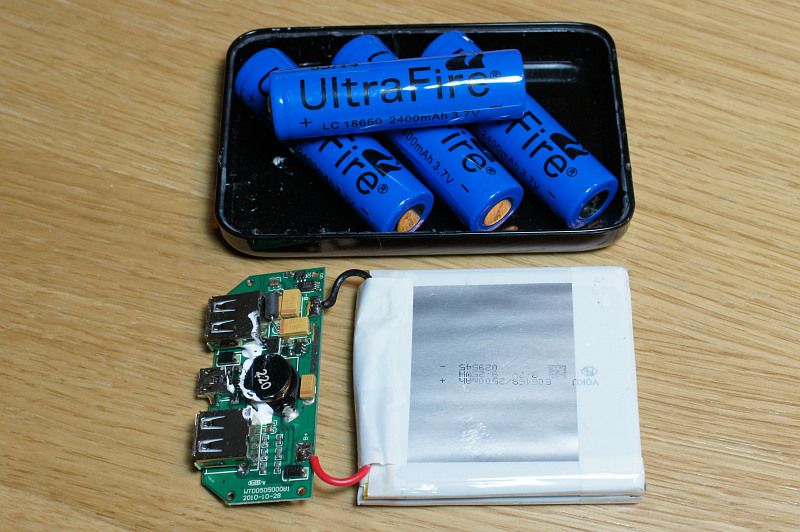
I don't understand what the objective is? Make a cloned battery cell with Ultrafires in?
Hm, UltraFire? Is that the best name for a battery? Sounds a poor choice to me. And the 3.7V made me curious too as that doesn't divide by 1.3V or 1.2V so it's not NiMH or NiCads. Yes: Li-Ion batteries called UltraFire.
Great thread DDY, keep it up!
I'm going to upgrade a USB power bank, from 5000mAH to 9600mAH by replacing the existing cells - which are somewhat worn, with four new 2400mAH 18650 cells for a total of 9600mAH. I could use higher capacity cells but 2400mAH ones are really cheap.
The four new cells don't fit in the existing case so I'll have to design and print a new one.
Progress has been slow as I've been busy with other things, namely replacing all 40 MR16 35W halogen bulbs and fittings in the house with 4W GU10 LEDs.
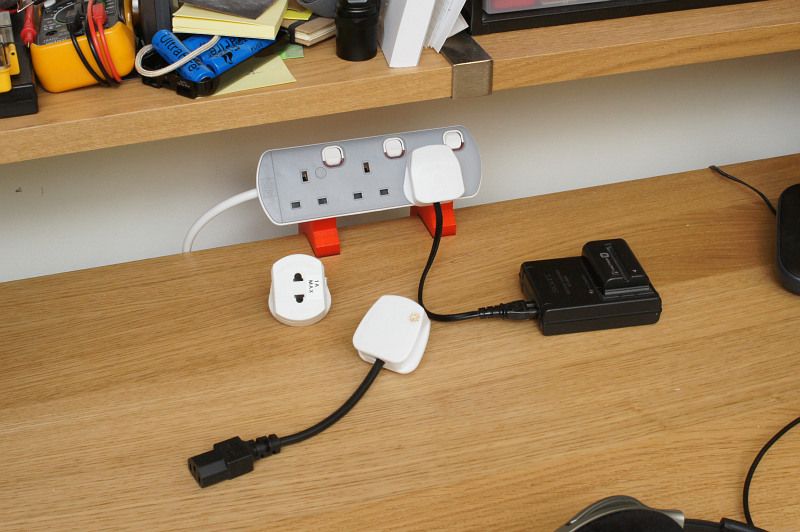
I haven't got anything on the power bank to show, but I have finished the trailing extension desk mount.
I'm quite impressed with the strength of the 3D printed parts, there is no give or play in the extension whatsoever.
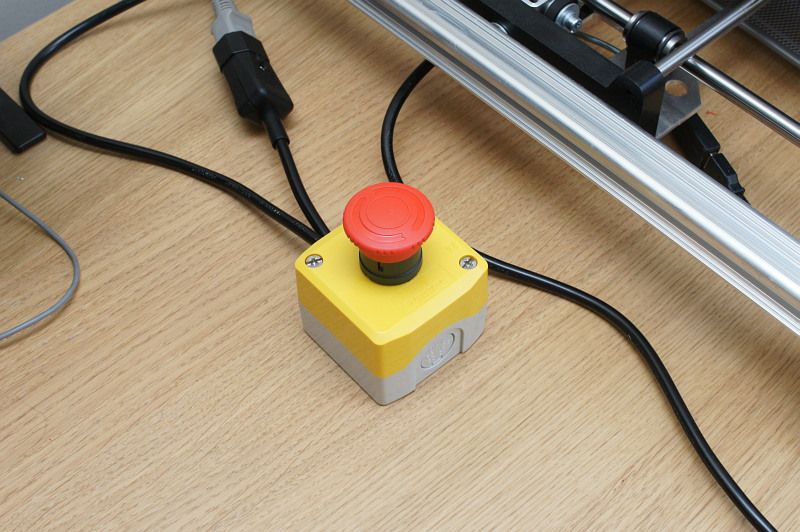
I've also bodged in an emergency stop button, in case I get something caught in the printer:
More updates to follow, eventually.
Why on earth didn't you just swap them out with MR16 LEDs and a couple of transformers? Easier AND better.

Now you need to 3d print yourself loads of replacement button covers, and replace everything you can with emergency stop buttons. Just for sheer pimpness.
I’m also using PLA Filament 3.0 Grey from 3d2print. I know that you’re worried about fumes, and for that, you can use Taulman 645 Nylon 645. This material does not emit any fumes. Actually, there is no odour at all with 645. You may see what looks like puffs of smoke, but it is actually water vapour or steam.
There are currently 1 users browsing this thread. (0 members and 1 guests)
 Posting Permissions

 Reply With Quote