LinkBack URL
 About LinkBacks
Agreed quite a lot of effort has gone into this. Especially as some things get done several times.Originally Posted by mycarsavw


Agreed quite a lot of effort has gone into this. Especially as some things get done several times.

Update: Teaser
Don't have time for a full update, go out in a moe.
Managed to do quite a bit of stuff last night.
So here's some low quality teasters because I'm evil.
[rem IMG]https://i69.photobucket.com/albums/i45/pob_aka_robg/Spork/project_spork.jpg[rem /IMG] [rem IMG]https://i69.photobucket.com/albums/i45/pob_aka_robg/dichotomy/dichotomy_footer_zps1c040519.jpg[rem /IMG]
Pob's new mod, Soviet Pob Propaganda style Laptop.
"Are you suggesting that I can't punch an entire dimension into submission?" - Flying squirrel - The Red Panda Adventures
Sorry photobucket links broken
I completely agree
This log is giving me a lot of ideas for my next build, as well as being a great laught outloud read!
Also, that now looks AMAZING! Really well done!

dude, this is looking really good, definitely something to be proud of!
Pob255 (24-08-2009)
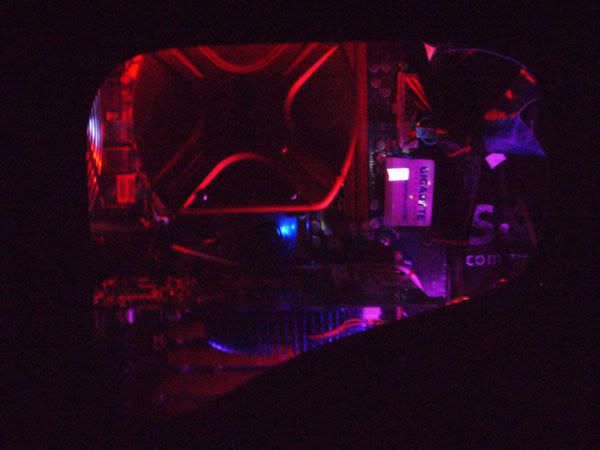
Update: The work behind the teaser aka Cableing after dark
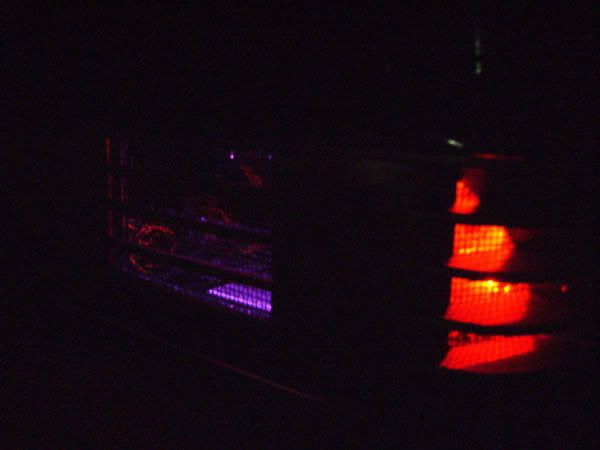
As you can probably guess from my little teaser I got a load of cable management done and did a test power up.
I've now finished all the insides execpt for the DVDr/w, the cables for it are in place but it's not fitted and I'll come to the reason for that shortly.
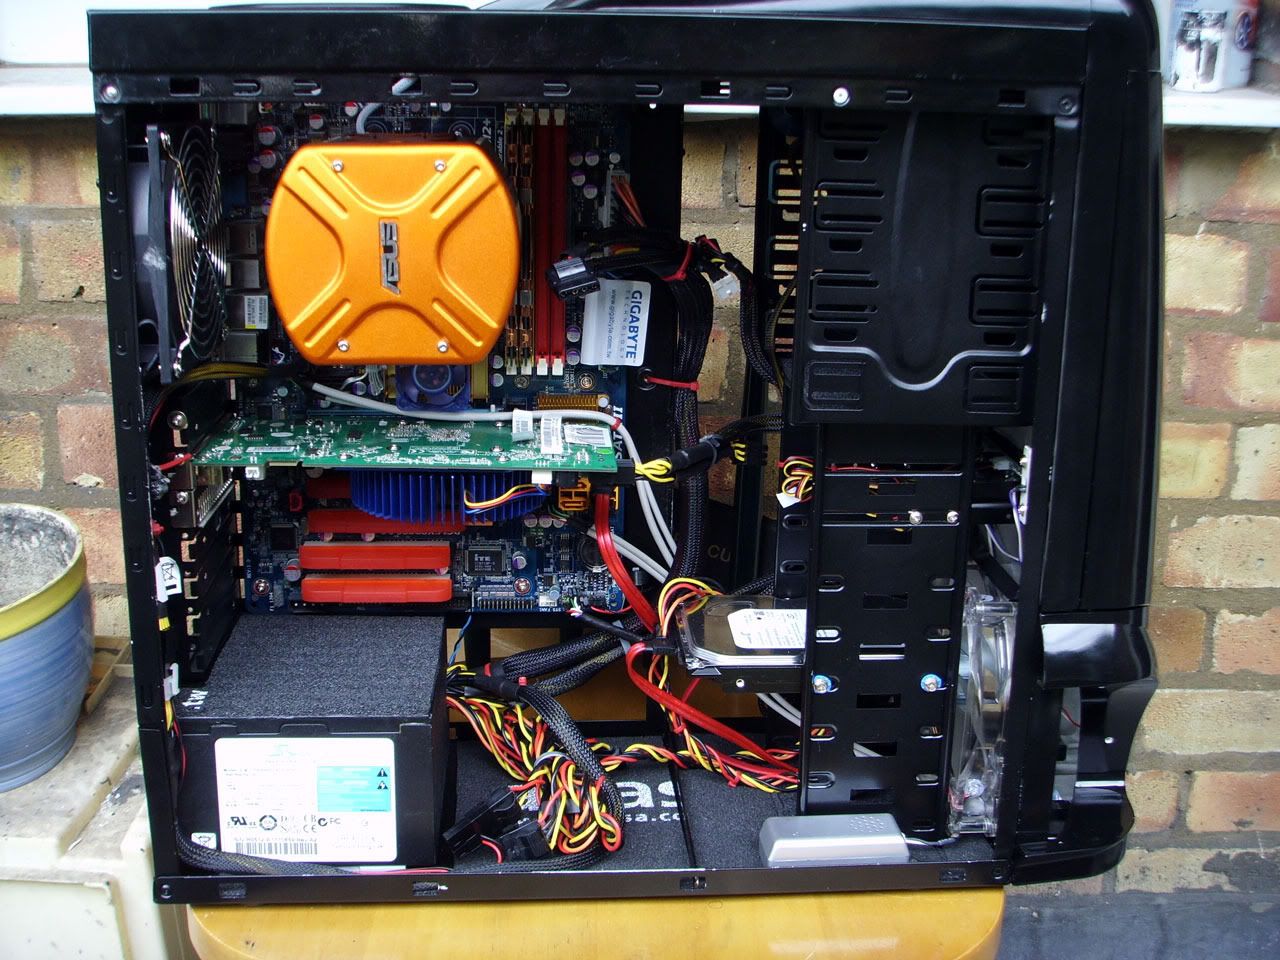
So lets have a look at the final cableing.
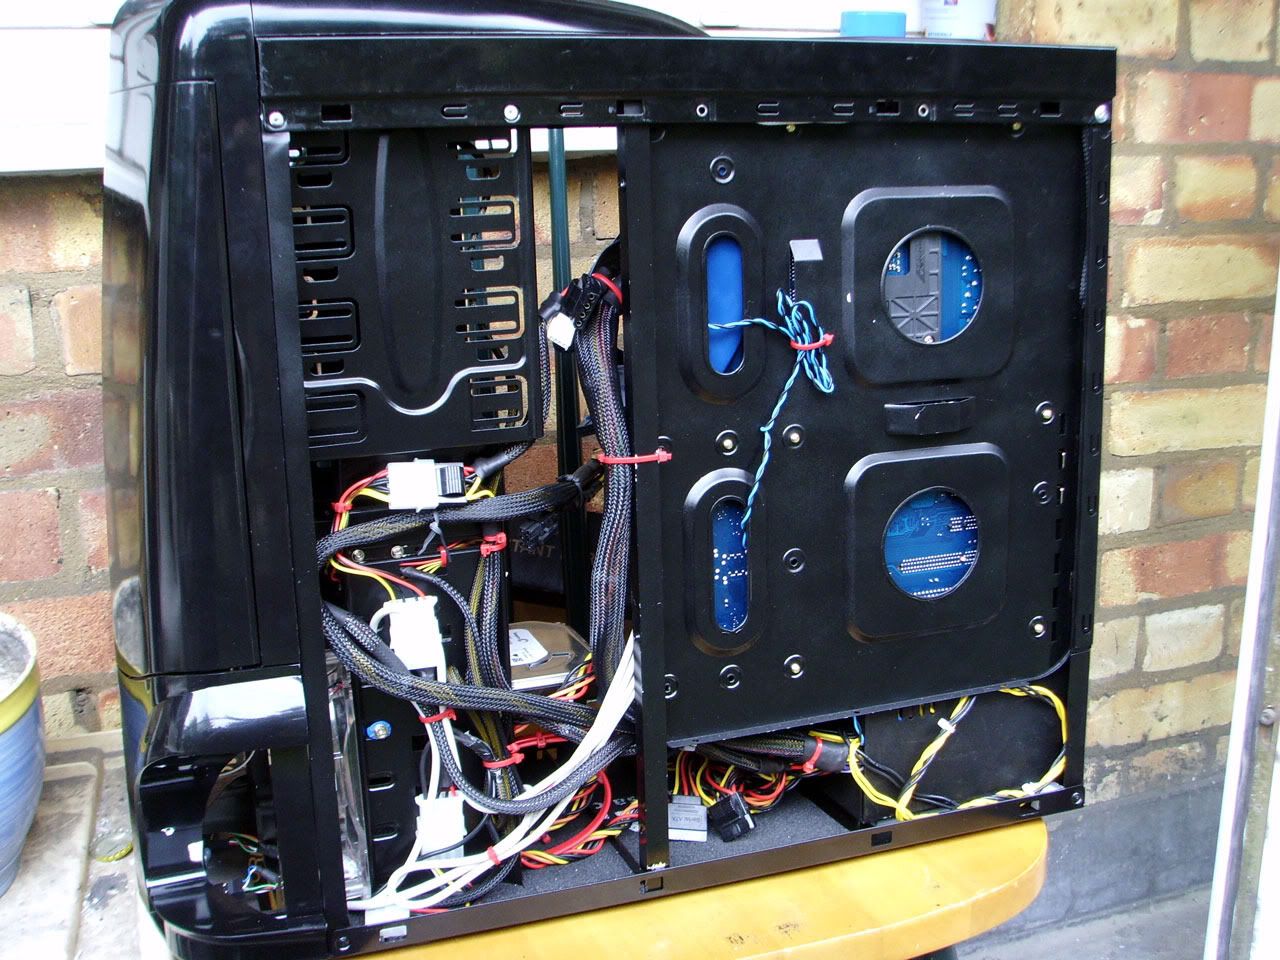
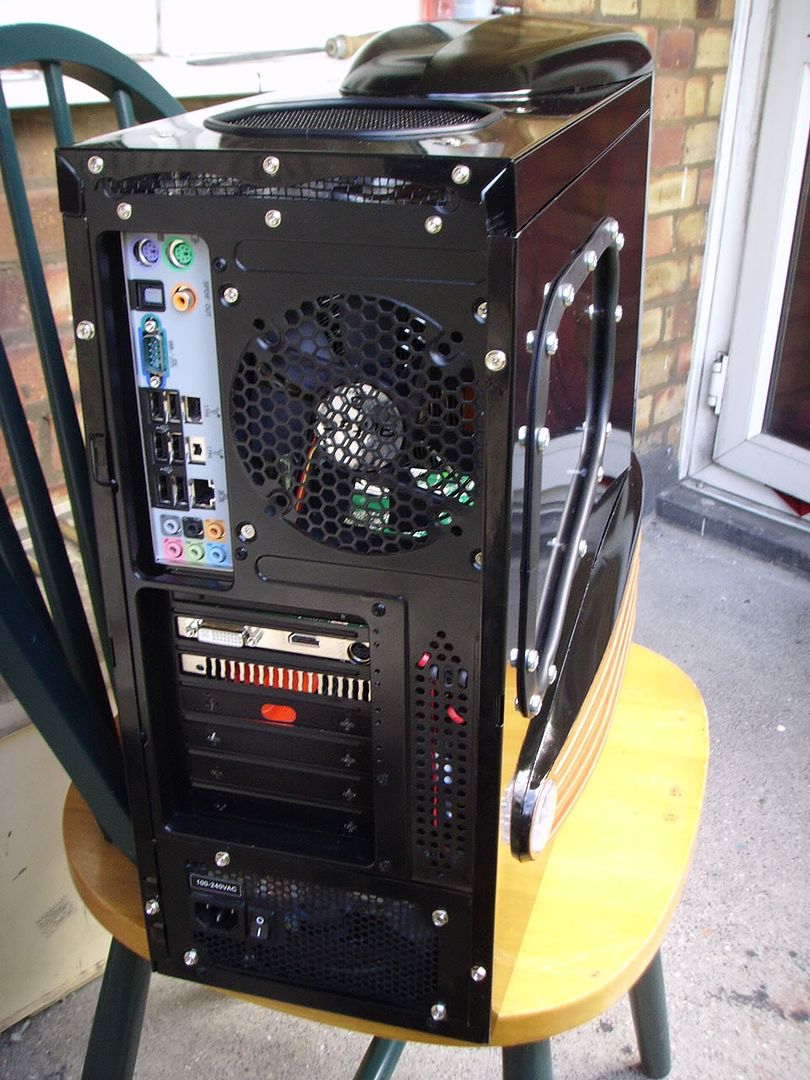
And around the back
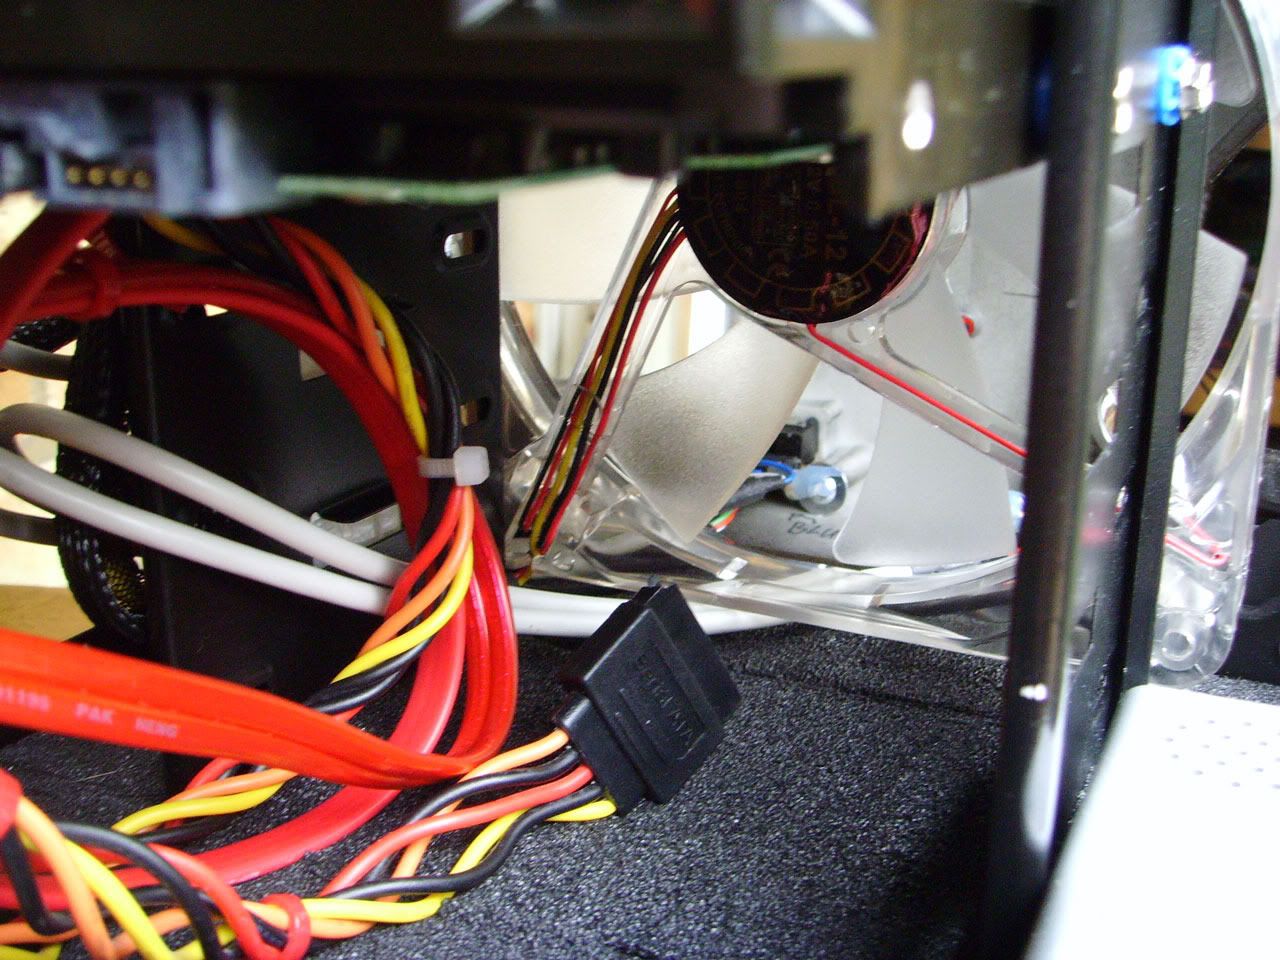
Here's a few close up's
Front fan area, I've used a midway sata power cable on the hard drive, combined 2 sata data cables together with both double sided table and cable ties, the spare leads are just hidden in under the hard drive, that way a 2nd hard drive can bee added without too much fuss.
I sleeved the power+reset+power Led+HDD Led into one bunch, ran them behind the drive bay and had no issues with thoes, however the USB+Audio where another story, I had some real issues here and had to re-run the cables a couple of time before I was happy.
The wires are strangely broken up, because there is 1 USB and 1 audio jack on each side.
So instead of 2 wires running to 2 motherboard headers, I've got 4 wires running to 2 motherboard headers and both sets of wires are running from 1 header to 2 seperate locations.
I tried running both sets behind the hard drive bay at first, but ended up running the audio cables under the front fan.
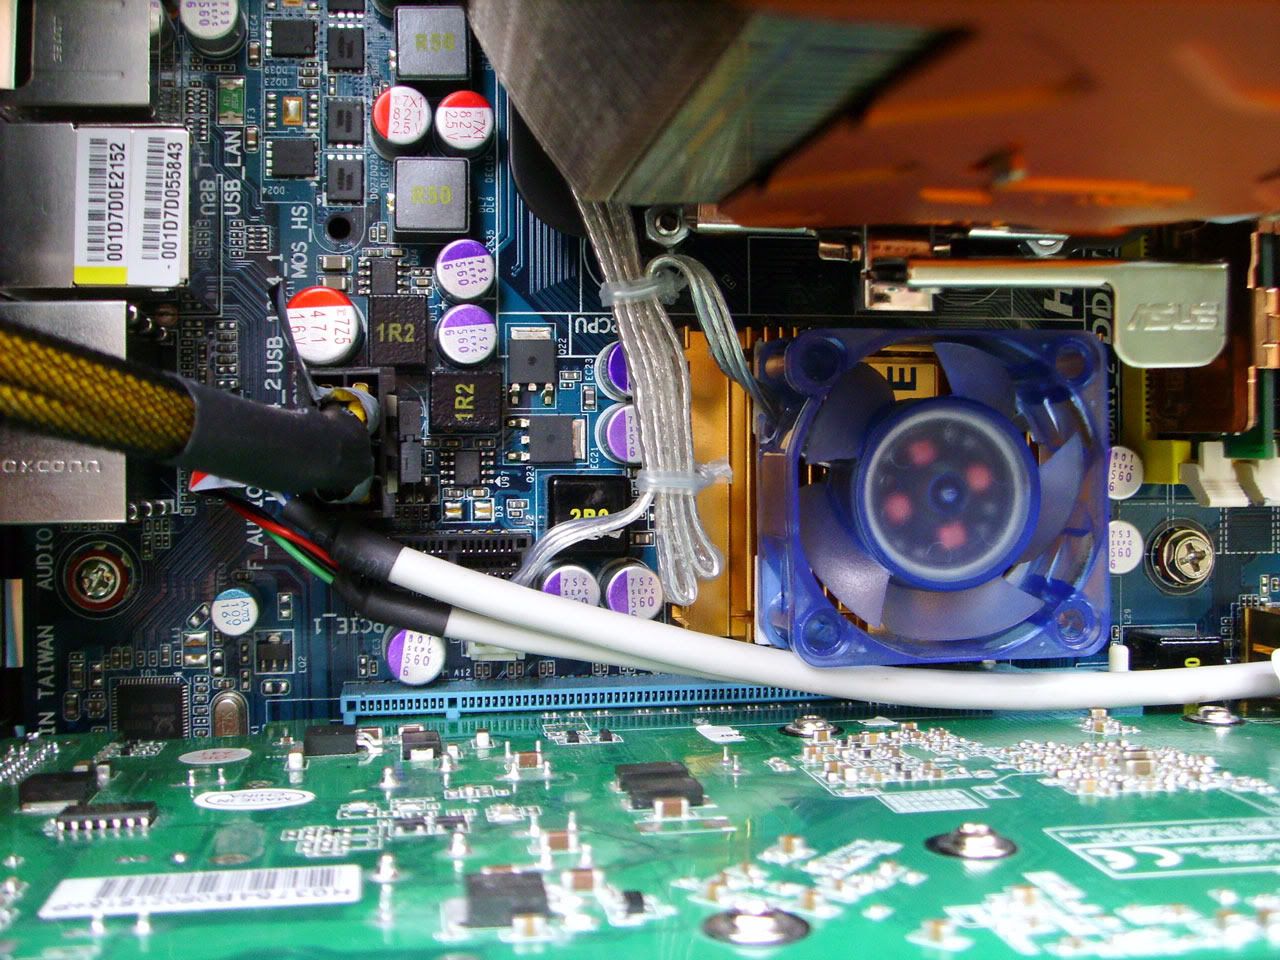
And here's why.
Not only does this Gigabyte motherboard have a lego colour scheme, it also has some rather bad layout placements.
The Audio header behind the EPS connector?? what in god's name where they thinking?
I also added a 40mm x 20mm Akasa chipset fan to that rather small northbridge heatsink, it was an old one I had kicking about.
These fans don't seem to like being under volted, or at least the LED's don't, as one has burnt out and the other is noware near as bright as it once was.
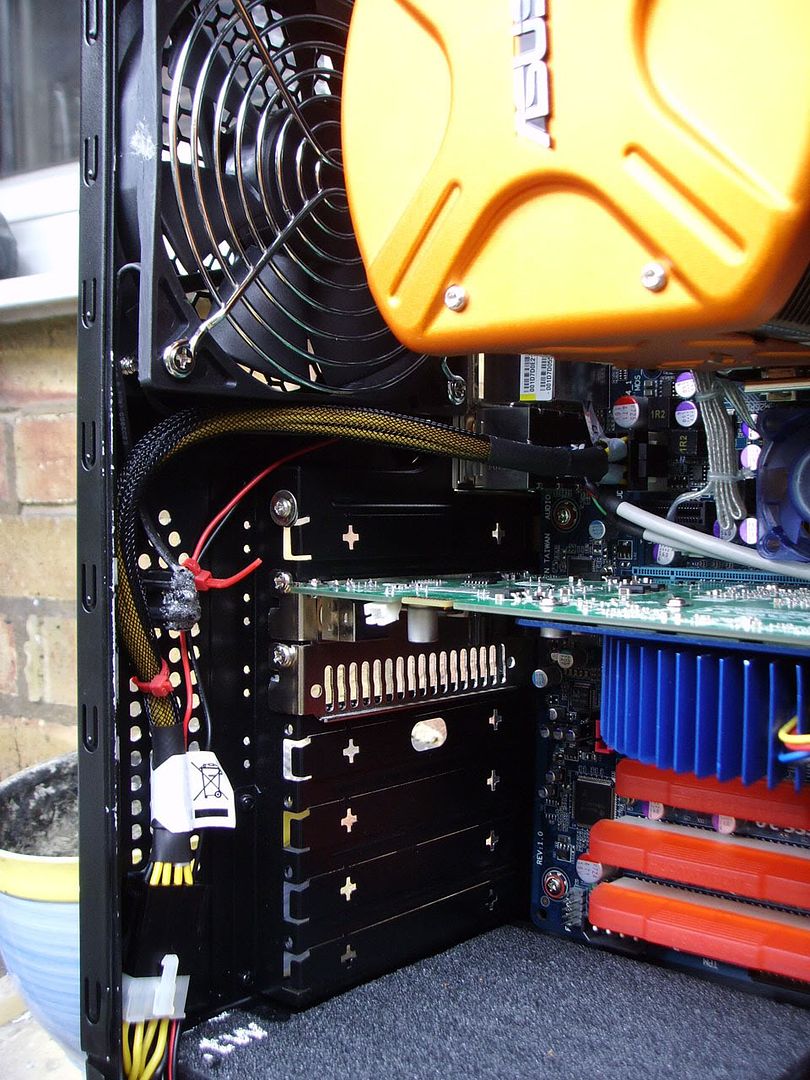
My original plan was to run the 8pin EPS cable behind the motherboard tray, for this reason I got a extention lead a while back as the psu cables are short.
With the extention it's plenty long enough, it would of reached without the extention if the EPS socket had been at the top edge of the motherboard and not in the middle.
However the problem is the plug&socket join, they are just too thick to sit behind the motherboard tray, this case is just a bit too narrow for that.
So instead I ran the EPS cable around the back.
You can see that I also added a fan guard to the Antec Tri-cool fan.
While I'm on the subject of that tri-cool I discovered something really odd when I powered the pc up.
Originally I had the power cable nicely hidden behind the motherboard tray, however when the fan was switched to "low" the tv reception died
Switched to "medium" or "High" and the tv reception was fine, very strange behaviour, I messed about with the wire while the fan was on "low" and I found that when I held both the wires the reception improved but was still not as good as it should be.
I think it might of been to do with the wires touching the back of the audio jack socket on the motherboard, I adjusted it so it was no longer incontact and that gave simular reception to me holding the wires.
So I then ran it around the front beside the EPS cable and the TV reception was fine and uneffected by the speed setting on the fan, which is why it's there now.
Strange but ture.
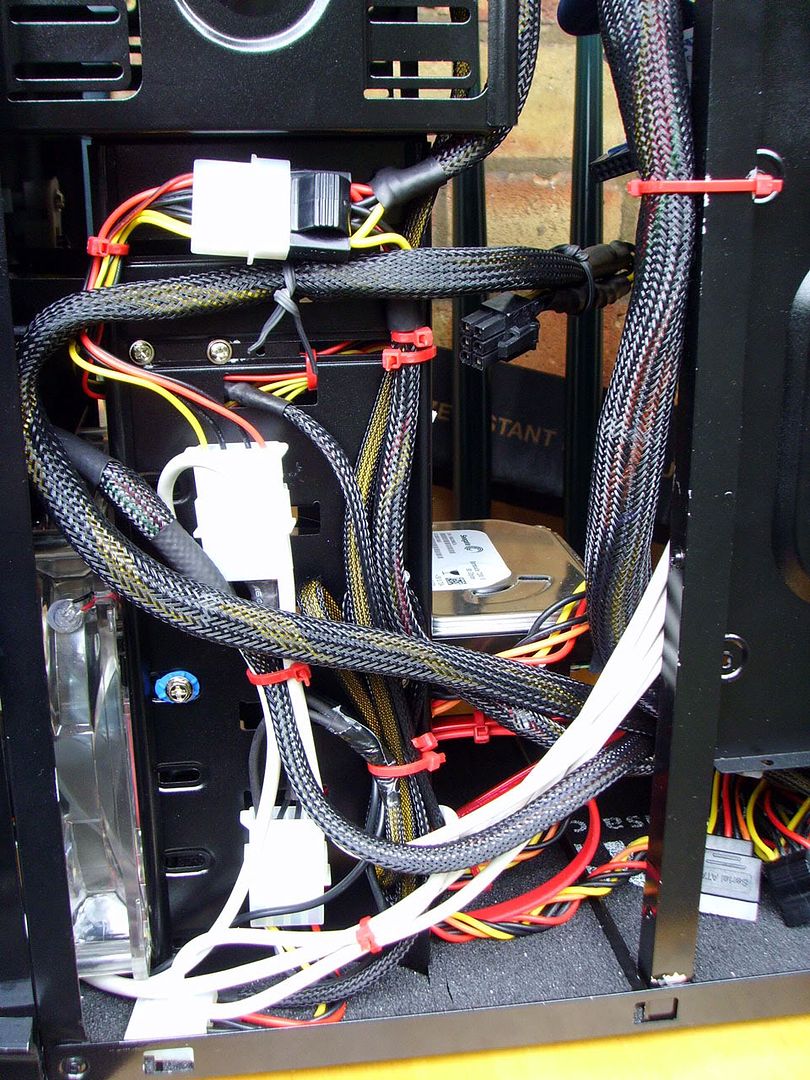
Finally a close up of all the wires bundled up behind the hard drive bays
Cables are tied down and molex socket joins are stuck down with double sided tape to keep them in place.
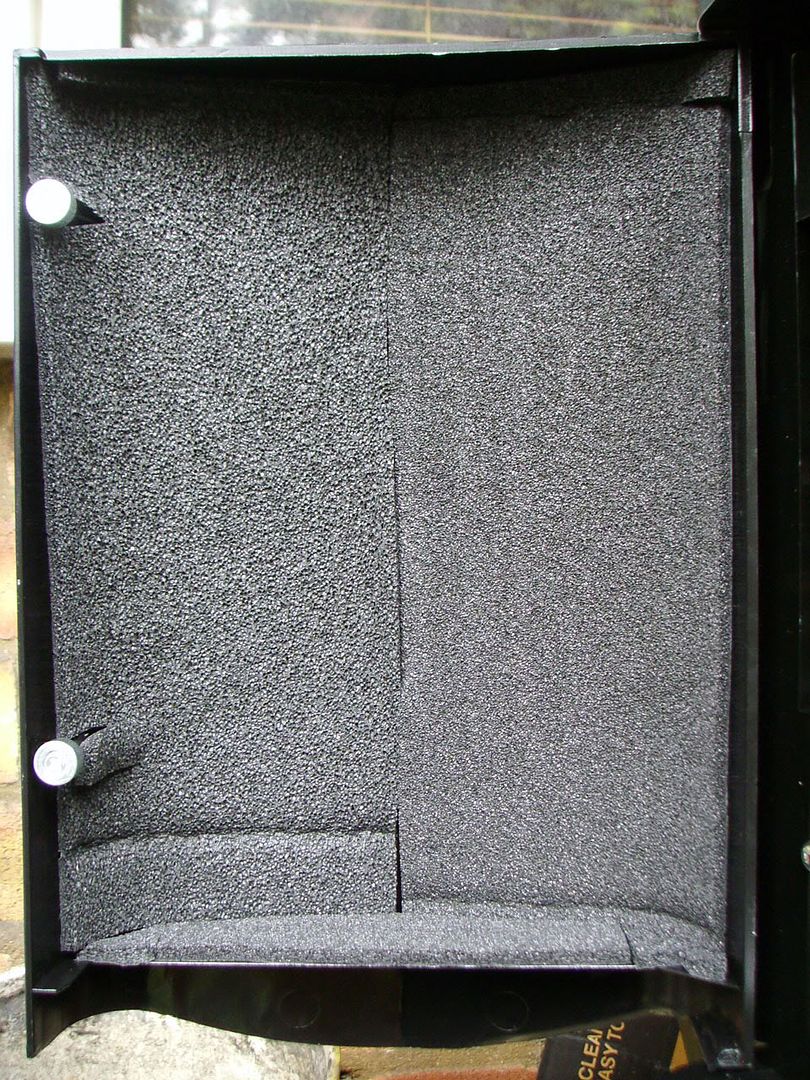
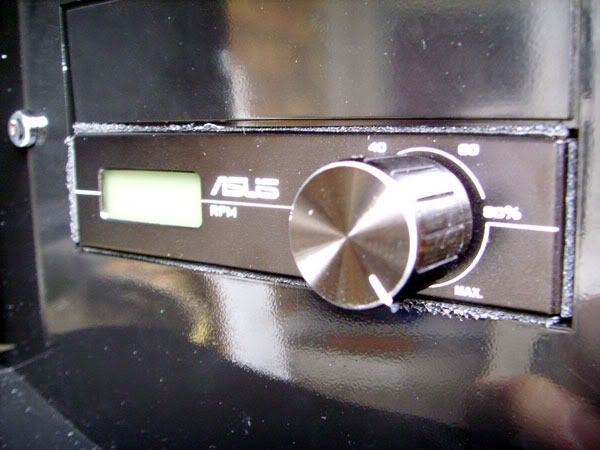
Next I used some left over PaxMate to line the inside of the door to stop it sounding so hollow.
I noticed a gap around the Asus fan controller, so I cut some thin strips of PaxMate and stuck them around it to fill the gaps.
It was a bit too thick so I trimmed it down to about half it's thickness and it fits great.
No more nasty gaps now.
On to the DVD, I'm seperateing that out as this post is also a sort of mini-tutorial.
[rem IMG]https://i69.photobucket.com/albums/i45/pob_aka_robg/Spork/project_spork.jpg[rem /IMG] [rem IMG]https://i69.photobucket.com/albums/i45/pob_aka_robg/dichotomy/dichotomy_footer_zps1c040519.jpg[rem /IMG]
Pob's new mod, Soviet Pob Propaganda style Laptop.
"Are you suggesting that I can't punch an entire dimension into submission?" - Flying squirrel - The Red Panda Adventures
Sorry photobucket links broken

Nice job!!Your mate will be impressed as they have got a unique PC that no one else in the world has!! Take that, bog standard Dell!

Update: DVD deconstruction tutorial aka cross posting for fun and post count.
I few posts back I said I was thinking about takeing the DVDr/w drive apart and painting it black.
Well I decided it needed to be done.
So for thoes of you who've never tried this before here's a simple set by set guide to takeing apart a dvd or cd drive.
I've done this quite a few times, mainly at work, to ether repair a jamed draw or remove things that people have "posted" into the drive.
It works on all the types of drives I've taken apart so far, IDE and SATA, rom, read/write and combie drives.
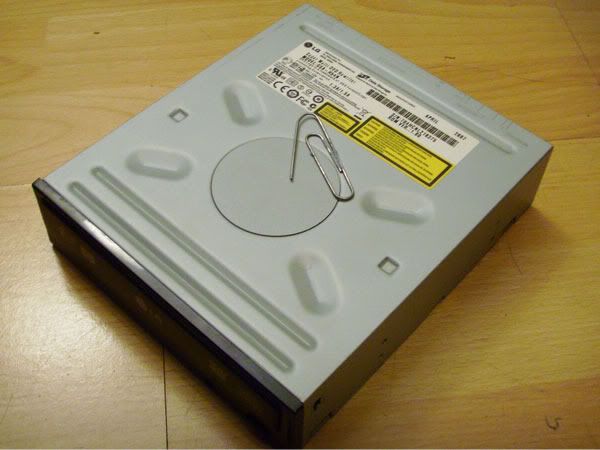
Step One: important tools.
Apart from your trusty cross point screw driver, a flat bladed screw driver and you also want this most important of tools
A bent paper clipI like the large plane metal ones but most times a smaller or plastic coated one will work.
Intresting side note, old cd drives used to come with a length of stright wire, sometimes even with a plastic handle, you don't seem to get them anymore
Step Two: eject the draw.
This is why you need this most important of tools, have a look at a cd/dvd drive and you'll notice a small hole.
Insert the bent paper clip and push, the draw will manually eject a small distance, you can then pull it all the way out by hand.
However I never bother to fully extend the draw when takeing a drive apart, you only
This in it self is a very handy bit of info, usefull for getting cd/dvd's out or checking if there's one in the drive without having to power it up.
Step Three: detaching the face plate
The face plate it held in place by 3 plastic clips, you can see them for the outside, one on the bottom and one on each side.
To relase them, use a flat bladed screw driver, push down and then forward so the the clip is no longer engaged.
It's best to do the two sides first and the bottom clip last.
Here it is detached, it will not come fully off as it will not pass over the draw front, this is why you have to eject the draw first.
The top of the face plate my or may not be held in it depends on the drive, most common is a simple plastic loop, so you need to angle the face plate away from the bottom to detach this last hold before it's fully lose.
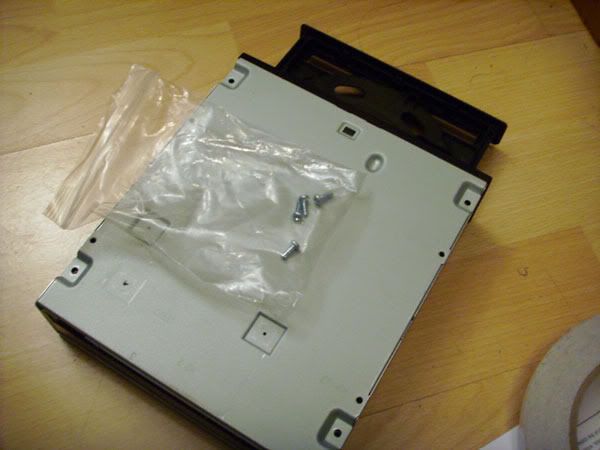
Step Four: unscrewing the case.
some of you may of noticed that in I had already removed the screws in the last step, this is because I did step 4 before step 3, if this is your first time takeing apart a dvd/cd drive detach the face plate first.
The two halves of a dvd/cd drive case are held together by 4 screws on the bottom.
Just unscrew and remember to keep them safe, you don't want to lose them
Step Five: remove the bottom.
The bottom of the drive case should now very eaisly lift off exposeing the circuit boards underneath.
Some times there are thermal pads between bottom of the caseing over and a chip or two, these are only ever sticky on one side, so pose no problems removeing the bottom.
Just be aware of these so you don't damage them.
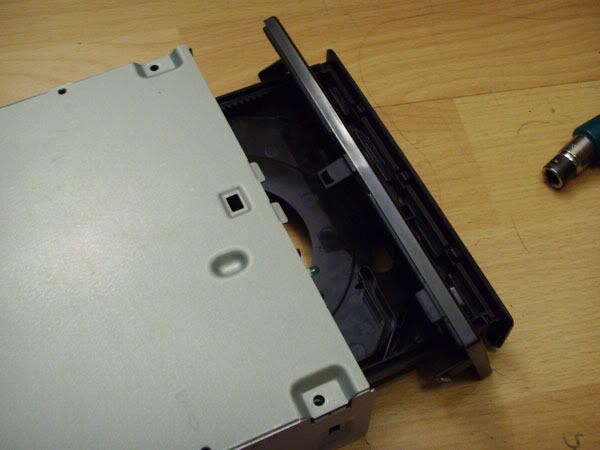
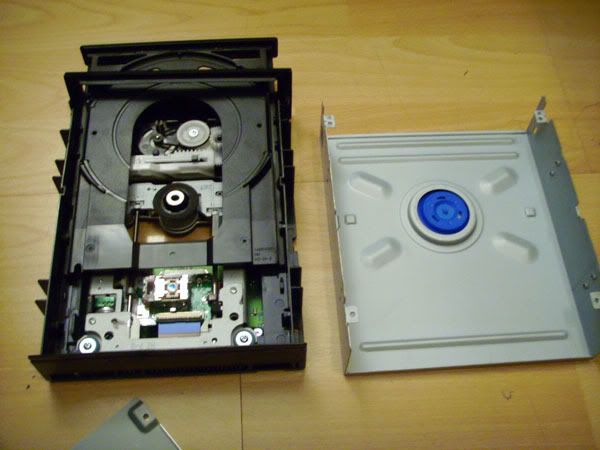
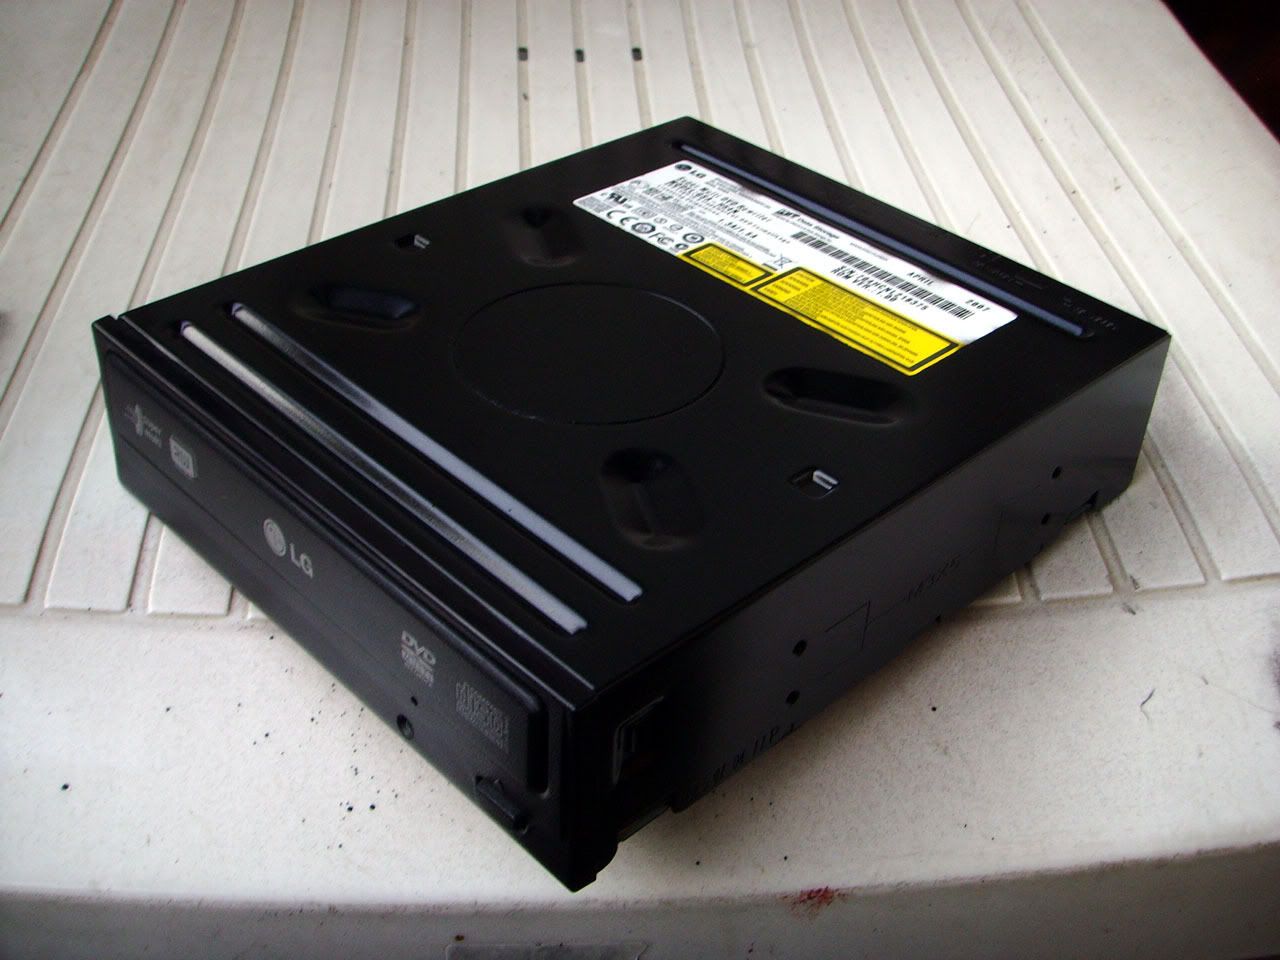
Step Six: remove to top
This can sometimes be tricky, basically it should just lift off like the bottom.
Lift it stright up and it should come free, however sometimes there can be clips like the ones holding the face plate on or a non-stright path, ie you lift it up untill it's almost off them have to slide it backwards slightly to get it fully off.
All depends on the drive, on this LG drive it was just a simple stright lift.
That bule plastic thing on the inside of the top is a baring.
What happens when you put a cd/dvd into the drive is this, when the draw is fully closed the arm with the motorised spindal lifts up, picking up the cd/dvd and pinning it into place against the top baring.
When you eject the disc, it waits to stop before lowering the arm back down and leaveing the disc in the tray.
In this way the disc is totally free from the draw when in operation and there's no chance of it getting scratched.
If you hold the face plate inplace and push the draw shut you can see how this operation works.
To put a drive back together just reverse these simple steps.
If you've closed the draw while it's in bits then eject it again by just using the bent paper clip in the hole like you did at the start.
[rem IMG]https://i69.photobucket.com/albums/i45/pob_aka_robg/Spork/project_spork.jpg[rem /IMG] [rem IMG]https://i69.photobucket.com/albums/i45/pob_aka_robg/dichotomy/dichotomy_footer_zps1c040519.jpg[rem /IMG]
Pob's new mod, Soviet Pob Propaganda style Laptop.
"Are you suggesting that I can't punch an entire dimension into submission?" - Flying squirrel - The Red Panda Adventures
Sorry photobucket links broken
Update: A spot more Painting aka I love the smell of clear coat in the morning... Smelled like, victory!
Three updates, I loaded more industrial onto my Sansa Clip and really got going, Ultravoilence is great music to mod too.
If they are ever playing live near you, I recommend you go see them
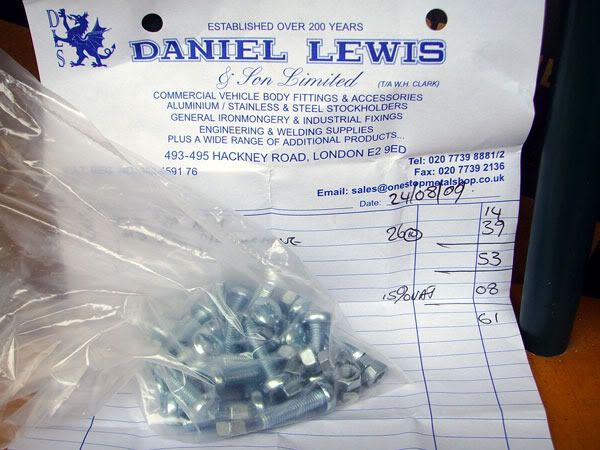
This morning I wandered down to my local builder supply merchant again and I bought.
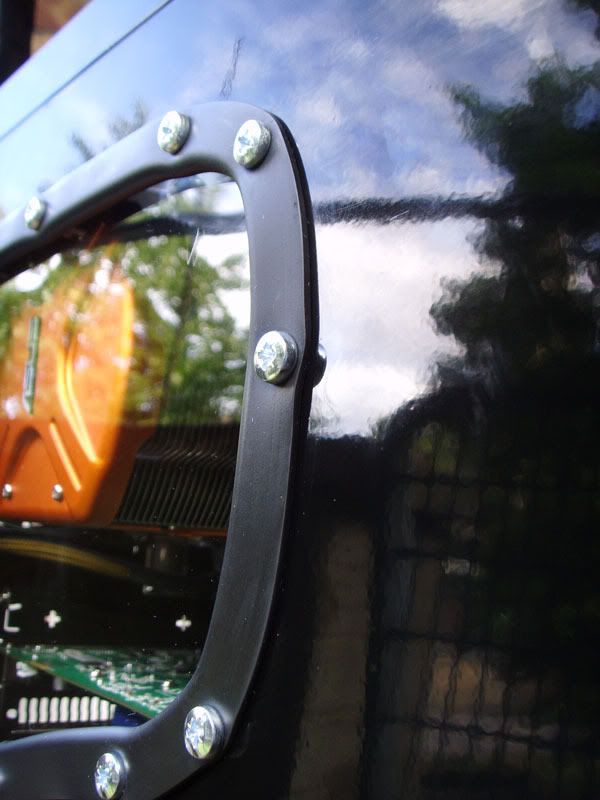
15 (plus a few extra thrown in) Nuts and Bolts for the grand total of 61p
These will be used to hold the window in.
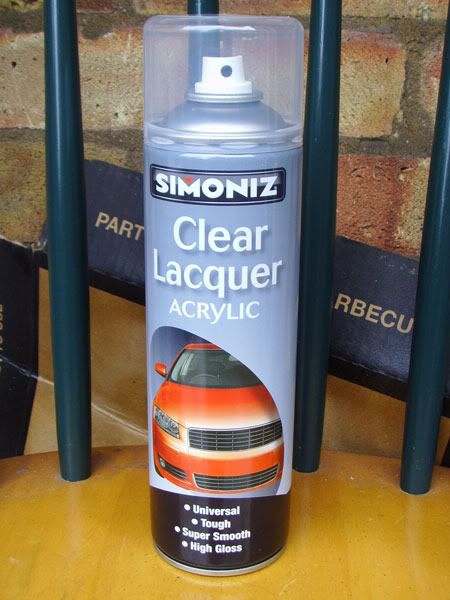
I also wanted to get another can of Lacquer but they had slod out, but the nice man there told me to just pop around the corner to a place that repairs cars as they would have some.
And they did
A different brand and I actually prefur this stuff, it's less thick and gunky, which made it spray better and gave a more even coverage.
Also smells slightly different and was less chokeing, although that may be because it was not so gusty today and the spray wasn't blowing back in my face.
After my abject failier with the light switch plate when I tried to seal it with the old Lacquer I had been thinking about what to do with it and I had an idea.
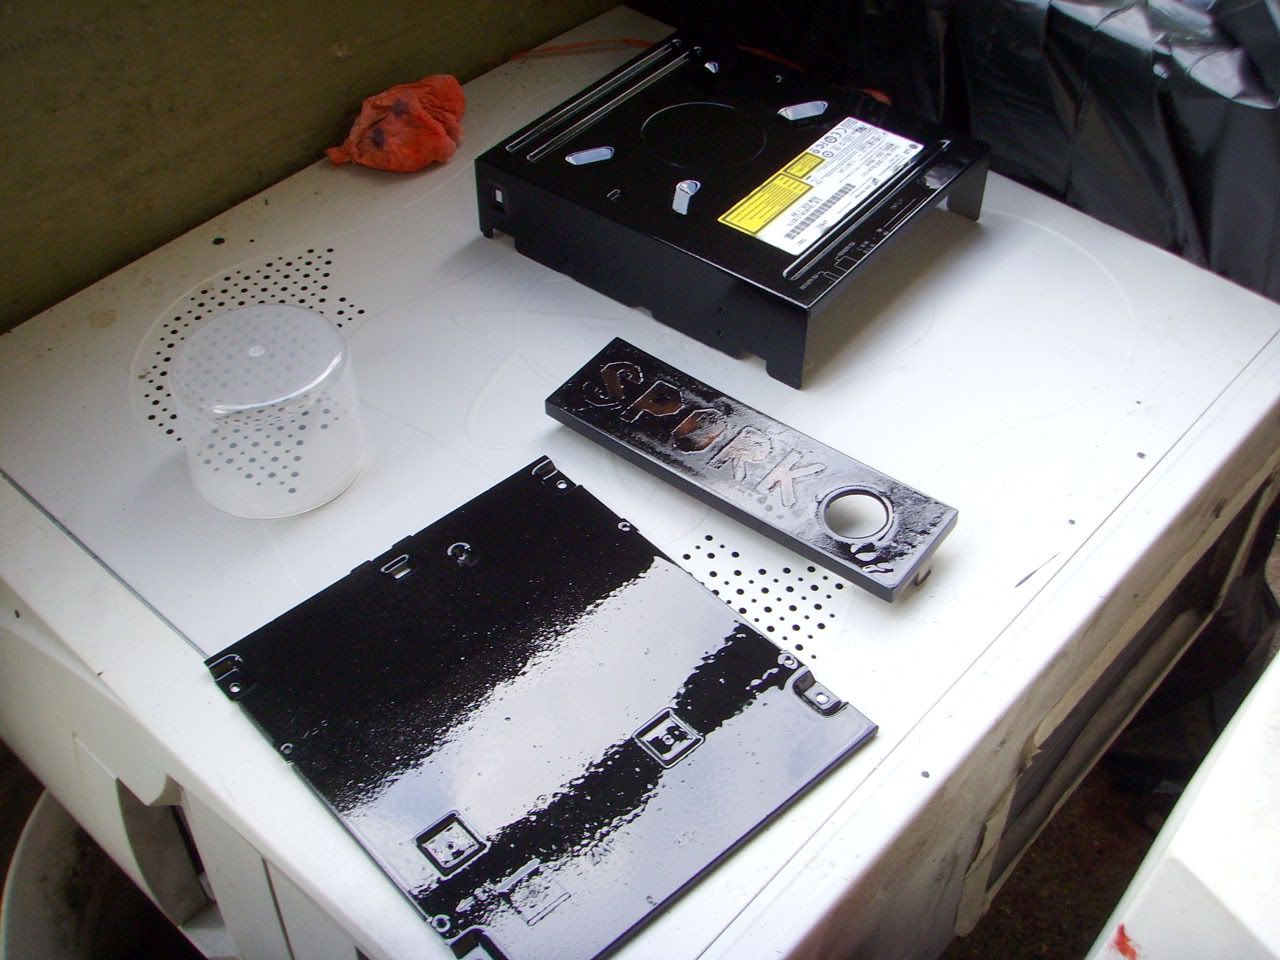
Side note: I also painted the DVD drive case at the same time, but with everything else I did I forgot to take photos of it
However it can been seen in the background of some of the photos, so for thoes with it in I've left them large, uncropped and thumbnailized instead.
It was masked inside, had 3 coats of airbrushed matte black acrylic and 2 coats of Lacquer
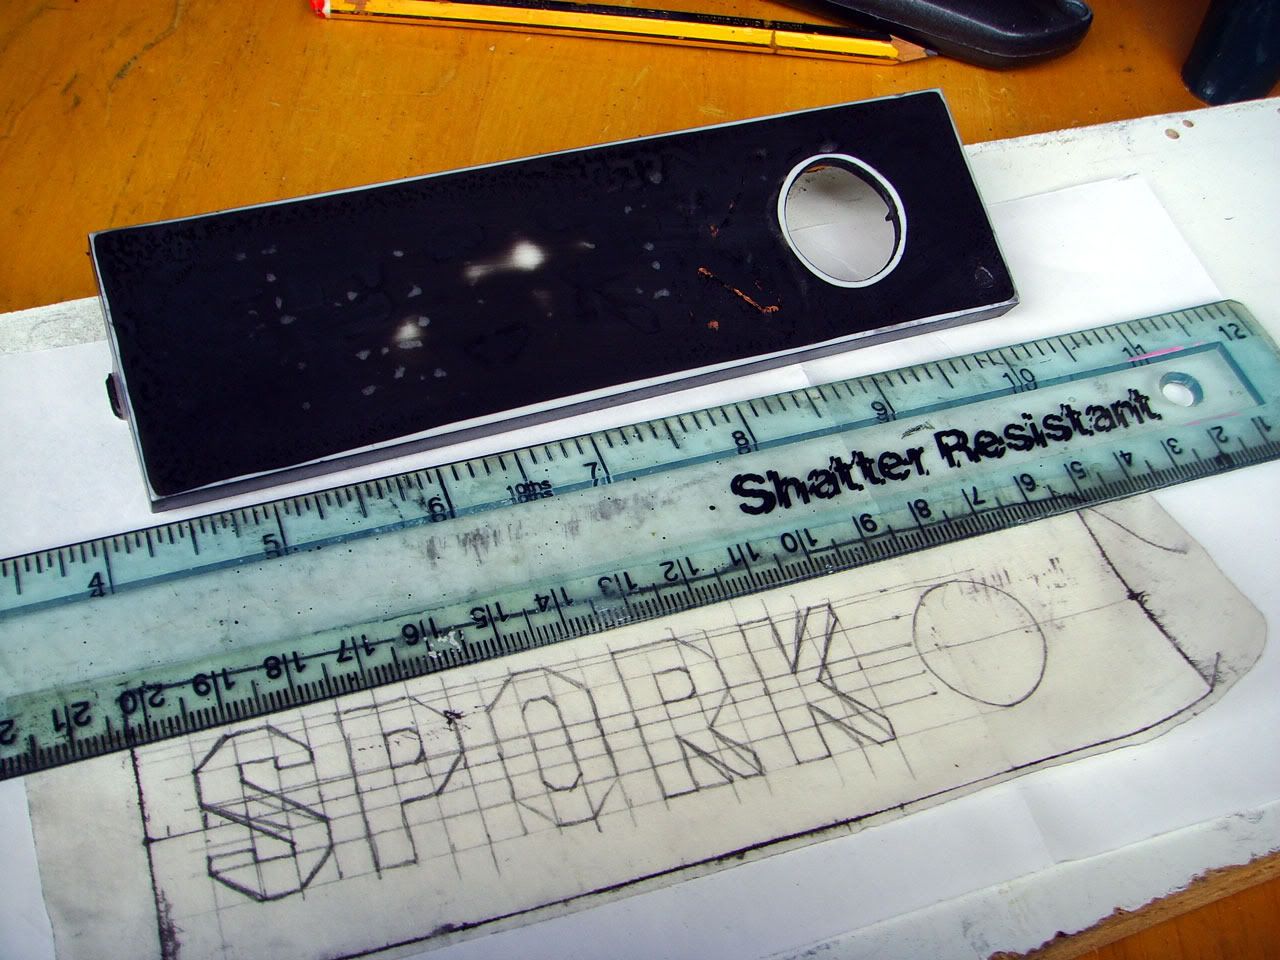
Experiment number 3
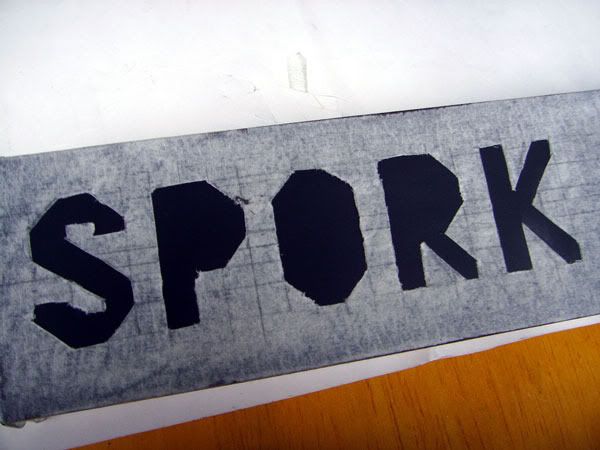
I started off by wet sanding it smooth with some 1200grit wet&dry and then marking out the letters on a bit of masking tape.
Now I used some of the PaxMate backing to "stick" the masking tape down to while both drawing and cutting it out, however the masking tape just didn't stick to it.
This ment that while the masking tapes stickyness was not reduced it did make it very hard to work on, especially when trying to cut it out.
I got out the air brush and gave the face plate two coats of matte black acrylic before applying the mask.
As you can see it's not very neatly cut and as anyone who's done air brushing will know the secret to good air brushing is good masking.
However I don't have any proper masking film so I had to make do by patching it with a couple of extra bits of tape.
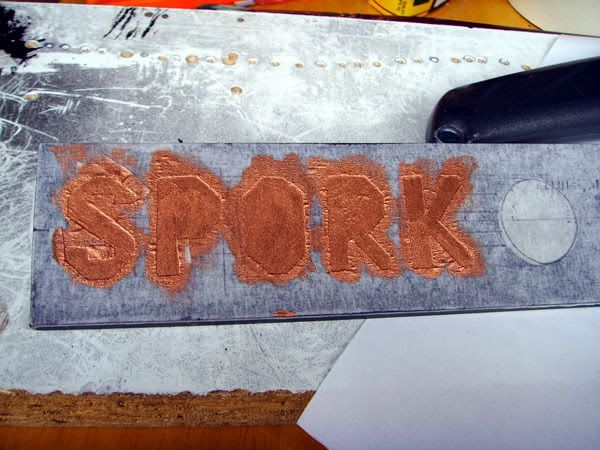
I next hand filled the letters with my copper paint, as the copper paint cloggs up my air brush.
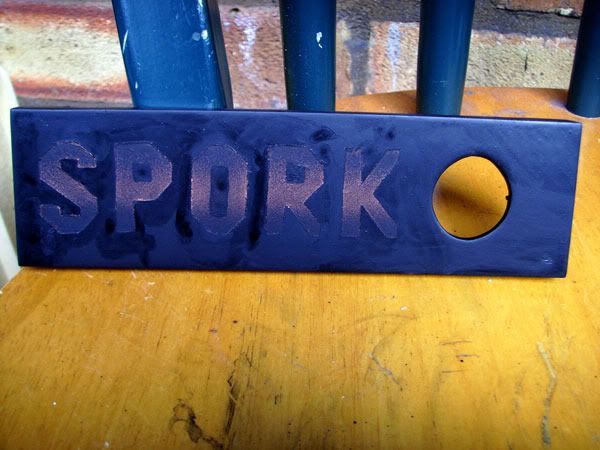
Three coats of copper to get it solid and not patchy and it looked like this
Now as it stands that copper is too strong and nowhere near as subbtle as I want it.
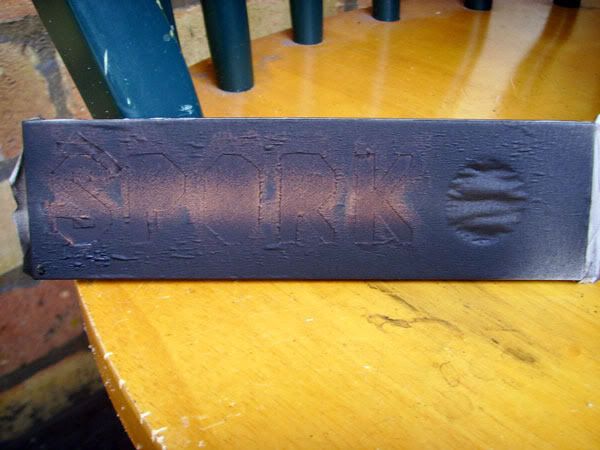
So with the air brush I added a black fad to the top and bottom.
That looks much better
However when I remove the mask . . .
Due to my dodgy mask the copper leeked quite a bit.
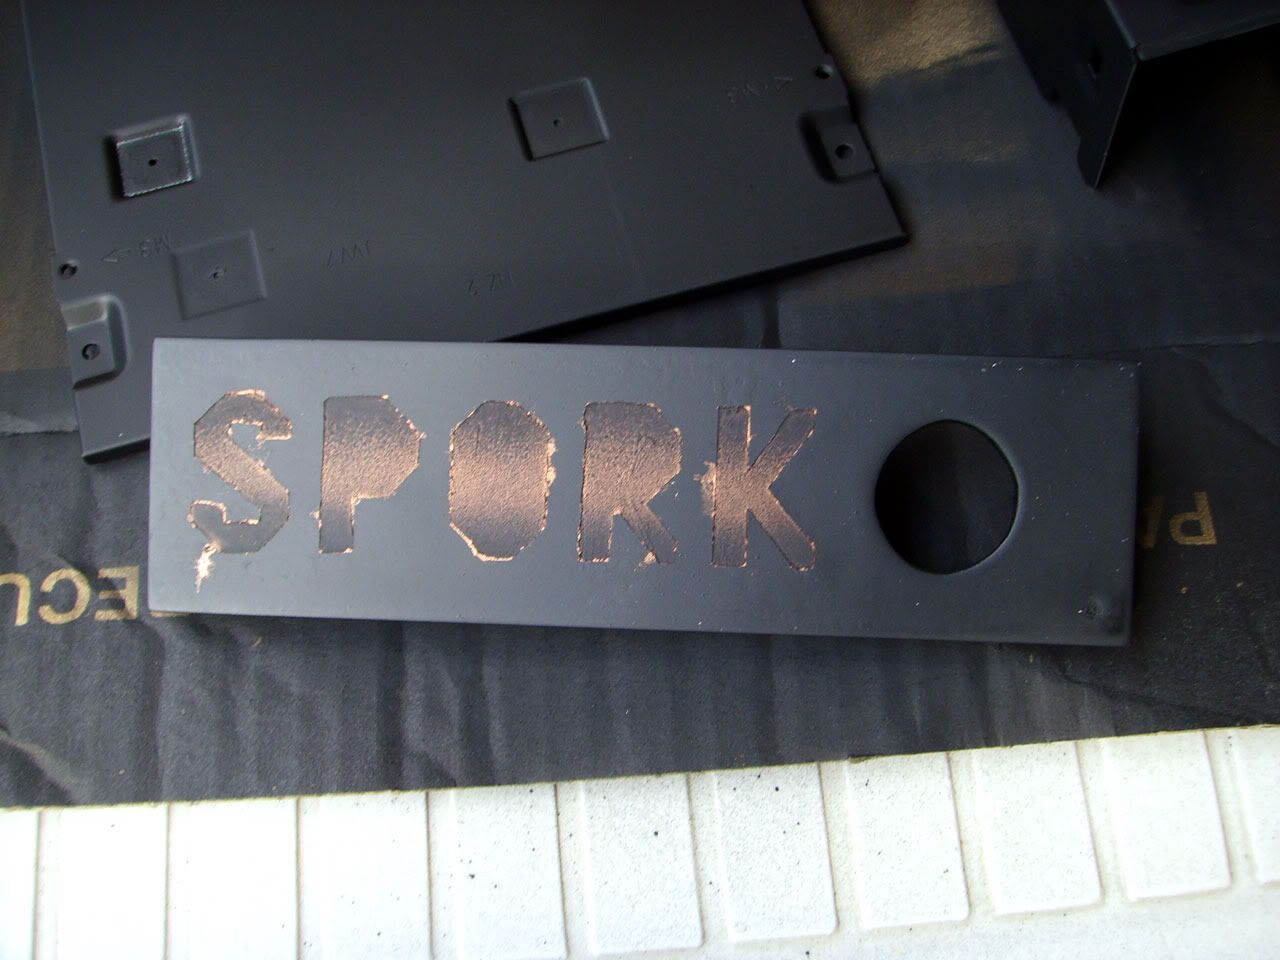
So I got my small paint brust out and hand touched up the black background
3 thin watered down coats, being very careful not to go over the letters.
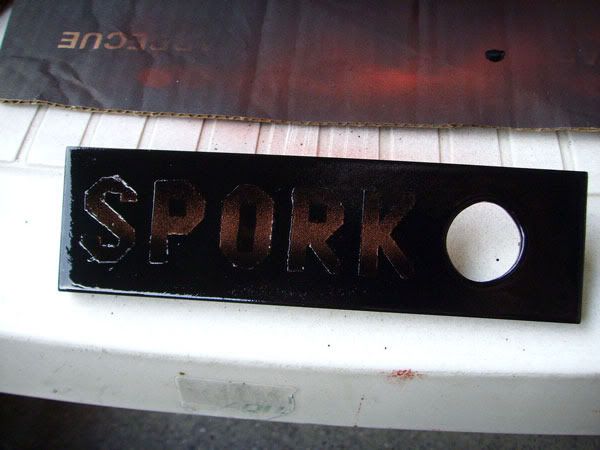
Now some Lacquer, coat number 1 looked like this.
Two more coats and it looks like this.
In that photo it looks like there's white around the letters but that's just reflexion caused by the fact that they are risen up quite sharply by the layers of paint that where constriceted by the mask.
I've put the switch in with a little UHU to secure it and it's drying over night now, job's a good'en
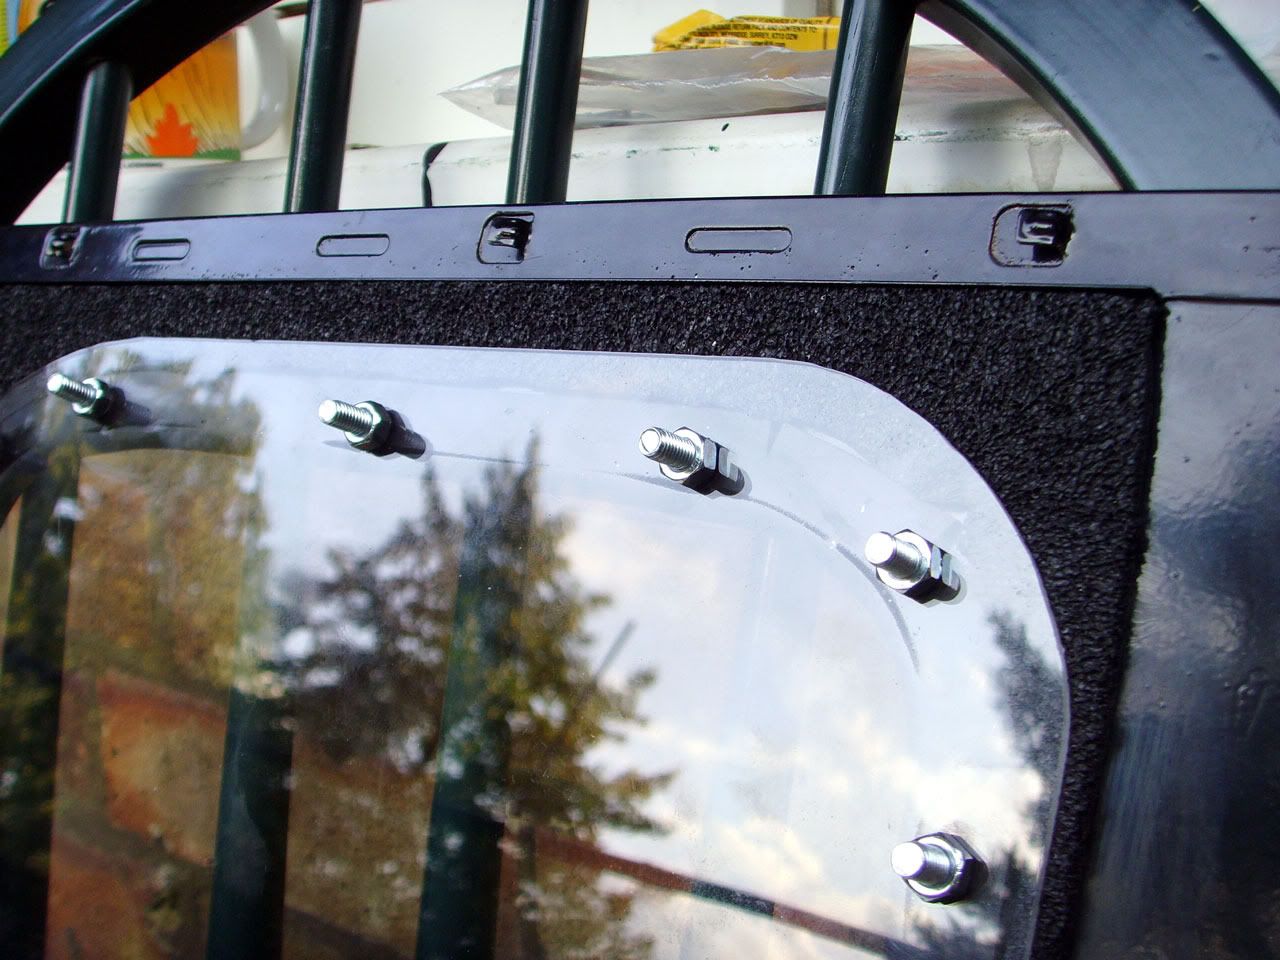
In between this and something else (yes there's still more to come
This took longer than I thought it would because altough I drilled some nice 6mm ish holes through rubber+panel+perspex the rubber just streched around the drill.
This ment the holes in both side of the rubber U-channel where not nice large round holes so it took a bit of effort to get the 5mm diameter bolts through.
However that wasn't so bad, as this gave me something to do while waiting for each coat of paint to dry.
The air brushed acrylic only take about 5min to touch dry and the Lacquer 10min, but there's limited thing to do in shuch a short time frame and it did stop me smokeing myself silly instead.
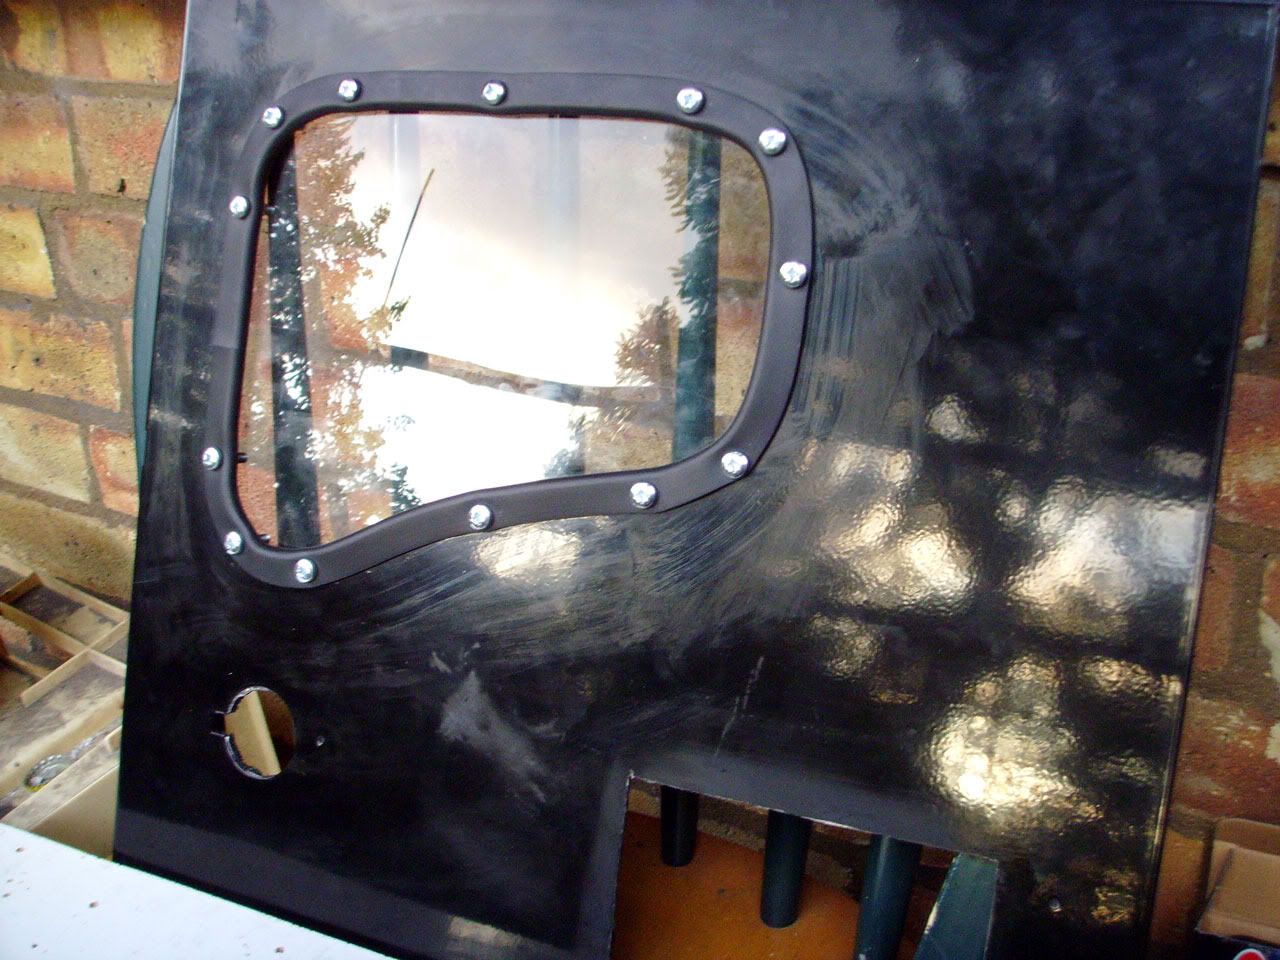
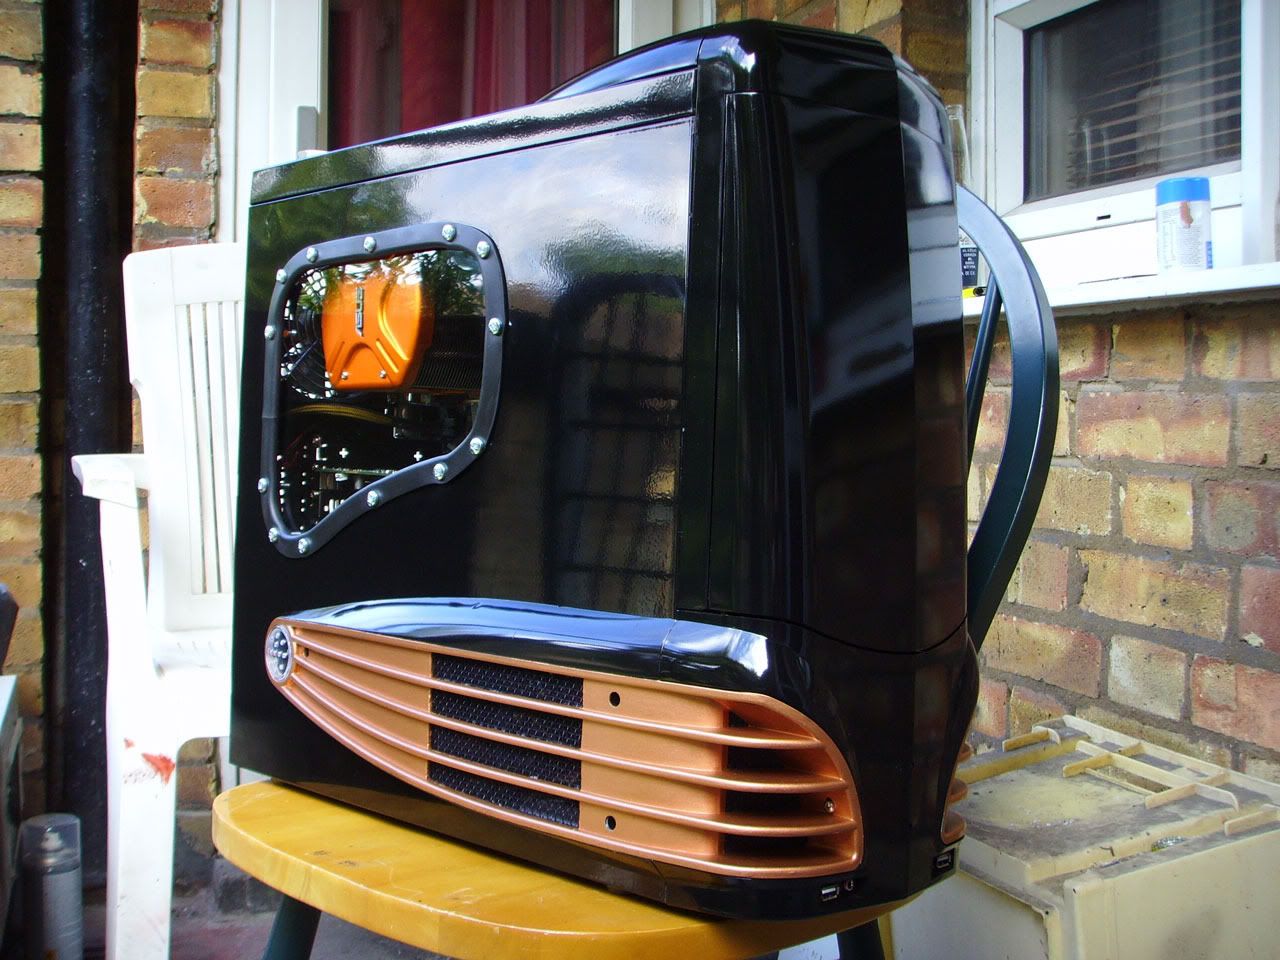
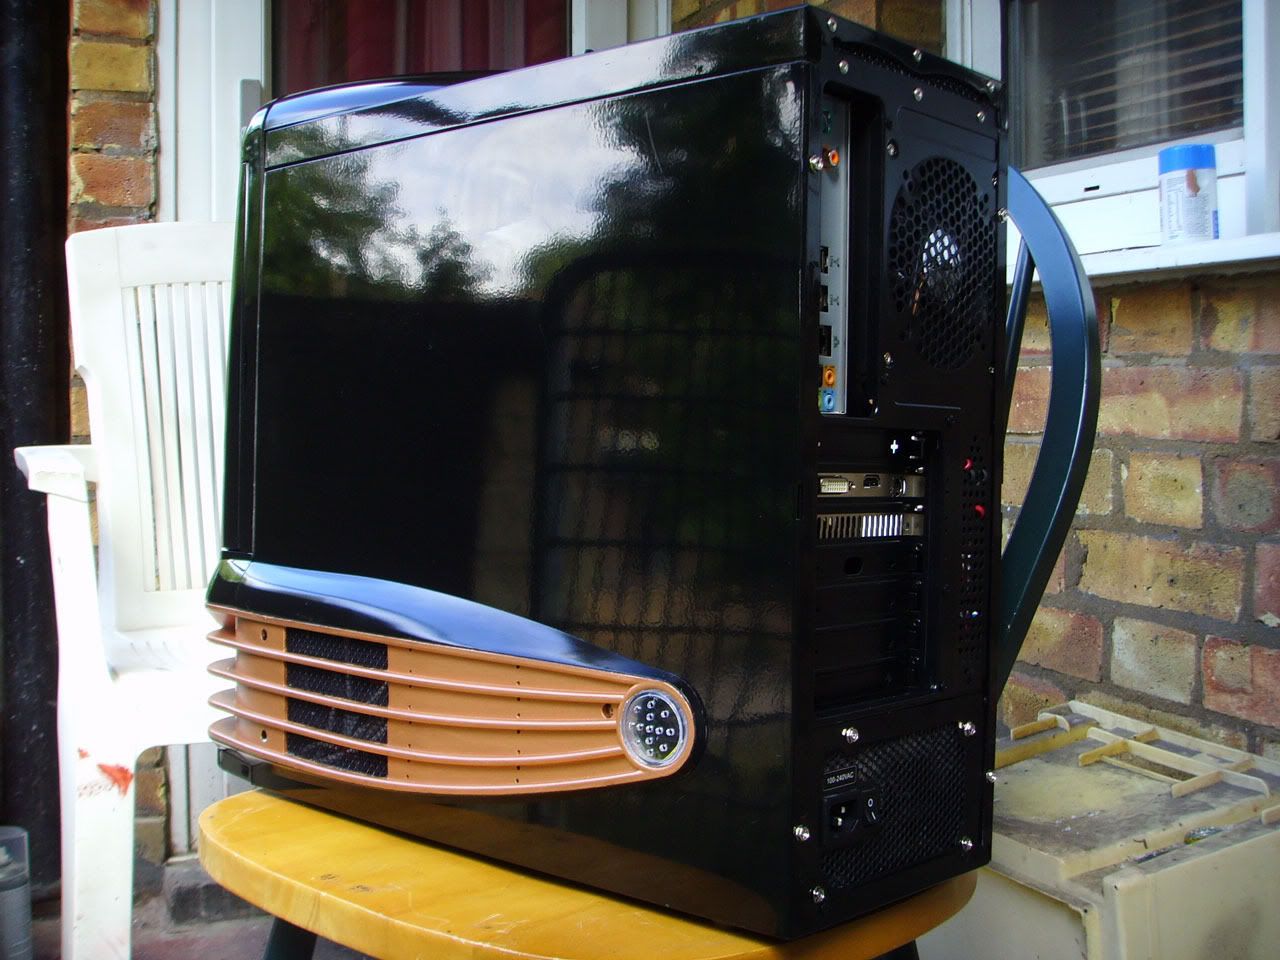
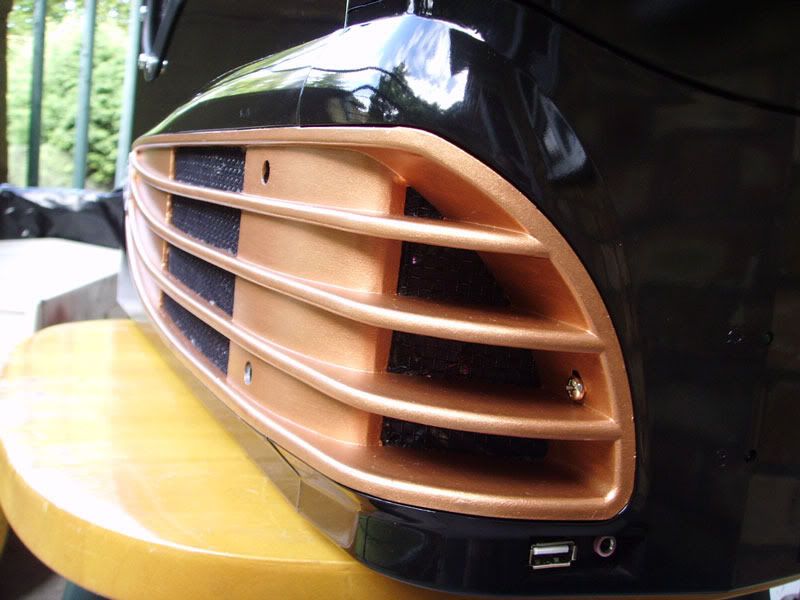
Here's the final resault, from the outside.
Panel still needs a final clean.
And the inside.
Well that's all for tonight, I do have one more update from today, but it's getting too late to keep typing this up and I actually have to go into work tomorrow.
But as I'm feeling evil, I'll give you a hint.
And that's all you're getting for now, But trust me the next update is going to be good.One thing that has been missing from this build so far is any mention of a rodent.
Well in my cupboard-o-bits I have a Gigabyte GM-M6800 that I picked up ages back when play were selling them cheap.
At the time I did do an external Mod to it to improve the feel of it. the thread is here http://forums.hexus.net/chassis-syst...e-modding.html
Well as I've never really used it I've decided to put it into the build, however after all the hassle I went through with the keyboard it just doesn't fit the colour scheme . . .
Ain't I a stinker.
Last edited by Pob255; 25-08-2009 at 03:45 AM.
[rem IMG]https://i69.photobucket.com/albums/i45/pob_aka_robg/Spork/project_spork.jpg[rem /IMG] [rem IMG]https://i69.photobucket.com/albums/i45/pob_aka_robg/dichotomy/dichotomy_footer_zps1c040519.jpg[rem /IMG]
Pob's new mod, Soviet Pob Propaganda style Laptop.
"Are you suggesting that I can't punch an entire dimension into submission?" - Flying squirrel - The Red Panda Adventures
Sorry photobucket links broken
Well I promised you a good one and here it is.
Update: Mouse modding aka this is almost too good to give away.
Just a quick side note to start with.
With the paint & lacquer fully dry, I could put the DVDr/w back together
I may have to paint my own dvd drive black now.
One thing that has been missing from this build so far is any mention of a rodent.
Well in my cupboard-o-bits I have a Gigabyte GM-M6800 that I picked up ages back when play were selling them cheap.
At the time I did do an internal Mod to it to improve the feel of it. the thread is here
Well as I've never really used it I've decided to put it into the build, however after all the hassle I went through with the keyboard it just doesn't fit the colour scheme.
At the moement it's a gunmetal grey and black, so I think the rodent needs a makeover.
To start with I took it apart again to get the top off as that's the main gunmetal part, however I couldn't seperate the two halves of the top.
I may of used some glue on it to help make it more solid
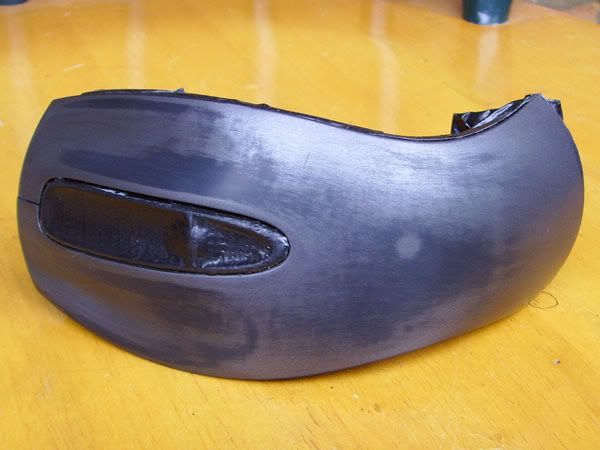
So what I ended up doing was using some gaffer tape to carefully mask off the central wheel area and the inner plate with it's circuit board and hope it survives.
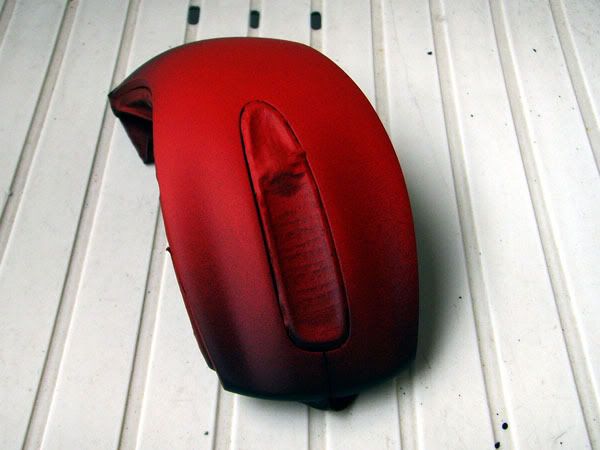
With it all masked I gave the top a light wet sanding with 1200grit wet&dry.
It now looks like this
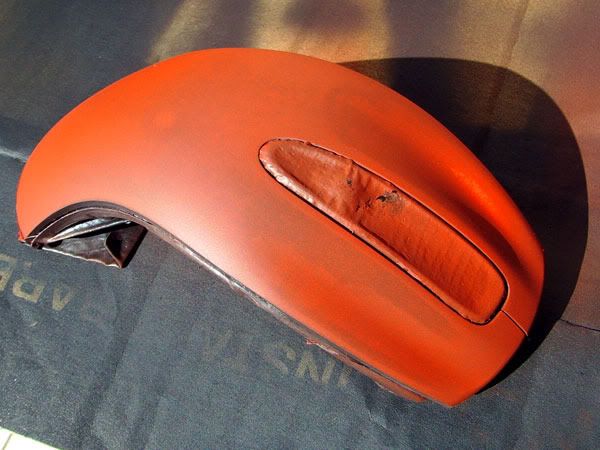
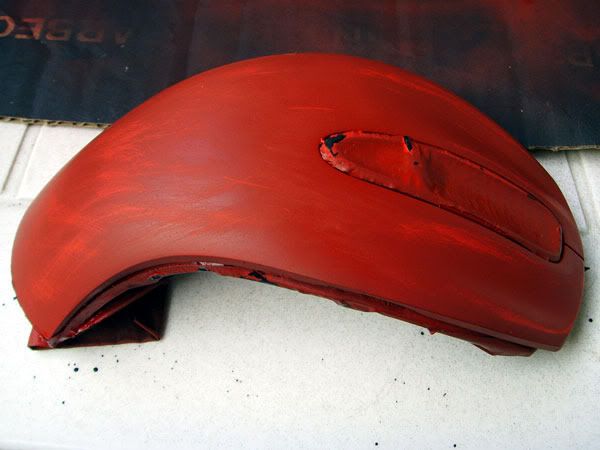
I dug about a found a tube of primary red artist acrylic, this stuff is very thick so I had to do quite a bit of mixing and blending with water to get a creamy consistancy with out any lumps, so I can use it in the air brush.
2 thin coats of red and it looked like this
Well not quite so orange, because I didn't take it off the back cardboard the white balance of the camera is skewed which makes it look orange in the photo.
What you can see is how patchy the paint coverage is, it's also already looking too bright a red.
So I mixed a tiny bit of black into the mix, to dull it down and reduce the paints transparency.
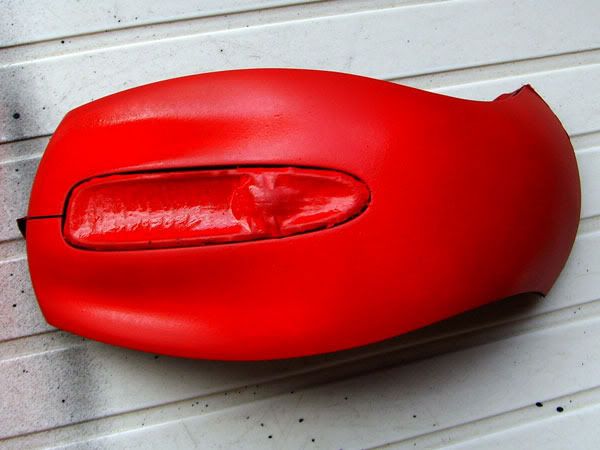
2 coats of my new mix and it was looking better although starting to get a rough texture so I gave it another light wet sand with the 1200grit wet&dry
I took it off the cardboard this time, so the colour is more acurate
You can see the pure red coming through from the sanding.
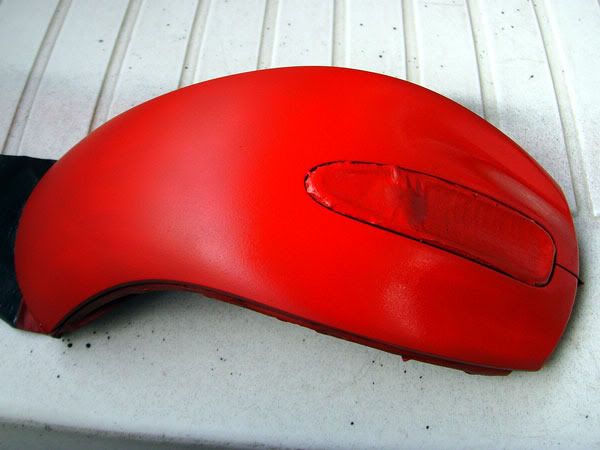
Now I've got a smooth red base I moved back to the pure red, thined down just a touch more to help the flow.
After 2 more coats of red.
It's getting there but still needs a bit more.
Another 2 coats of red
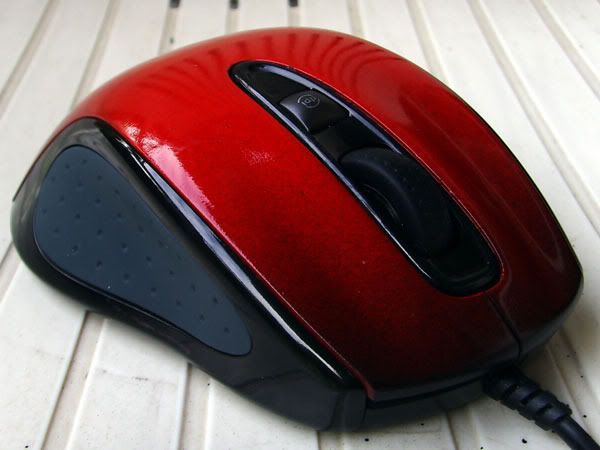
Now that's a nice solid red.
But a solid primary red is too bright, especially next to the darker red of the Satek keyboard, it needs something.
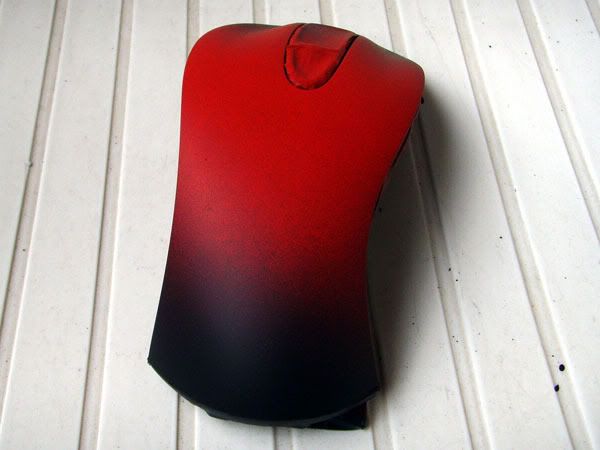
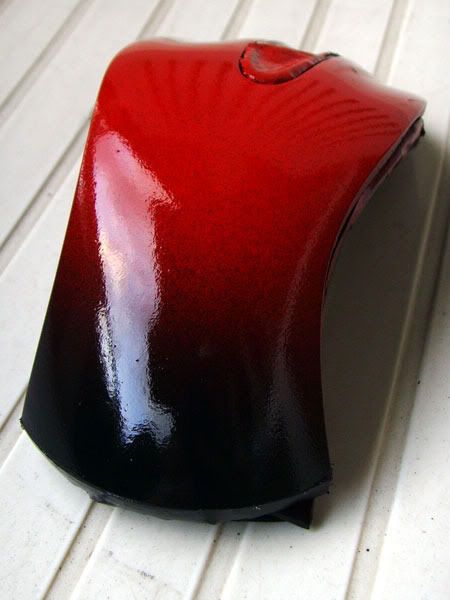
It needs a black fade.
Still could be better, so I added a thiner black fade at the front
Oh yes, I'm loveing that.
It would get worn away fast by a hand, so I better put some Lacquer on it
5 thin coats in total.
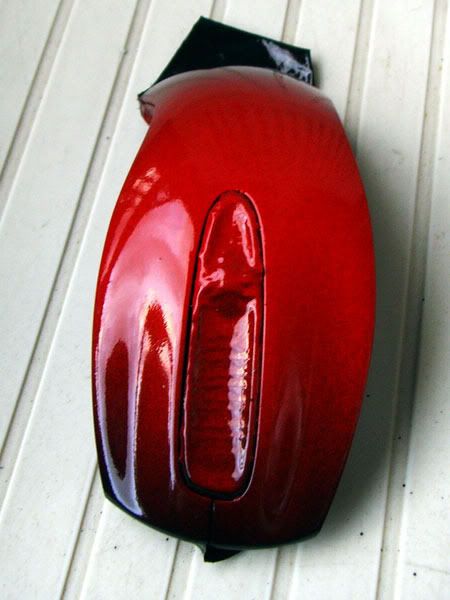
I left that to dry overnight, then carefully removed the mask, claened off some gunk left behind by the tape and then screwed it all back together.

This has come out better than I could of hoped, the Lacquer has caused the red to darken slightly, so it's no longer that bright primary red and the finish come out so smooth and silky.
The only slightly off point is the slightly blueish grey rubber side grips, would of loved them in black or red, however as I have no way to colour the rubber.
It's also such a minor point and the paint came out so well, that I'm happy to leave it as it is and not risk mucking it up.
I'm going to try to get some better final photos tomorrow as thoes don't quite do it justice
[rem IMG]https://i69.photobucket.com/albums/i45/pob_aka_robg/Spork/project_spork.jpg[rem /IMG] [rem IMG]https://i69.photobucket.com/albums/i45/pob_aka_robg/dichotomy/dichotomy_footer_zps1c040519.jpg[rem /IMG]
Pob's new mod, Soviet Pob Propaganda style Laptop.
"Are you suggesting that I can't punch an entire dimension into submission?" - Flying squirrel - The Red Panda Adventures
Sorry photobucket links broken
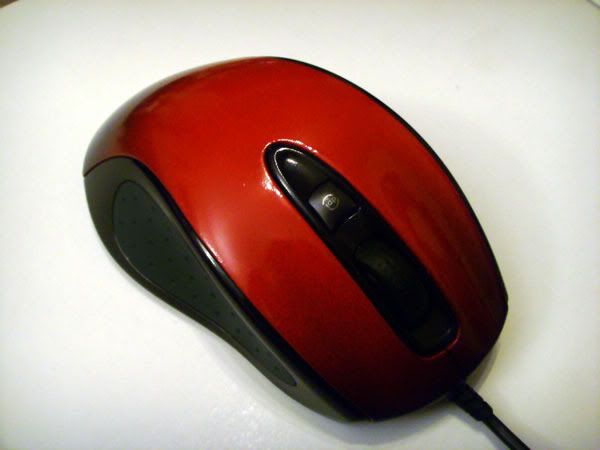
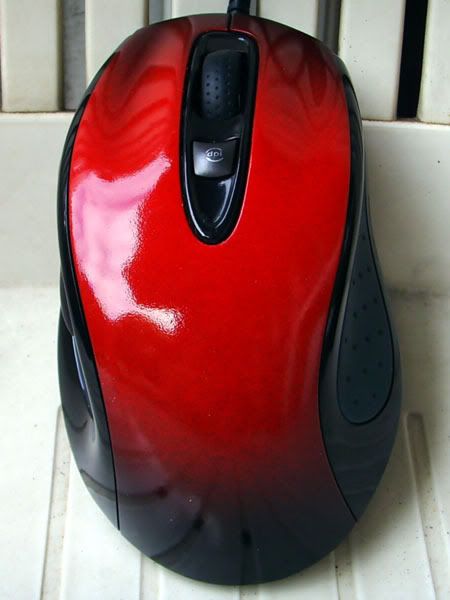
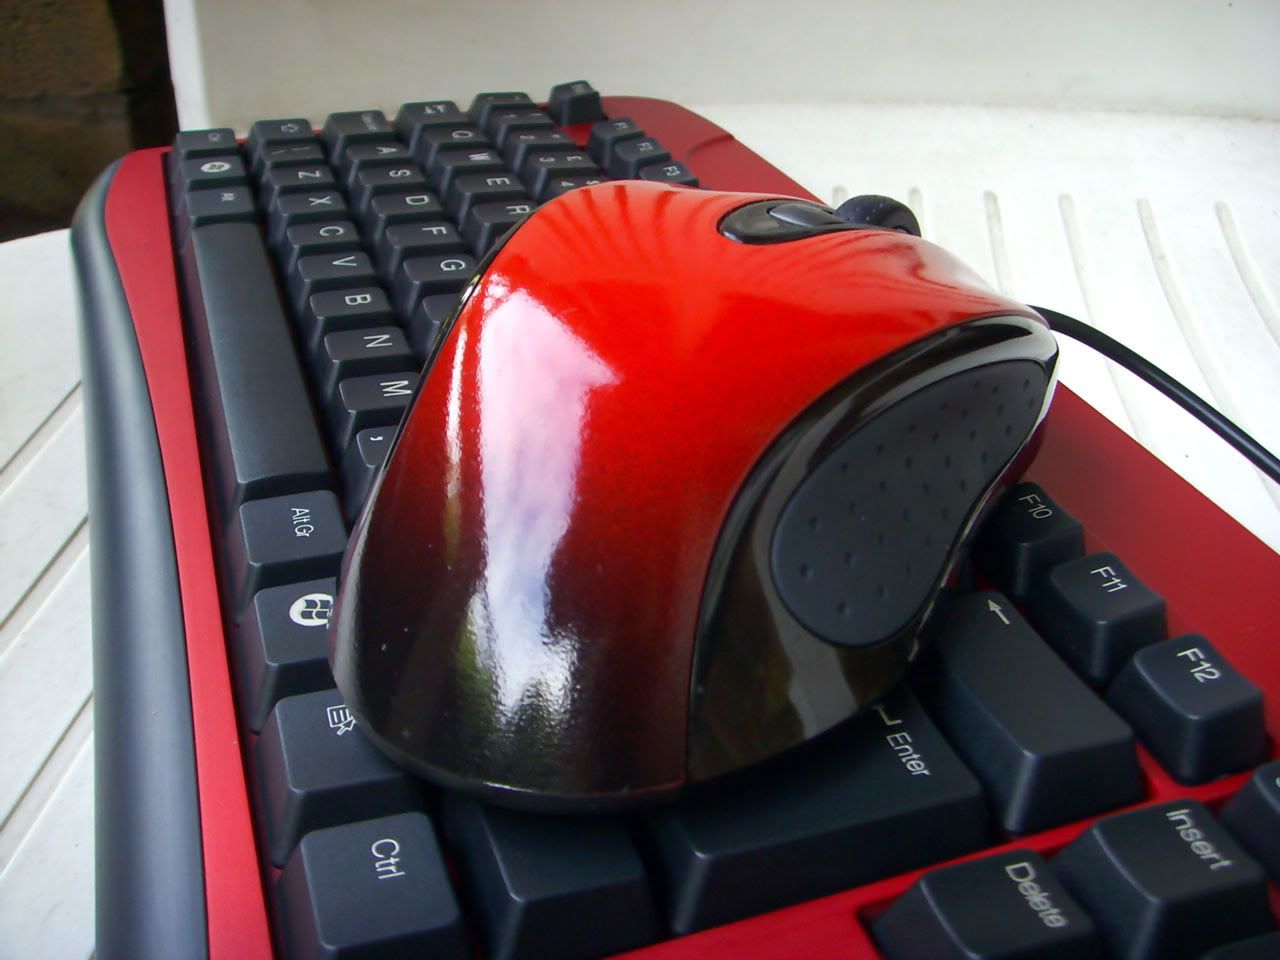
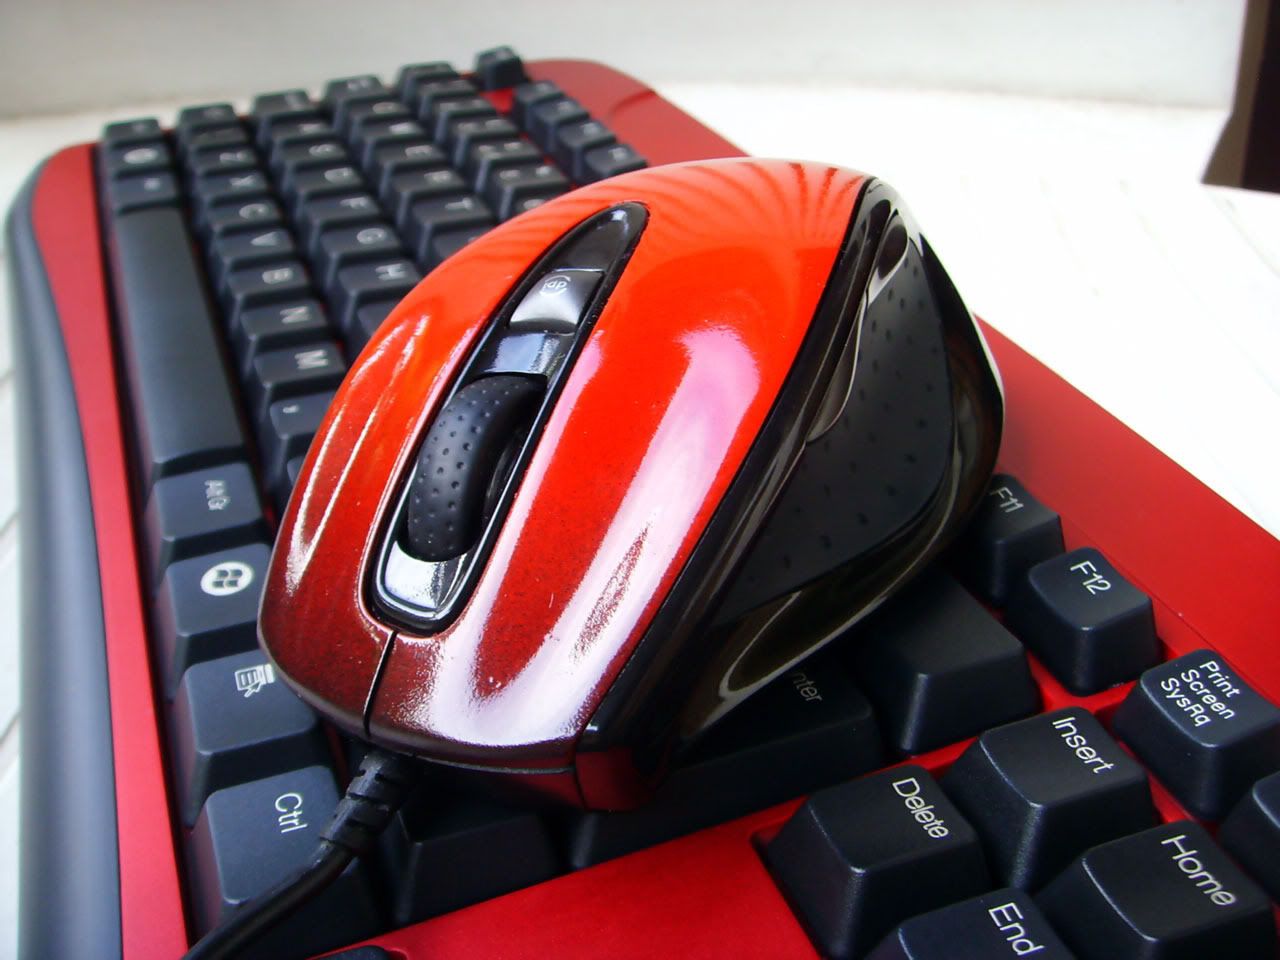
Well I promised some better photo's and here they are
And here's some high res photo's of mouse & keyboard. Thumbnails again, so click on the image for full size.
Please do, they look so good.
Strangely enough in sun light the mouse does have a slight orange colour to it, but indoors it looks a nice deep red.
It doesn't quite match the keyboard, but again indoors they are much closer.
Who is that hansom masked man?

[rem IMG]https://i69.photobucket.com/albums/i45/pob_aka_robg/Spork/project_spork.jpg[rem /IMG] [rem IMG]https://i69.photobucket.com/albums/i45/pob_aka_robg/dichotomy/dichotomy_footer_zps1c040519.jpg[rem /IMG]
Pob's new mod, Soviet Pob Propaganda style Laptop.
"Are you suggesting that I can't punch an entire dimension into submission?" - Flying squirrel - The Red Panda Adventures
Sorry photobucket links broken
Zhaoman (28-08-2009)
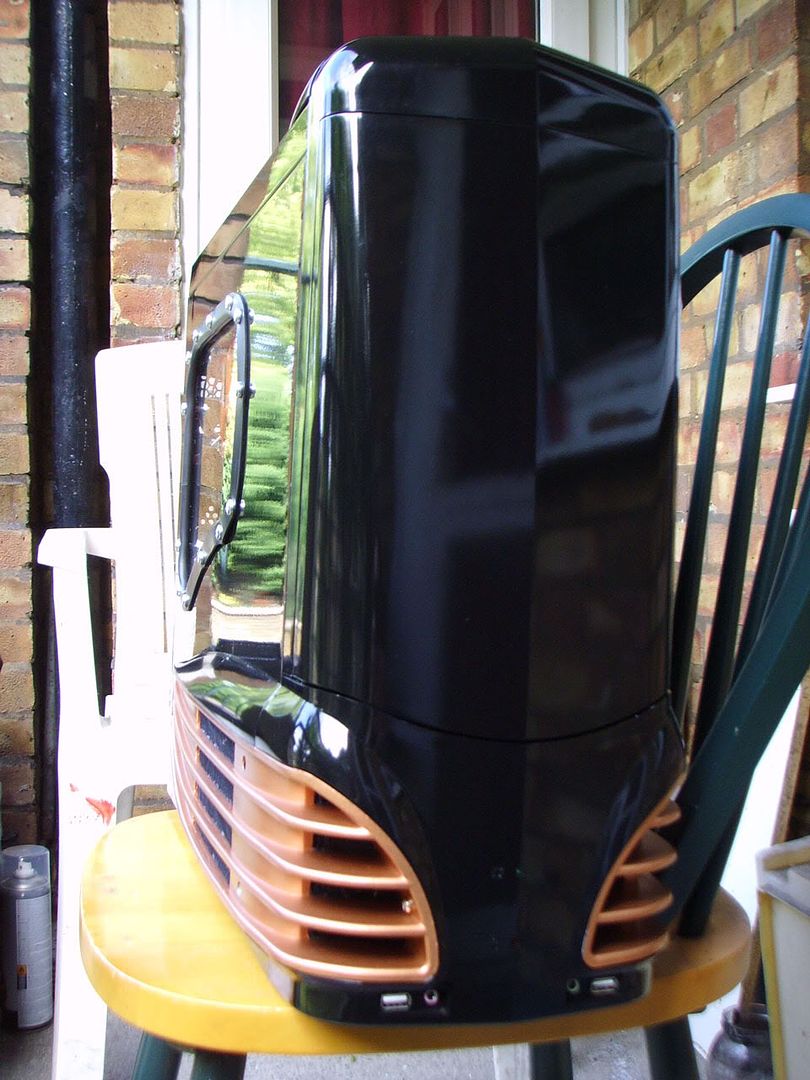
Update: It's finished! well apart from the windows & software install.
The hardware build is all done, I've got windows xp installed and all the drivers.
Now doing the slow process of updates, anti-virus and other software.
I gave the case a full clean, found a few small scratches and chips on the original paint.
It looks like the original paint was not that robust to start with, I should of used the Lacquer on eveything.
After the full clean I used some furniture polish to give it all a light polish.
Here's the final Photo's
1280x960 or 960x1280 thumbnailed so you should know the drill by now.
.
.
.
A couple of detail shots 800x600 thumbnailed
.

[rem IMG]https://i69.photobucket.com/albums/i45/pob_aka_robg/Spork/project_spork.jpg[rem /IMG] [rem IMG]https://i69.photobucket.com/albums/i45/pob_aka_robg/dichotomy/dichotomy_footer_zps1c040519.jpg[rem /IMG]
Pob's new mod, Soviet Pob Propaganda style Laptop.
"Are you suggesting that I can't punch an entire dimension into submission?" - Flying squirrel - The Red Panda Adventures
Sorry photobucket links broken
Biscuit (18-10-2009),GheeTsar (27-08-2009),M0nkeyb0Y (03-09-2009),matty-hodgson (09-11-2009),mycarsavw (27-08-2009),NightshadowUK (27-09-2009),PeteSmith (23-09-2009),shaffaaf27 (09-09-2009),Ulti (23-10-2009),watercooled (27-08-2009),wazi (29-08-2009)

That mouse looks absolutely fantastic mate.... good work!
Pob255 (26-08-2009)

You should be seriously proud of your work - it's a beauty! Bet it will be hard to part with it.
Out of interest, what was the final cost of the mod? Have you got another project lined up?
Really well done!!
I thought at one point that you had wrecked the side panel with your sanding around the window, but my lack of faith was unfounded!
That really is a fantastic build.
Cost break down
Motherboard £35
GIGABYTE GA-MA790X-DS4
CPU £33
ATHLON X2 5600+ (2.8ghz)
Ram £15
2x 1gb DDR2-pc6400
Graphics card £52.70
Palit 8800GT 512mb
Case £27
el-cheapo black alien case
Modding costs £70 (probably a bit more)
Lacquer x2 £9
perspex £4
Metal mesh £7
Other metal £5
Cold Cathode tube £xx (spare 12" purple)
Chilled pc order £23
-Cable Ties Red
-Black Cable Braid / Sleeving
-Blowhole / Edge Trim
-2x YATE LOON 140mm - D14SL-12 with 4 Red Leds
Scan Order £22
- Akasa AKCB8-8 8PIN EXTENSION
- 92mm Enermax UCCL9 CLUSTER
- Akasa PAX-MATE-V2
- Sata cable Red
Hard drive £xx
Spare 80gb sata I had kicking about
DVDrom/CDRW £xx
Spare I have kicking about
CPU cooler £22
Asus Silent Square Pro
Mouse £xx
Spare Gigabyte GM-M6800
Keyboard £7
Satek red
So £192 without modding the case
£262+ with moding, In all honesty I didn't and shouldn't of spent that much on the modding.
Given that the case total with modding costs comes to £100and a lot of man hours of work, I could of made my life and this build a hell of a lot simplier by just getting a decent £70 case to start with.
Or I could of just stuck with the simplier plan, positive pressure design, cutting 2x 120mm fan holes in the bottom, a ventalation hole in the top, and that's it.
But then it would be missing the little touches, e.g. the PSU sleaving
It also wouldn't be unique or as much fun to do as it was.
And yes it was fun
I'm not doing this as a business or financial gain, but for fun and experience. That and my work is not up to the quality I would demand from a "professional" modding if I had to pay for it
The final price we agreed on is £250, my fault for going over, my costs to bare.
I should of known really, ever time I tinker with my own pc I end up getting a few extra small things and thoes small costs seriously mount up.
[rem IMG]https://i69.photobucket.com/albums/i45/pob_aka_robg/Spork/project_spork.jpg[rem /IMG] [rem IMG]https://i69.photobucket.com/albums/i45/pob_aka_robg/dichotomy/dichotomy_footer_zps1c040519.jpg[rem /IMG]
Pob's new mod, Soviet Pob Propaganda style Laptop.
"Are you suggesting that I can't punch an entire dimension into submission?" - Flying squirrel - The Red Panda Adventures
Sorry photobucket links broken

Good work!
Desktop (Cy): Intel Core i7 920 D0 @ 3.6GHz, Prolimatech Megahalems, Gigabyte X58-UD5, Patriot Viper DDR3 6GiB @ 1440MHz 7-7-7-20 2T, EVGA NVIDIA GTX 295 Co-Op, Asus Xonar D2X, Hauppauge WinTV Nova TD-500, 2x WD Caviar Black 1TB in RAID 0, 4x Samsung EcoDrive 1.5TB F2s in RAID 5, Corsair HX 750W PSU, Coolermaster RC-1100 Cosmos Sport (Custom), 4x Noctua P12s, 6x Noctua S12Bs, Sony Optiarc DVD+/-RW, Windows 7 Professional Edition, Dell 2408WFP, Mirai 22" HDTV
MacBook Pro (Voyager): Intel Core 2 Duo @ 2.6GHz, 4GiB DDR2 RAM, 200GB 7200RPM HDD, NVIDIA 8600GTM 512MB, SuperDrive, Mac OS X Snow Leopard, 15.4" Matte Display
HTPC (Delta-Flyer): Intel Core 2 Q8200 @ 2.33GHz, Zotec GeForce 9300-ITX, 2GiB of DDR2 Corsair XMS2 RAM, KWorld PE355-2T, Samsung EcoDrive F2 1.5TB, In-Win BP655, Noctua NF-R8, LiteOn BluRay ROM Drive, Windows 7 Home Premium, 42" Sony 1080p Television
i7 (Bloomfield) Overclocking Guide
There are currently 1 users browsing this thread. (0 members and 1 guests)
 Posting Permissions

 Reply With Quote