LinkBack URL
 About LinkBacks
With the missing posts now redone, I should be able to rebuild the remaining updates fairly quickly and you'll be able to see the finished build soon™


With the missing posts now redone, I should be able to rebuild the remaining updates fairly quickly and you'll be able to see the finished build soon™
[rem IMG]https://i69.photobucket.com/albums/i45/pob_aka_robg/Spork/project_spork.jpg[rem /IMG] [rem IMG]https://i69.photobucket.com/albums/i45/pob_aka_robg/dichotomy/dichotomy_footer_zps1c040519.jpg[rem /IMG]
Pob's new mod, Soviet Pob Propaganda style Laptop.
"Are you suggesting that I can't punch an entire dimension into submission?" - Flying squirrel - The Red Panda Adventures
Sorry photobucket links broken
Ulti (09-01-2013)

Yay! just a quick skim through this, going to come back to reading it a little later to have a good decent read
Originally Posted by TAKTAK

(contrary to my other post, here was where I sorted out the edge strips)
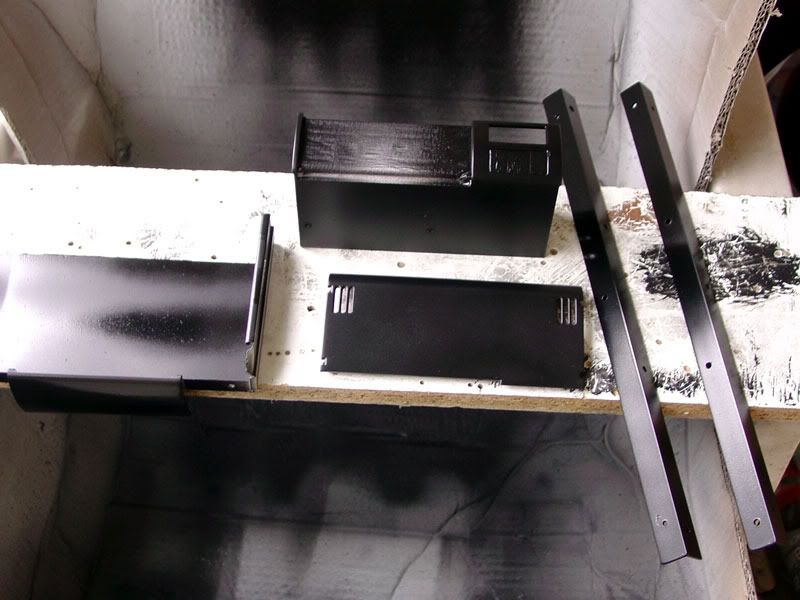
I sorted out the top edge strips.
3 holes along the top and panel, which I then tapped
4 slightly larger holes along each side and panel, for rivets (I've used m3 bolts and nuts to hold it together for a test fit)
I've also tapped the holes for the top panel psu filter.
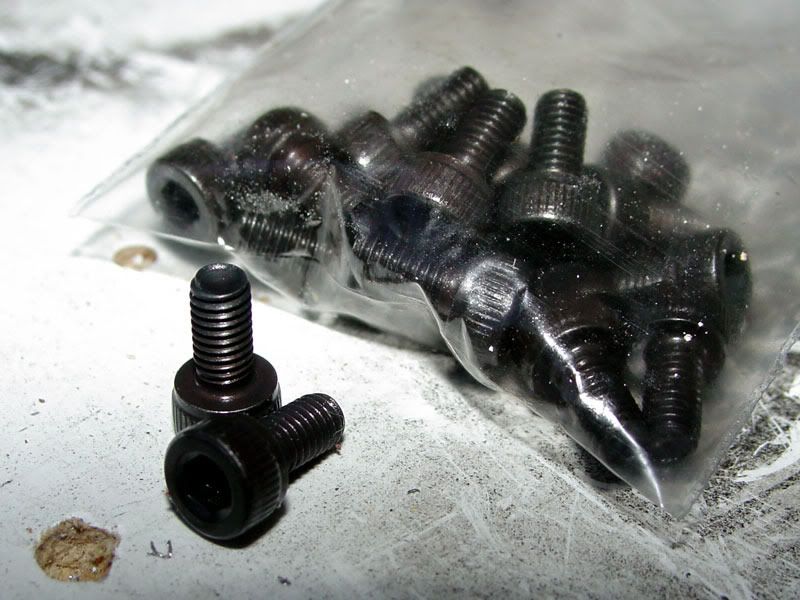
I got some nice 6mm m3 socket cap bolts to use on this case.
And that's it for construction all that's left is sanding & painting
I got some 80grit emery cloth, which I used to roughly sand down the case frame.
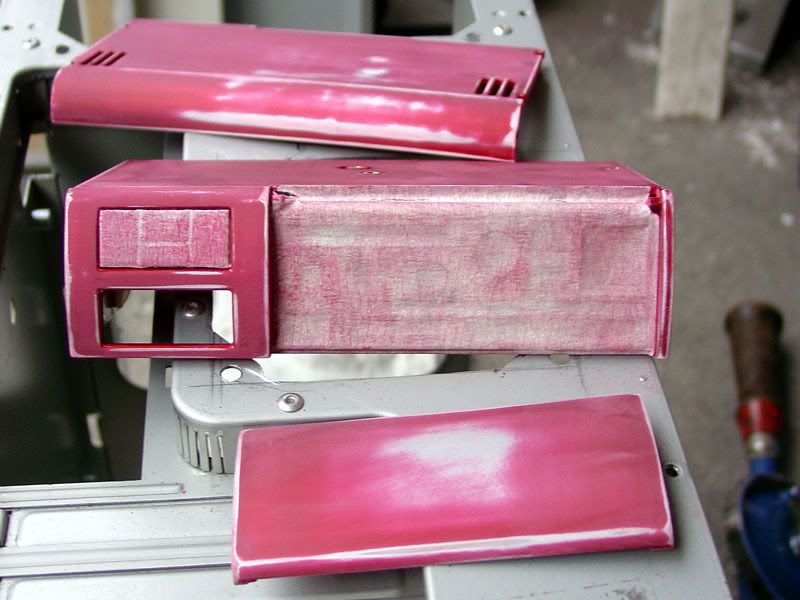
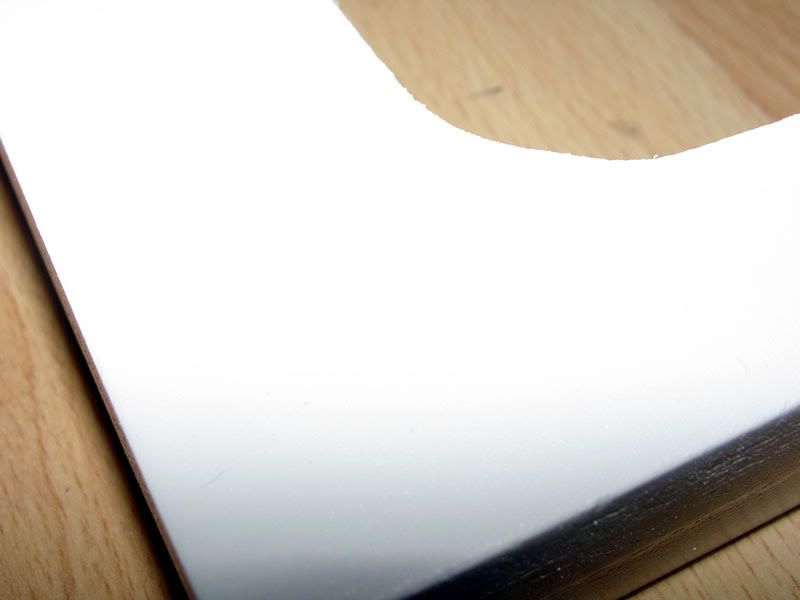
I then moved on to the all-in-one, being plastic the 80grit ould just rip the surface up too much, so I just used 400grit wet&dry followed by 800grit
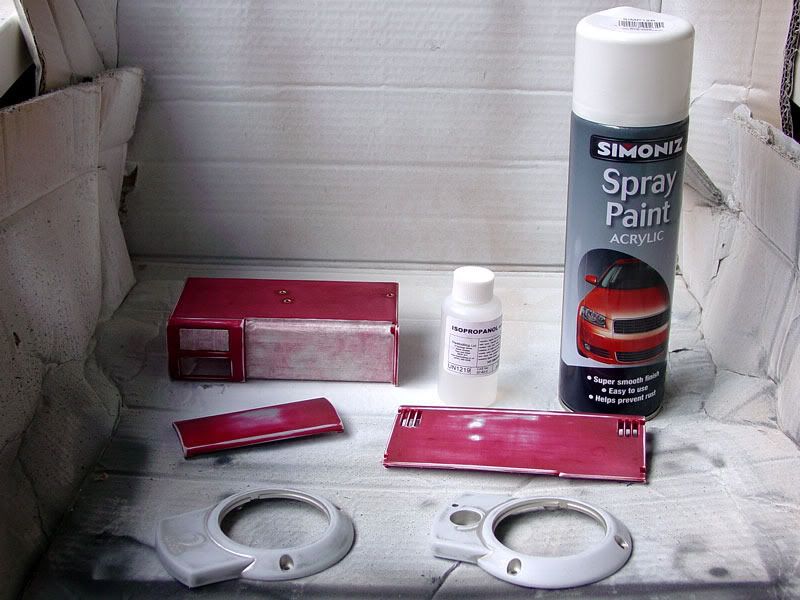
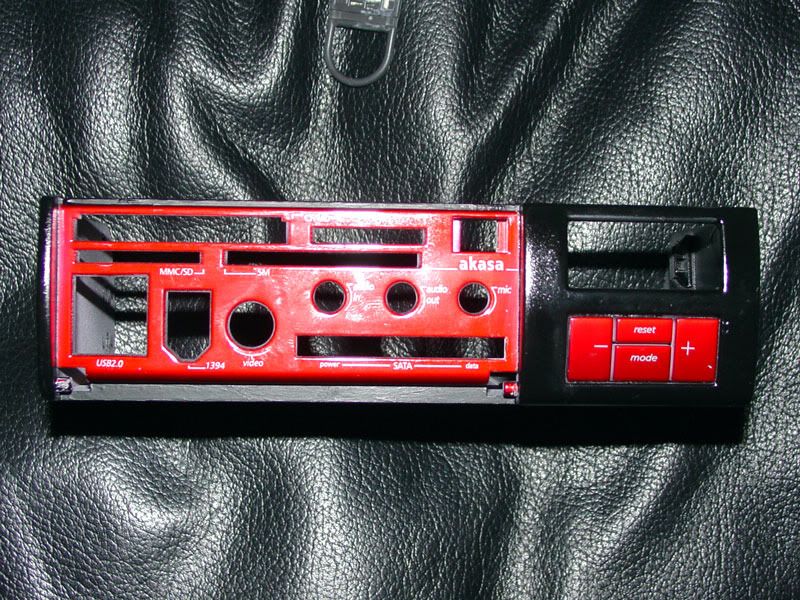
As you can see I masked off the connection area and buttons, they are going to stay cherry red.
I'd just like to give a warning when sanding cherry red paint.
It turns EVERYTHING pink, not just the wet&dry, as you can see, but also both my hands and one leg of my jeans had pink stains on them, I do hope it'll wash out of my jeans ok, as even after washing I still had slight pink stains on my hands.
update it did wash out of my jeans ok, but it took two days for my hands to lose their pink tinge
[rem IMG]https://i69.photobucket.com/albums/i45/pob_aka_robg/Spork/project_spork.jpg[rem /IMG] [rem IMG]https://i69.photobucket.com/albums/i45/pob_aka_robg/dichotomy/dichotomy_footer_zps1c040519.jpg[rem /IMG]
Pob's new mod, Soviet Pob Propaganda style Laptop.
"Are you suggesting that I can't punch an entire dimension into submission?" - Flying squirrel - The Red Panda Adventures
Sorry photobucket links broken
Update: Painting
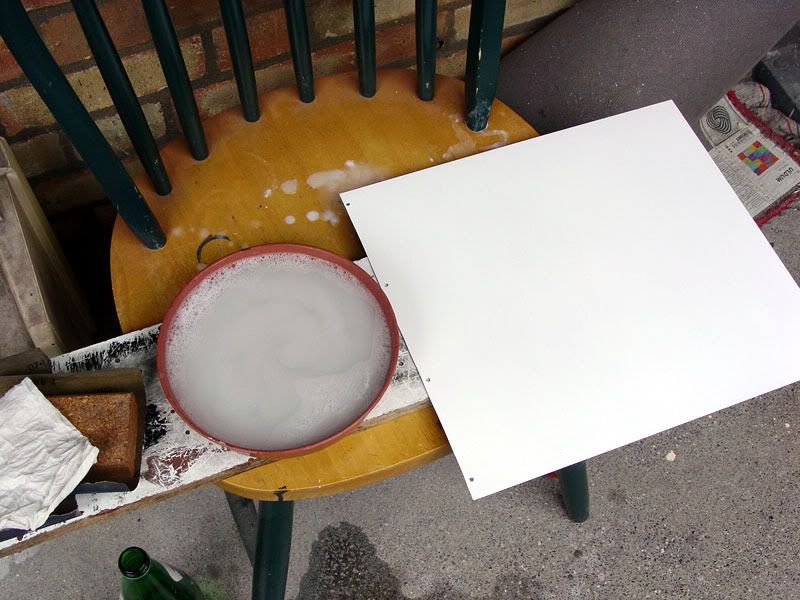
To start with I sanded the frame work and any thing else that was unsanded with 400grit, next I wiped everything down with an unused dish cloth (they are great for this sort of thing) and finally I wiped it all down with a tac cloth (Mmm smelly, sticky and strangely tactile)
I didn't take any photos before I started on them with the primer but I sure you've seen sanded metal before
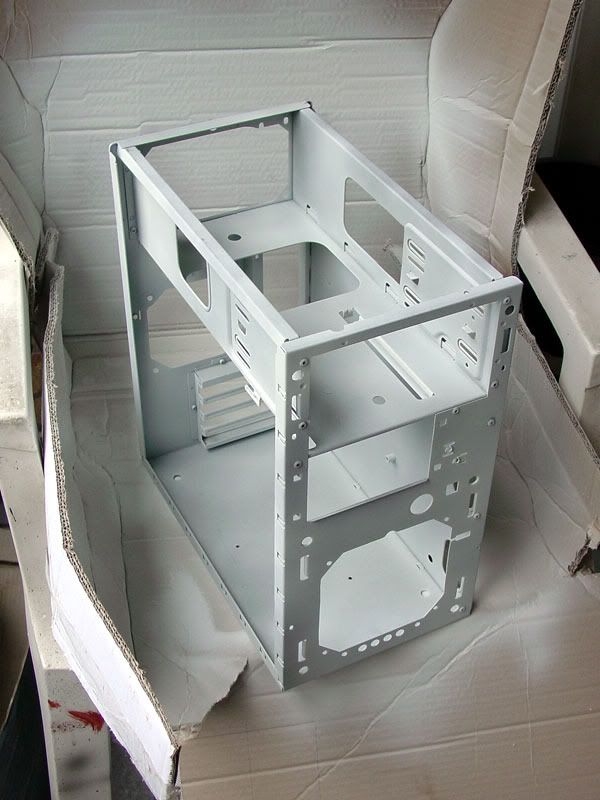
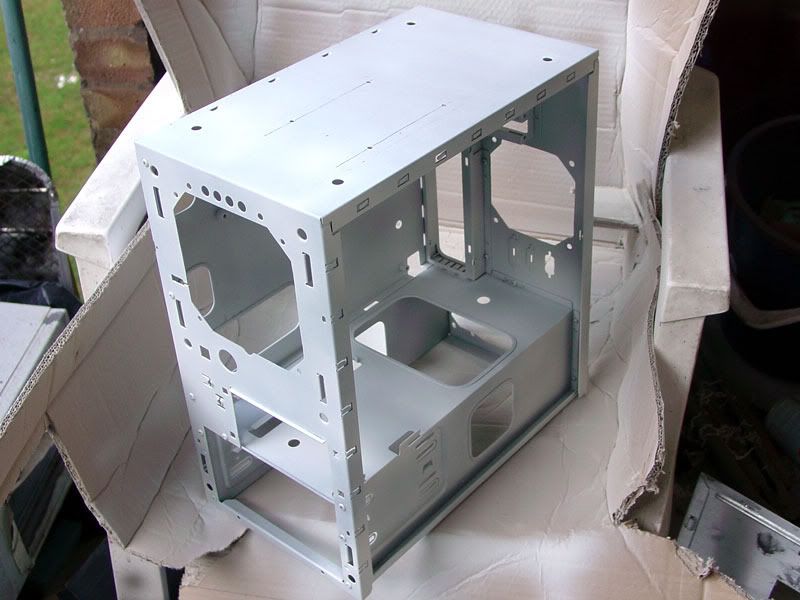
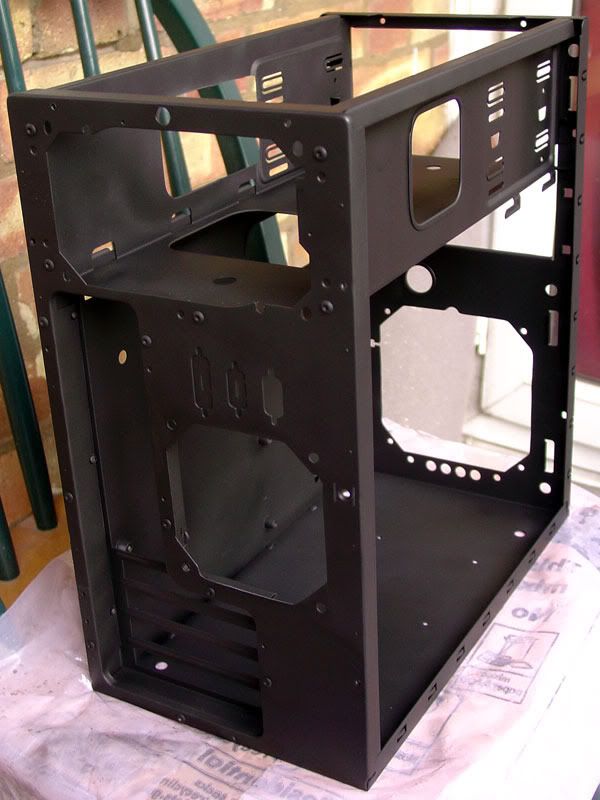
I've used Simonz brand white primer.
Frame work, note my advanced (cardboard and lawn chair) spray booth
flip it over and spray the areas I didn't reach last time, once it had dried of course, otherwise I'd have the case attached to my spray booth.
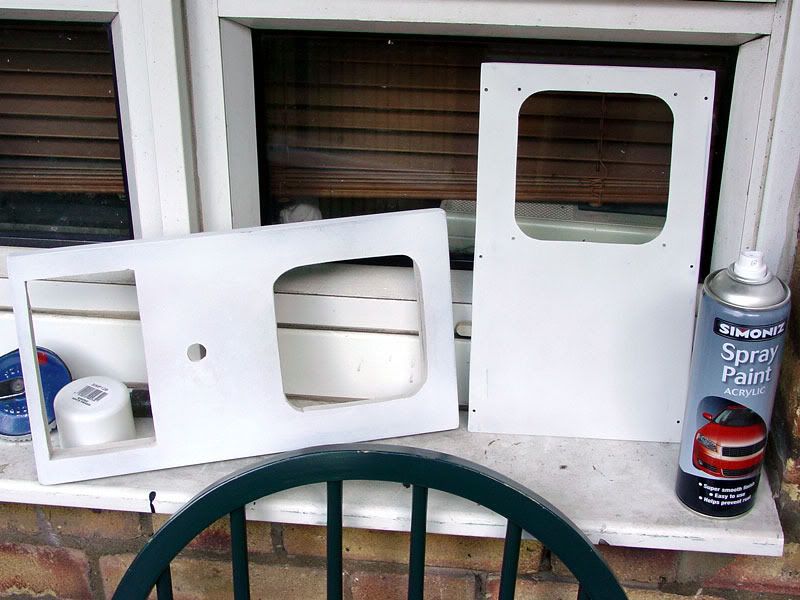
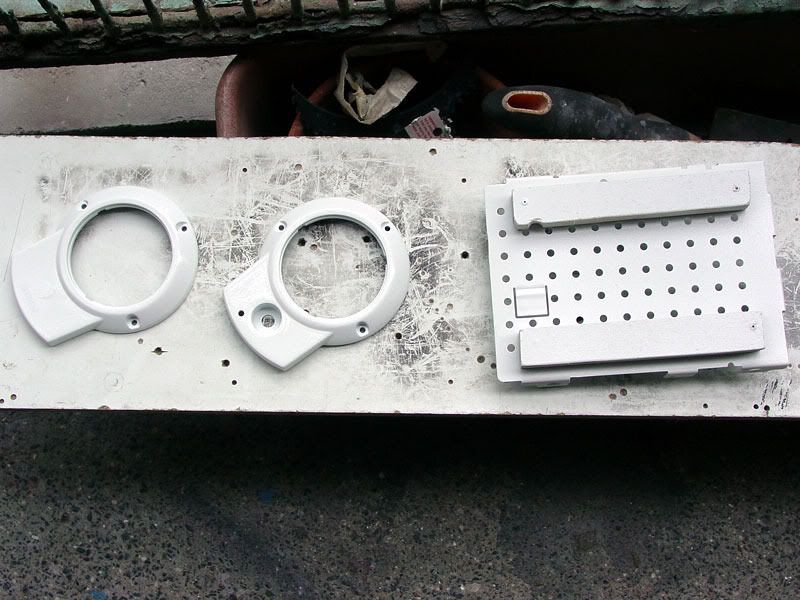
I used a slightly different method on the plastic parts (the all-in-one and speaker bits)
I wiped with the tac cloth, then went over them again with Isopropanol to get them really clean.
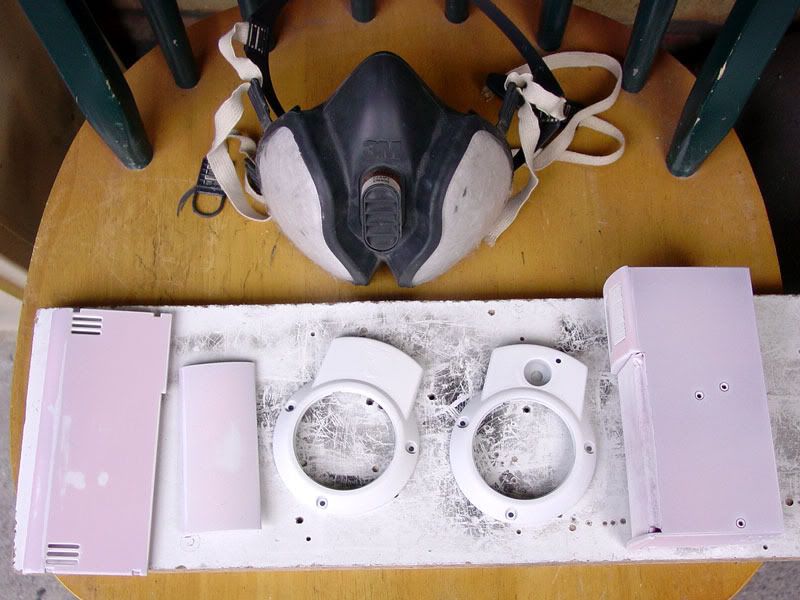
A light primer spray later and I also included my old M3 mask in the photo, yes it's a disposable mask and the elastic has lost a lot of its stretch.
I probably should dispose of it but it's still doing a great job, as I never used it much when I first got it (about 10 years back) and it's been sat in a cupboard since.
And I can tell it's working as I really cannot smell the paint fumes while wearing it, at first I though that the Simonz brand paint was using some new low solvent mix, until I took the mask off.
It really is a big step up from those basic disposable dust masks, if you do a lot of spray painting then a good mask with replaceable filters is worth it, you can pick up this M3 one for about £19 on ebay but you can get other makes for around £5
Every thing was then left over night to dry before I started on the colour coats.
Last edited by Pob255; 09-01-2013 at 08:53 PM.
[rem IMG]https://i69.photobucket.com/albums/i45/pob_aka_robg/Spork/project_spork.jpg[rem /IMG] [rem IMG]https://i69.photobucket.com/albums/i45/pob_aka_robg/dichotomy/dichotomy_footer_zps1c040519.jpg[rem /IMG]
Pob's new mod, Soviet Pob Propaganda style Laptop.
"Are you suggesting that I can't punch an entire dimension into submission?" - Flying squirrel - The Red Panda Adventures
Sorry photobucket links broken
Hope you can keep up, as I said before I can just copy and paste now with a small bit of editing.
Update: first paint coats
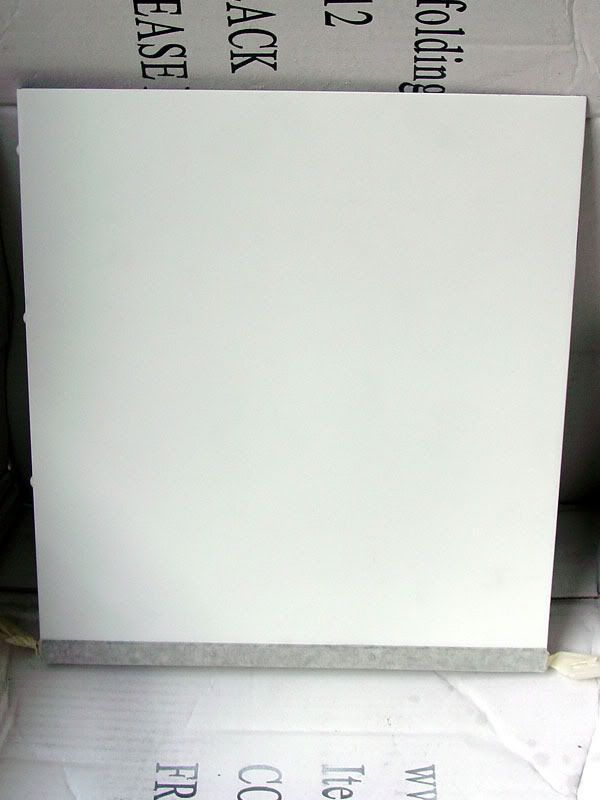
I started off by spraying the panels and front bezel with white gloss
Sorry no photos of the spraying so instead . . .
Yes, today's update is brought to you by liquorice, damn but this stuff is like crack to me, luckily wearing the filter mask slows down the speed at which I can eat it.
and yes, to those who where involved in the pod cast this is what I was eating before we started
that last was the modbrothers modding podcast which I was lucky enough to be invited on as a guest, it's gone now, I've still got most of the episodes saved, I hope I've still got the one I was on, it's really weird to listen to a podcast you where a guest on
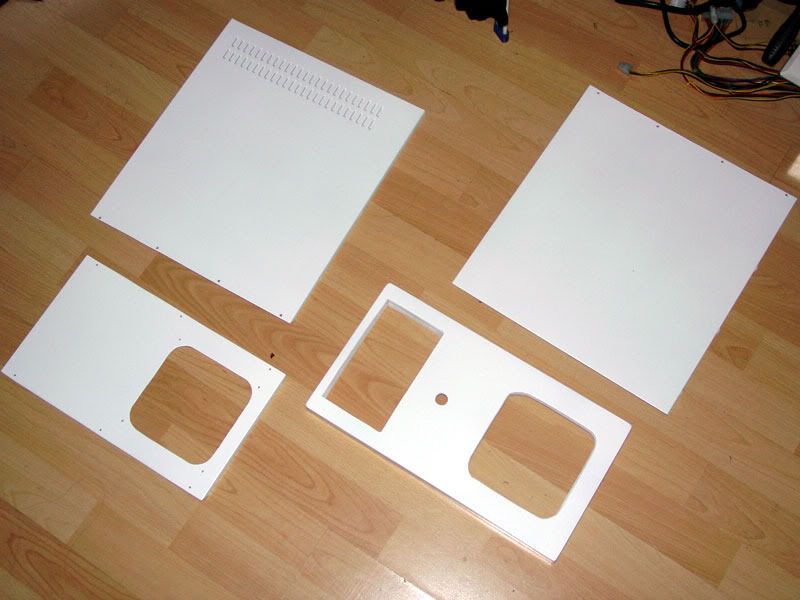
I got about 3 coats out of one can before realising I had more than just the panels to spray whiteops:
Carefully laid out on the floor to dry
Pretty good finish.
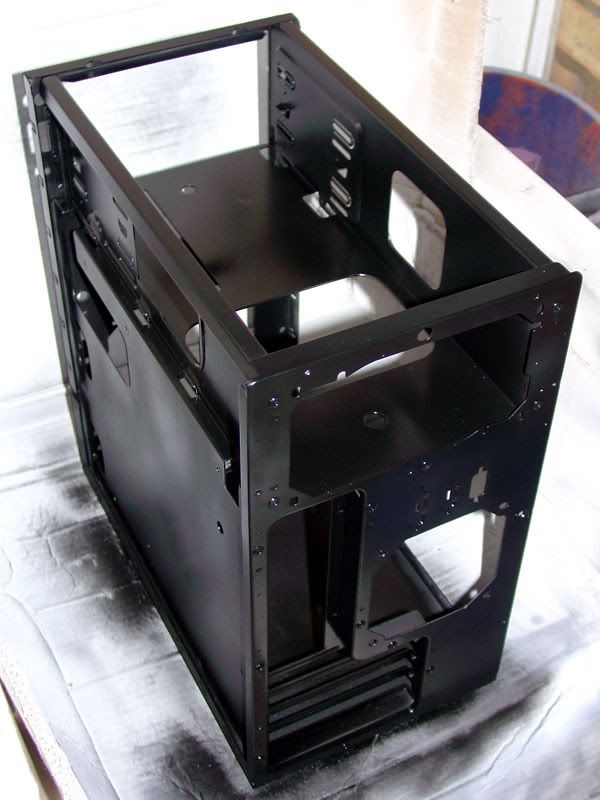
While they where drying I got out my air brush and matte black artist acrylic paint to do the frame.
Trying to paint large areas with an air brush is a pain, why I got my self a hvlp spray gun however my compressor just cannot provide the pressure required for the spray gun
The only way to paint a case with an airbrush is to work it in small sections rather than trying to cover everything in one coat.
Some time later, don't ask me how many coats, artist acrylic doesn't work that way, it dries to fast when sprayed, by the time I've finished one section it's already touch dry at the start of the section.
The key I've found to using artist acrylic in an airbrush is to thin down the paint with water to the consistency of single cream, it then sprays very well and evenly although you do need to go over it 3 or 4 times to get solid colour.
I guess this is roughly after 6 coats but could be more in some areas.
Artist acrylic is not very robust esp when airbrushed because the coats are still very thin so this will need clear lacquer over it to fully seal it and as I needed to get some more with paint I thought I might as well get some black too to help seal it especially at the back and it would be better for the all-in-one and edge strips.
[rem IMG]https://i69.photobucket.com/albums/i45/pob_aka_robg/Spork/project_spork.jpg[rem /IMG] [rem IMG]https://i69.photobucket.com/albums/i45/pob_aka_robg/dichotomy/dichotomy_footer_zps1c040519.jpg[rem /IMG]
Pob's new mod, Soviet Pob Propaganda style Laptop.
"Are you suggesting that I can't punch an entire dimension into submission?" - Flying squirrel - The Red Panda Adventures
Sorry photobucket links broken

I wish you could have done my case mod for me!!
Stunning pob just stunning! had a good read through the posts from the start, looks like alot of planning went into this! i like what you have done with the mdf aswell, some really well thought out ideas put to good use on this mod! im looking forward to the next set of work logs
Update: painting goes on
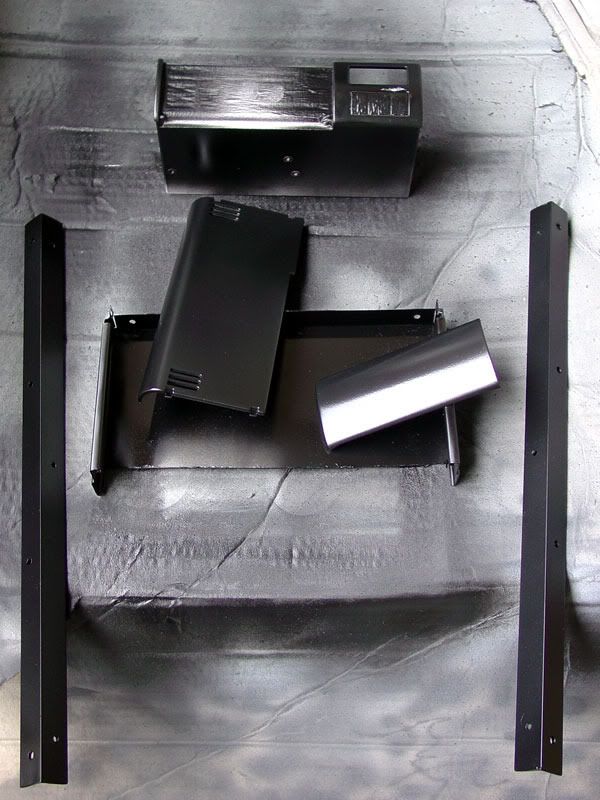
The new paint came so I started on the frame
Black satin matte, a light spray all over to help seal the air brushed paint in and 3 layers on the back where it will be exposed, also on the top rails.
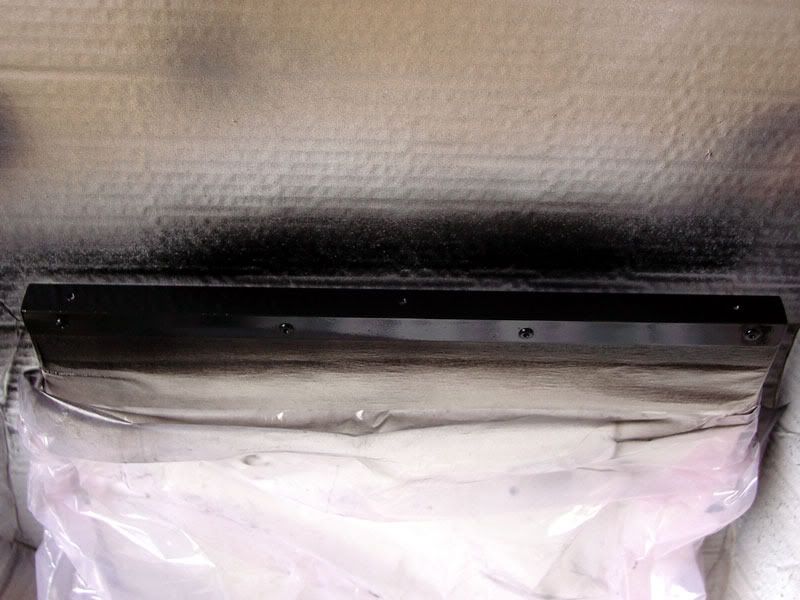
Then I moved onto the all-in-one and rails
1st coat
2nd coat, oh and that random bit of metal that the front cover is hanging from is not part of this build, it's just a chunk of case that I cut off from a different project, it was there and made a handy thing to stand stuff on while painting.
Must say painting is a pain, well the drying time is anyway, it's really been slowing me up, the Simonz brand paint is touch dry in 2-3 hours but it's still soft and easy to damage if you're not careful.
So I have to leave everything to dry over night and there is nothing else I can do when I want to be working on this.
As I discovered when I realised I'd managed to put a big gouge in the paint on the front of the all-in-one, I had to carefully sand the spot and touch it up.
While the white looked smooth on the panels in my previous shots I was a bit unhappy with it, esp on the panels.
So I wet sanded them with 1200grit wet&dry.
Much better, but now they've lost that gloss shinebut that's ok as I'll be putting another layer or two on them.
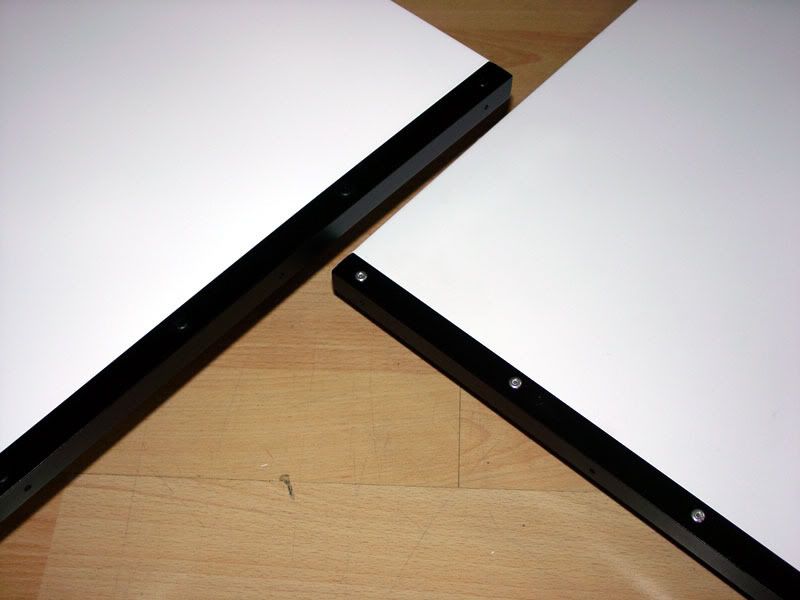
I then pop riveted the edging strips onto the panels, don't ask me why I decided to do it at this point, I was just caught up in the moment of what I could do at that time.
It was only as I took this photo did I suddenly realise that I still had to put another layer of white on them.and of course I'll have to put on another layer of spray to cover the rivets.
leaving a day to dry between each.
I did try just painting them with the black artist acrylic, rivets on the one of the left have been painted, looked ok but the difference between, a true matte and a satin matte really shows when it's dry and it just chips too easily.
While I was muttering rude word under my breath I got out the artist acrylic and my nice paint brush.
Hand painted, two watered down thin layers on the inside of the panels, I doubt they will ever been seen after I hand this case over but I just couldn't bring myself to leave them grey.
However artist acrylic dries fast even when hand painted, not as fast as when it's airbrushed but still fast, after 30min it was dry. (no hydrocarbon solvents so no hardening time, just drying time)
So I taped up the black edge strips and put on the next layer of white onto the panels.
That will put the shine back to the surface but still be smooth as it's only one layer.
This is a panel taped up ready for painting, I've only just realised that I forgot to get a photo after painting.
I also sprayed the hard drive cage and speaker bits, two coats each.
More worrying is that I'd not managed to get back in contact with SebTiger on the ebyer forums, he was going to CNC some 5mm acrylic for me to make the front.
I could get away without it but I'd not be happy with the result.
But to end on a more happy note, although this really should be in the next update I'm so happy with the result that I'm posting it now.
This is what the speakers look like.now I've just got to sort the power wiring out.
I dread wiring.
[rem IMG]https://i69.photobucket.com/albums/i45/pob_aka_robg/Spork/project_spork.jpg[rem /IMG] [rem IMG]https://i69.photobucket.com/albums/i45/pob_aka_robg/dichotomy/dichotomy_footer_zps1c040519.jpg[rem /IMG]
Pob's new mod, Soviet Pob Propaganda style Laptop.
"Are you suggesting that I can't punch an entire dimension into submission?" - Flying squirrel - The Red Panda Adventures
Sorry photobucket links broken
Update: getting close.
Well my initial deadline for this was the 1st of September, I'm not sure I'm going to make though because of these paint drying times and touch ups.
I swear fluff is attracted to wet paint, I wipe down a panel carefully make sure it's free of any fluff or dust, carefully stand it up ready for painting, double check it's clean, then spray on a thin layer.
Pick up the panel to move it inside to dry and I discover there's three or four bits of black fluff (all fluff looks black against fresh white paint) and they've got there in the time it's taken me to put the cap back on the can and pick the panel up.
I have got my acrylic front situation sorted out.
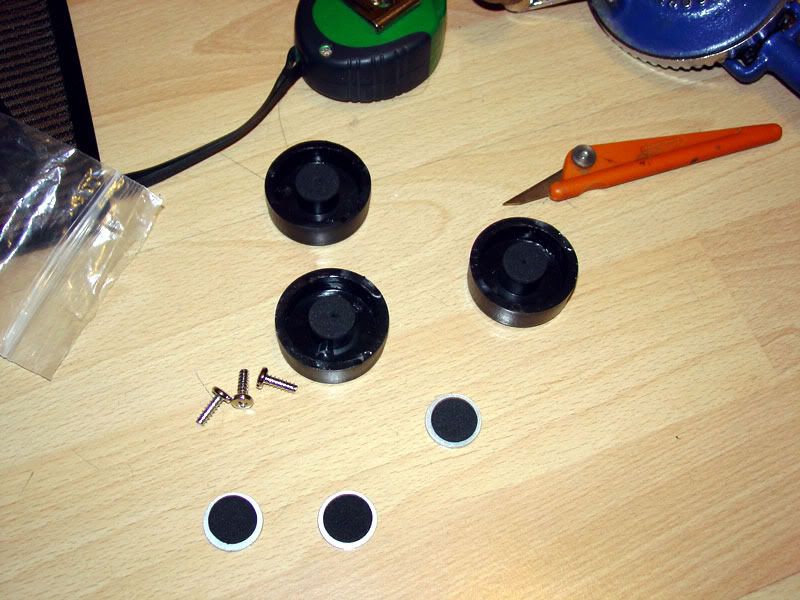
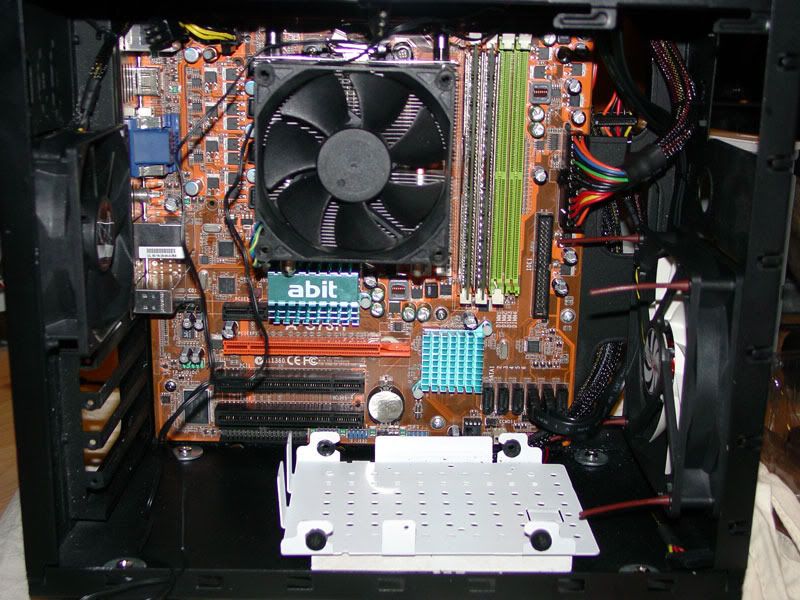
Now that the main frame is finished and dry I started putting the pc together, I went to attach the case feet and realised I had a problem, the holes for the original case feet are about 7mm in diameter so the m3 nuts and bolts I have are just too small, they are the correct size for the new feet but not the holes in the case from the original feet, so I needed some big chunky washers.
So while I was out getting some washers I made inquires about acrylic, thinking if I can get a sheet of 5mm clear acrylic I could try making a front for the bezel by hand.
However I've found a local place that not only sells acrylic but also does laser cutting
So bolstered by this I went home to get on with the putting the case back together.
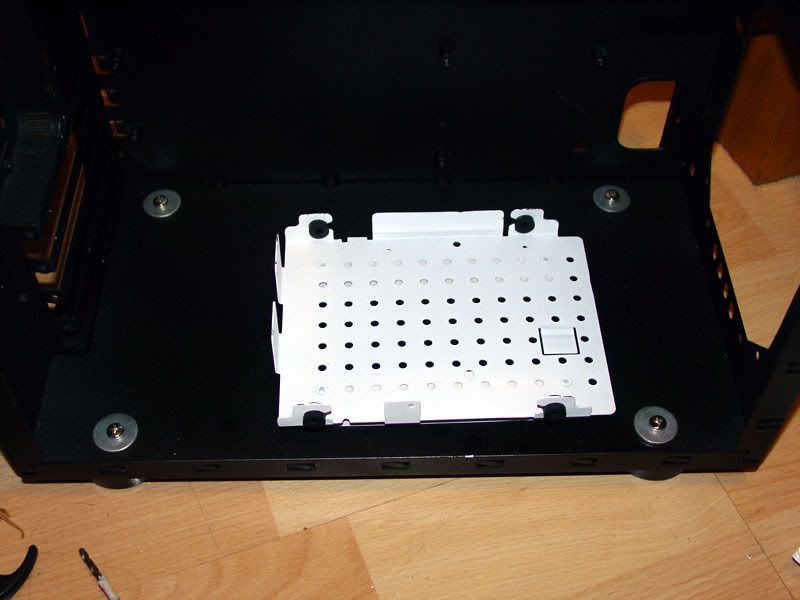
Here are the case feet and washers, I've added little sticky backed foam discs to both the washers and top of the feet, to both help hold them securely and add to some vibration absorption.
here they are fitted and at the same time I fitted the hard driver tray.
I also hand painted another layer of black on the insides on the panels
I've put the front of the All-in-one in the middle so you can see the difference between a true matte and a satin matte, although the camera flash makes the true matte look grey, it is actually black.
I then taped up the panels to respray the black edging strip and cover those rivets.
I also did some sleeving and wiring
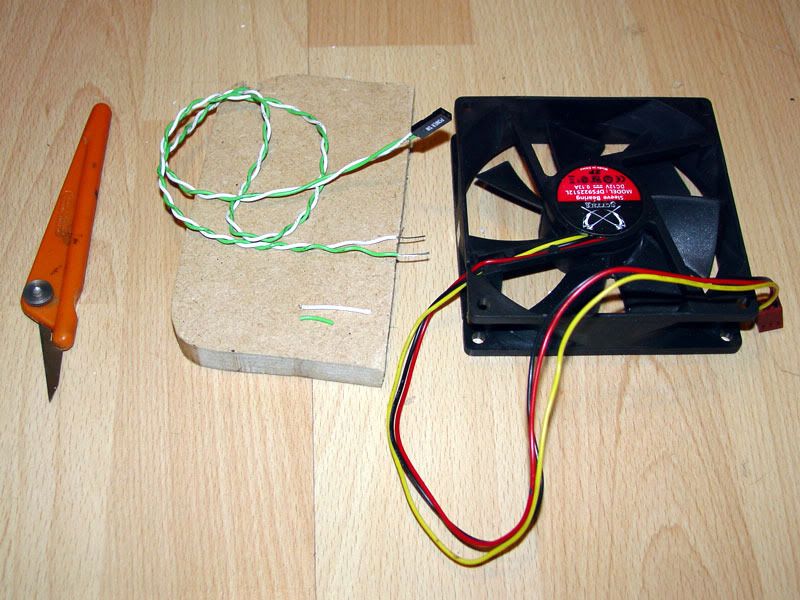
This is a scythe 92mm fan that I'm going to use as the rear case fan, needs sleeving, and a spare power button lead I had, I'm going to both sleeve it and wire it up to the power button I'm using.
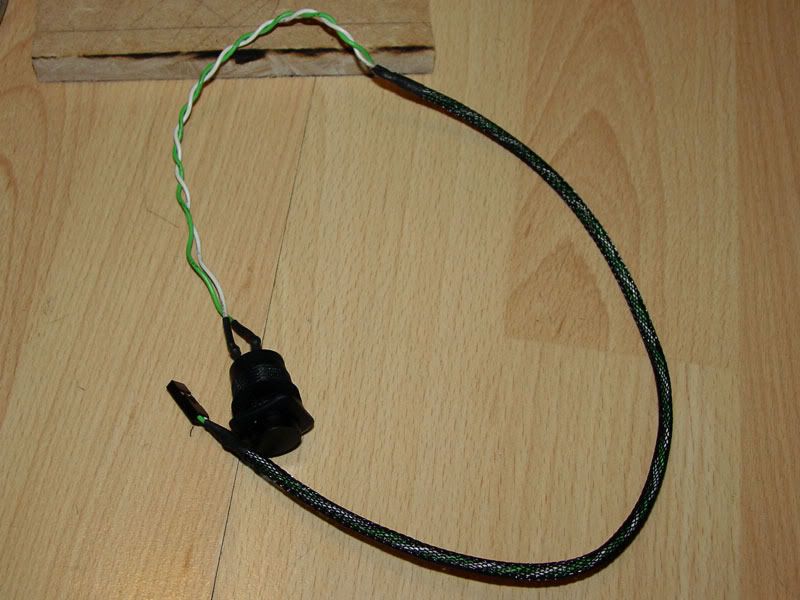
Power button attached and sleeved, sorry I though I had taken some in between shots but it turns out I didn't
The wire is only half sleeved as the upper section will be hidden inside the mdf bezel and not that I cut the sleeving to the wrong length.
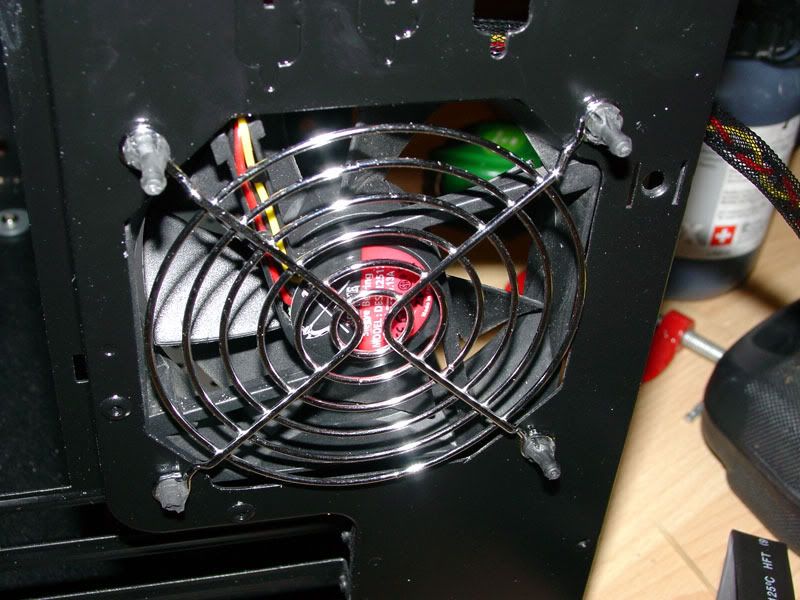
I've mounted the rear 92mm fan with some double ended rubber fan mounts, so I can also attach a chromed wire fan grill, these are not new rubber fan mounts but I have them spare and they are better than screws.
You can also just see that I've both braided the wires and sleeved them.
Next I clear lacquered the All-in-one.
This is the end result (I've touched up above and below the main connection area by hand with the matte black artist acrylic before clear lacquering) I'm really pleased with this.
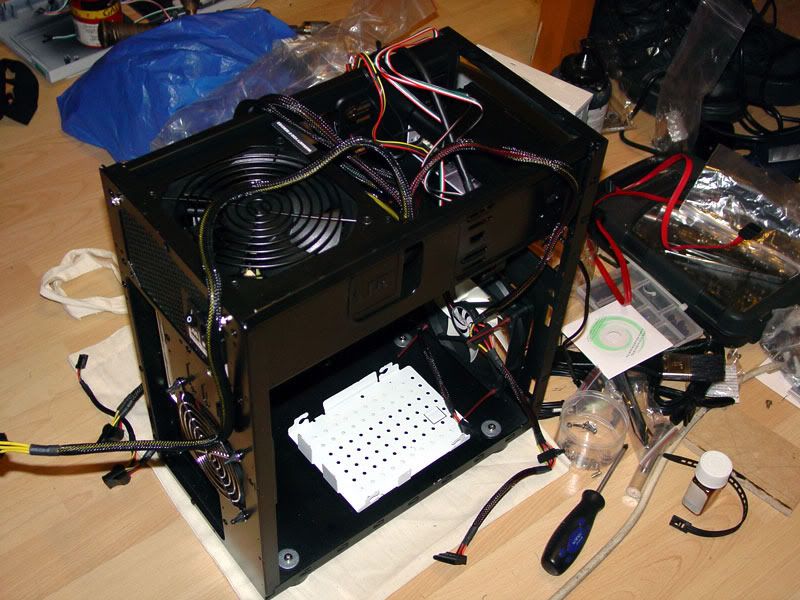
I then put it back together, fitted both the all-in-one and the PSU into the case, because these are the two big sources of cables and began my cable management.
It's going to be a real nightmare.
Note the 11 bladed NZXT 120mm fan in the front, this is held in by brown rubber fan mounts, I had got some black ones, however I didn't realise this fan was close cornered and all my black mounts are for open cornered fans, these brown ones are the only close cornered fan mounts I had left.
[rem IMG]https://i69.photobucket.com/albums/i45/pob_aka_robg/Spork/project_spork.jpg[rem /IMG] [rem IMG]https://i69.photobucket.com/albums/i45/pob_aka_robg/dichotomy/dichotomy_footer_zps1c040519.jpg[rem /IMG]
Pob's new mod, Soviet Pob Propaganda style Laptop.
"Are you suggesting that I can't punch an entire dimension into submission?" - Flying squirrel - The Red Panda Adventures
Sorry photobucket links broken
Ulti (12-01-2013)


Looking good!
Can't wait to see the front panel though!
Update: Mmm laser cutting
I picked up the laser cut acrylic front (they also gave me the off cuts, so I've got a couple of spare 5mm chunks of acrylic now.) I'm really happy with the job they did.
I'm going to have to ask them if they can laser cut steel, if so then I may well use them for case windows
I got back and had to do a test fit, just to double check they had the measurements correct and quadruple check I'd given them the correct measurements.
Looks perfect
Wasting no time I drilled the holes for the screws to hold the acrylic to the front and the fan filter in position.
The acrylic is held on by 6 nice black wood screws I got, the filter was more of an issue, this has to be removable.
An idea struck me, can you tap mdf?
I was sure I took a photo, but no I didn't.
I drilled 3mm holes and then used an M4 tap and using some 1 inch long M4 screws to spread the load over a greater depth of thread, although I think I can get away with shorter screws, having to screw and on screw 4 inch long bolts is a bit of a pain to get the filter off, and it's not supporting much weight.
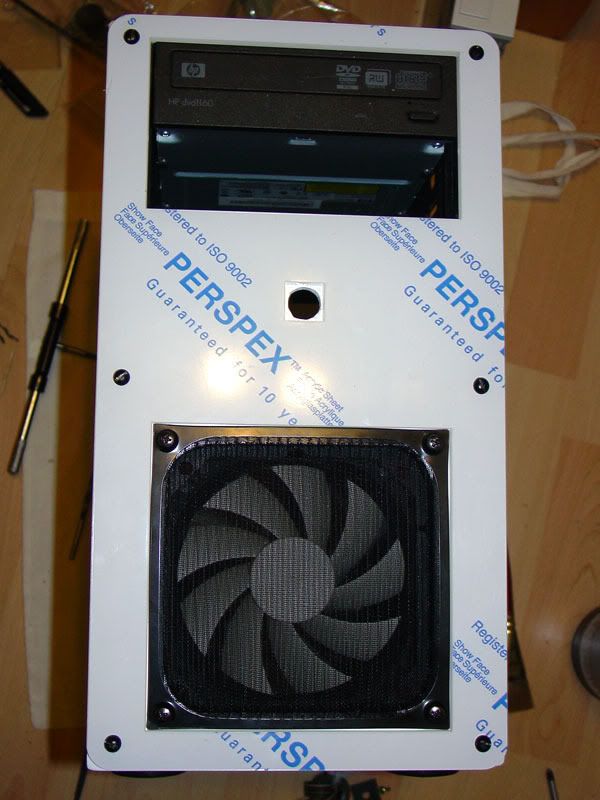
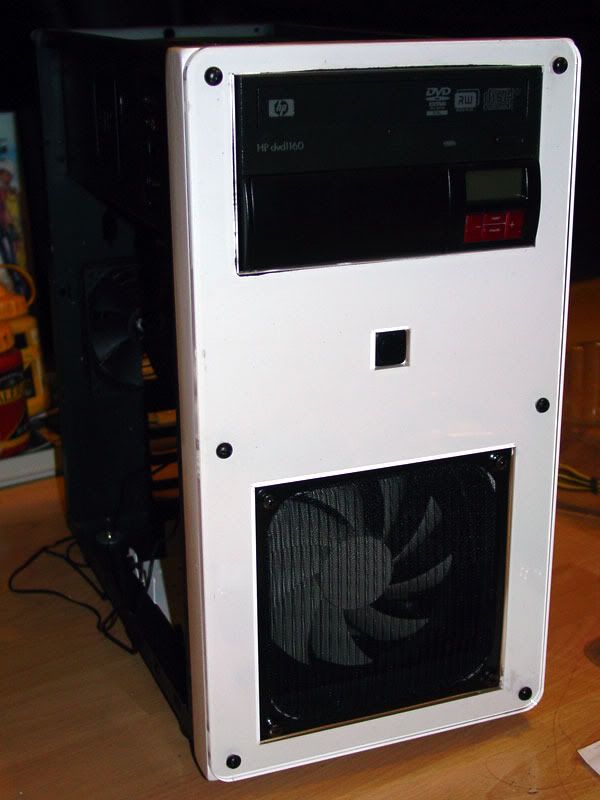
Here it all is together.
I decided that DVDrw front was looking a bit out of place, I didn't want to go through all the hassle of sanding, painting, waiting, lacquering and waiting, plus I'm running short of time here, so as a compromise I've just clear lacquered it, it should help it blend in slightly better with the painted all-in-one.
As you can see there's a big lack of internal components in those photos.
I was getting in such a mess with the cables I had to strip them out and start again.
The problem I'd hit is that I hadn't drilled any extra holes in the motherboard tray to cable ties wires too.
And then I remembered why I hadn't, there's not enough space behind the tray and the side panel, about a 1/4 of an inch or about 7.5mm, I do have more space behind the 5.25" bays and that was why I'd cut one hole in particular.
So at that point I had to strip it all out to start again.
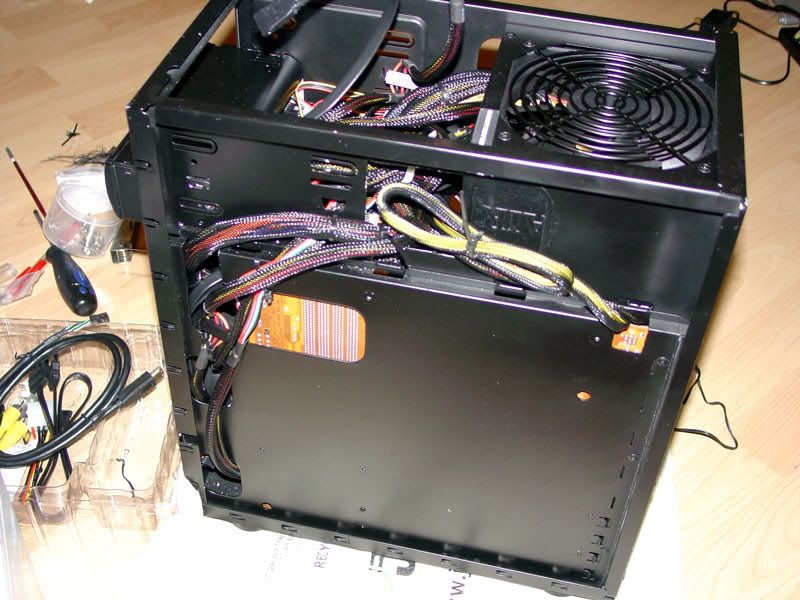
However I got there in the end.
The PSU is the biggest problem, I've carefully gathered and stuffed all the cables in behind the All-in-one.
Around the back.
And most importantly.
Inside. A nice job if I say so myself.given the size of the case and the number of cables I had to deal with,
The hardware is:
ABit A-S78H 780g chipset motherboard
CPU is an Athlon x2 7850 Black edition
CPU Cooler is an old Scythe Samurai Z revB, the original fan from that is the 92mm fan I've used on the rear of the case and I've mounted a Shuttle 92mm PWM fan on the cooler instead.
Ram is a OCZ Platinum DDR2 PC2-8000 2x2gb kit (1000MHz CAS5)
PSU is a Corsair CX400w
DVD is a HP Sata DVDrw
Akasa All-in-one (will automatically control front and rear fan)
Hard drive is a Westerndigital 320gb AAKS
OS is Windows 7 Pro
I've not got the MDF front back on at this point, because I'm having to do some touch ups on it and I'm waiting for the paint to dry.
The DVD front bezel still need to be left overnight to fully harden (ok to fully harden it does take a few days) However all the wires are in place for it.
At this point the only wires left to do is the power button, the temperature probes and the audio cables.
I've run into a slight snag with the audio cables, the original All-in-one only comes with jack cables, ie the cables are designed to run through the case out of the back and plug into the rear audio ports, this really isn't much use to me, I want the rear audio ports for the speakers with the front open for the possibility of using headphones.
The new All-in-one version 2 comes with an internal audio lead which plugs into the header of a motherboard, so I've sent off an e-mail to Akasa asking if this lead can be used on the original All-in-one and if so can they supply me with one.
Just waiting to hear back now, I hope I don't end up having to make something.
[rem IMG]https://i69.photobucket.com/albums/i45/pob_aka_robg/Spork/project_spork.jpg[rem /IMG] [rem IMG]https://i69.photobucket.com/albums/i45/pob_aka_robg/dichotomy/dichotomy_footer_zps1c040519.jpg[rem /IMG]
Pob's new mod, Soviet Pob Propaganda style Laptop.
"Are you suggesting that I can't punch an entire dimension into submission?" - Flying squirrel - The Red Panda Adventures
Sorry photobucket links broken
Update: sooooo close.
Well I've finally managed to get all the panels and the front bezel all cleaned up, repainted and clear lacquered, without getting more fluf stuck in the paint.
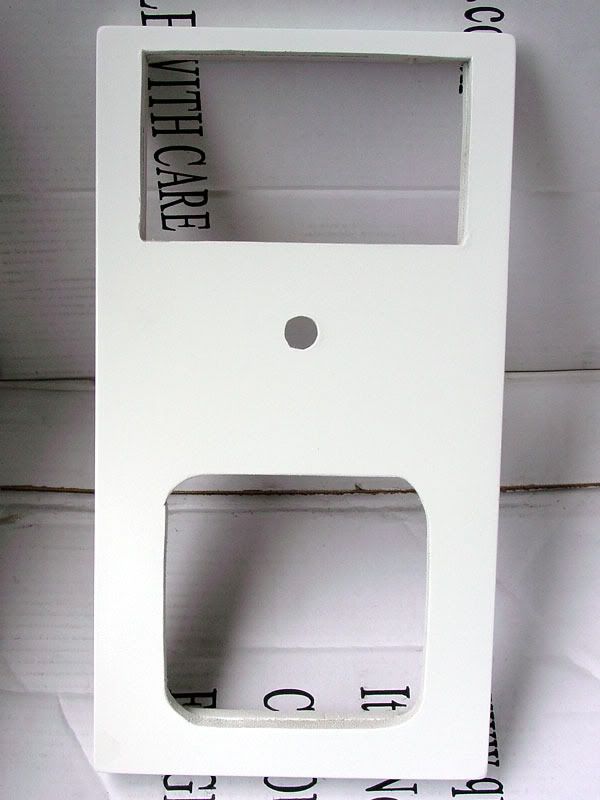
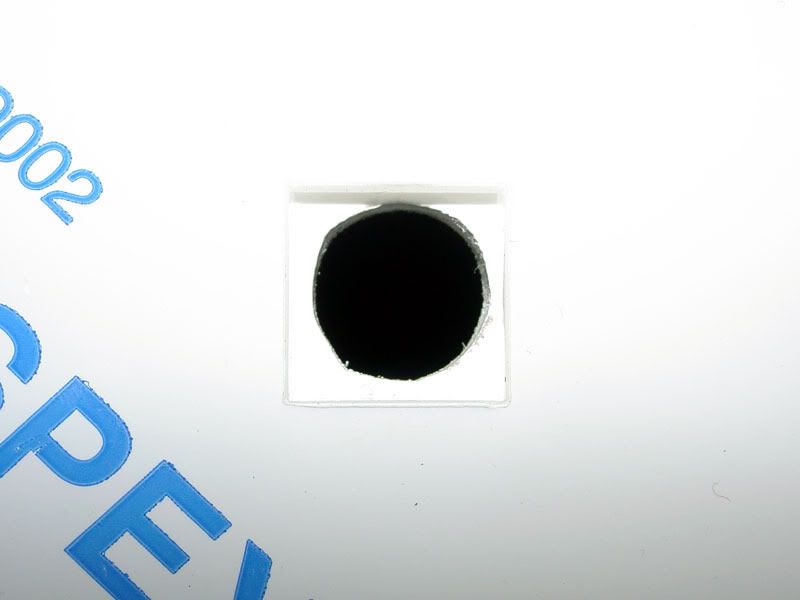
I started finally fitting the front Bezel when I discovered this
the hole is not central so the button will not fit, I double checked the measurements to make sure the place that cut the acrylic got it correct and they did.
Double checked my designs, to make sure I gave them the correct numbers, still correct.
So it must of been my hole that was off.
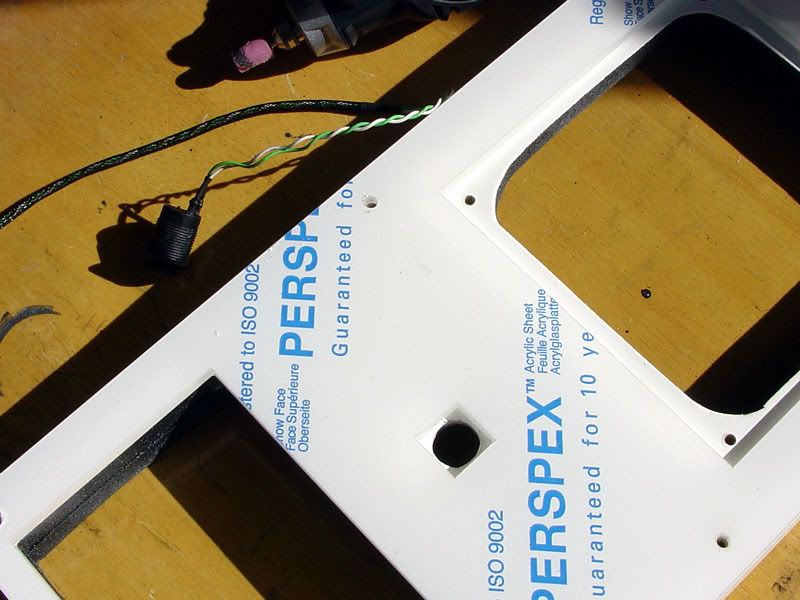
Never fear it's an easy fix with my rotary tool
Nice pink grinding bit . . . well it was pink, it's covered in metal and acrylic now, however that didn't stop it from working smoothly on MDF.
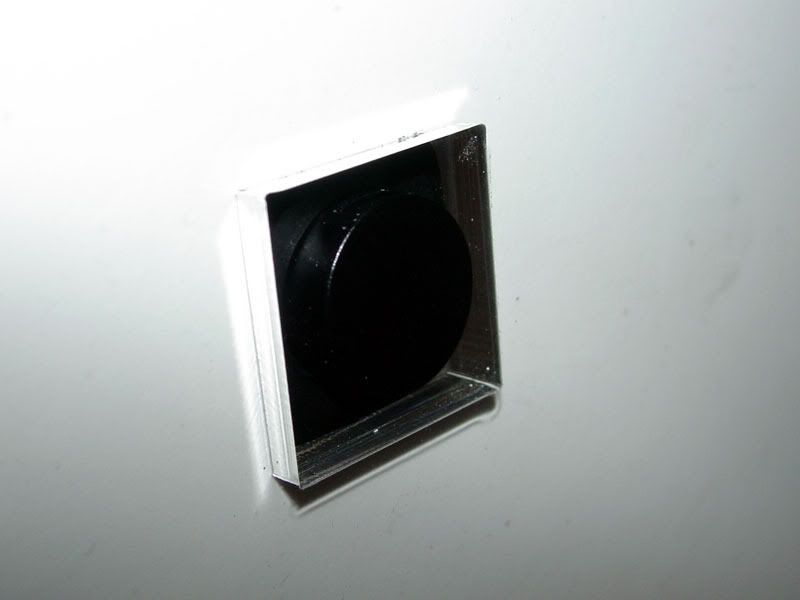
The hole is now corrected and the power button drops smoothly in place. (it was off by about 1mm)
With that sorted out all that's left it to reattach the bezel to the front, line up the drives correctly and screw them in.
Well ok I should wait for Akasa to get back to me about the cable, I have had a reply e-mail saying my query has been sent on to the technical department,but that's it so far.
I don't have time to wait atm, well I've got bit from 2 mods scattered all over the lounge atm and the otherhalf is not happy, so if I can sort out most of this I'll be able to clear out a good chunk of the mess.
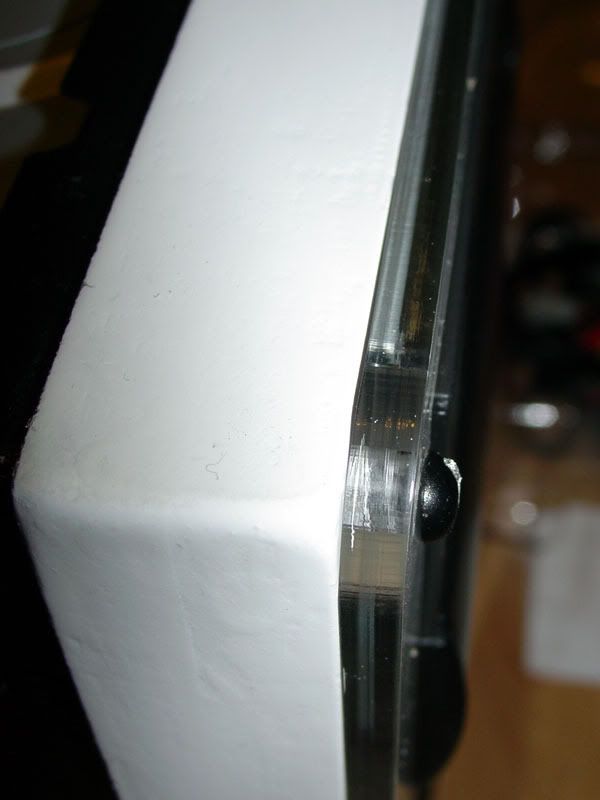
Wipe down the mdf bezel, peel off the acrylic protective film and screw it on.
Also got the drives lined up and screwed in, damb but I like this now.
A decent close up of the acrylic edges, nice and clear, that's what's nice about laser cutting acrylic rather than CNC machining it.
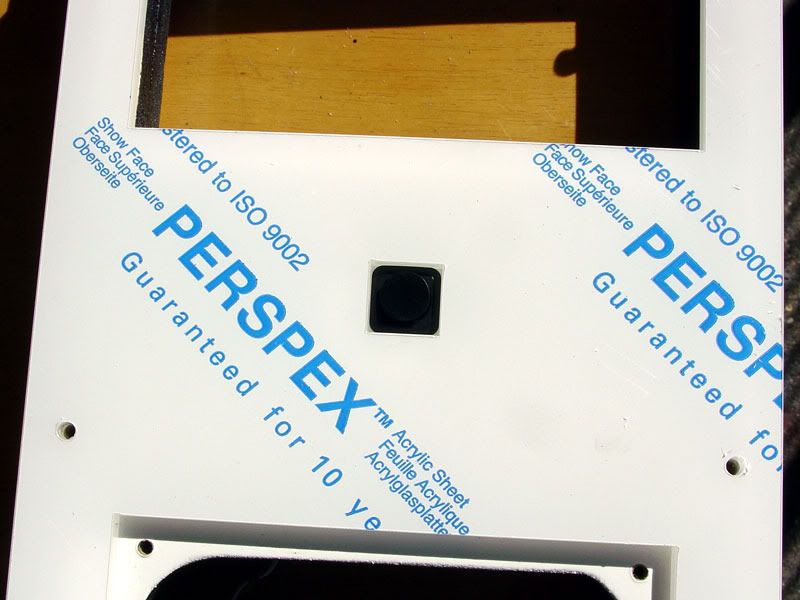
Here's that power button again.
Drive bays nicely slotted in.
Although the camera flash has made the clear Lacquered DVDrw look brown, it's not to the naked eye.
Just need to run some tests now to figure out the best places to stick the two temperature probes and set the fans up correctly.
[rem IMG]https://i69.photobucket.com/albums/i45/pob_aka_robg/Spork/project_spork.jpg[rem /IMG] [rem IMG]https://i69.photobucket.com/albums/i45/pob_aka_robg/dichotomy/dichotomy_footer_zps1c040519.jpg[rem /IMG]
Pob's new mod, Soviet Pob Propaganda style Laptop.
"Are you suggesting that I can't punch an entire dimension into submission?" - Flying squirrel - The Red Panda Adventures
Sorry photobucket links broken
Looks pretty unique indeed! How much was the laser cutting anyway? Did it include the cost of the acryllic or did you buy the sheet yourself? Oh and how thick is the acryllic too?
The Acrylic was in the cost, it's 5mm thick, clear, cast acrylic. This was pretty simple so I drew up on paper a technical schematic at 2:1 (ie half size) with full measurements, again my technical drawing GCSE has proven one of the most useful GCSE's I tookand the bloke there seemed impressed, but that could well be down to what some of the other customers give him.
This is the place if you're interested http://www.hamaracrylic.co.uk/ it's walking distance for me (about 20min) I've asked about more complex designs and they will as long as they are in autocad dwg format, I don't have autocad
[rem IMG]https://i69.photobucket.com/albums/i45/pob_aka_robg/Spork/project_spork.jpg[rem /IMG] [rem IMG]https://i69.photobucket.com/albums/i45/pob_aka_robg/dichotomy/dichotomy_footer_zps1c040519.jpg[rem /IMG]
Pob's new mod, Soviet Pob Propaganda style Laptop.
"Are you suggesting that I can't punch an entire dimension into submission?" - Flying squirrel - The Red Panda Adventures
Sorry photobucket links broken
Ah I live in Redbridge so I can easily hop on the tube and head to Bethnal Green. Heh, I took GCSE DT Graphics too so I have to agree with you in how useful it is.
Do you mind me asking how much they charged you in total for the acrylic piece?
I've not tried any real CAD software but I was thinking of building my own "version" of the SG05 as I want something like the SG05 but in a slightly different form factor.
Here's what I have so far after messing around with Google Sketchup for a good few hours (SFX PSU, SSD, fan mesh, GPU, Heatsink, Fans, Motherboard models were all on the sketchup model site).
Anyway I don't want to derail your thread so I better stop rambling now haha.
Nice looking design
As to the cost I cannot remember exactly this mod was done in summer 2010, I know the cost varies depending on the thickness and colour of the acrylic used, as well as the size of it.
They also sell acrylic cement and make up boxes, you be best off contacting them to ask about a rough price.
If you need some mesh I can let you have some of the stuff I used on my coolermaster 120 I've still got a big roll of it left.
And an Update.
Setting up the fan controller, I've got two temperature probes to locate and test.
Now as the akasa all-in-one has an automatic mode, which is great for a basic user, in automatic mode it just run fixed speeds at certain temps.
45c = 7v
55c = 10v
65c = 12v
At least that's all the manual says about it, I don't know if it's a smooth increase or just a step up.
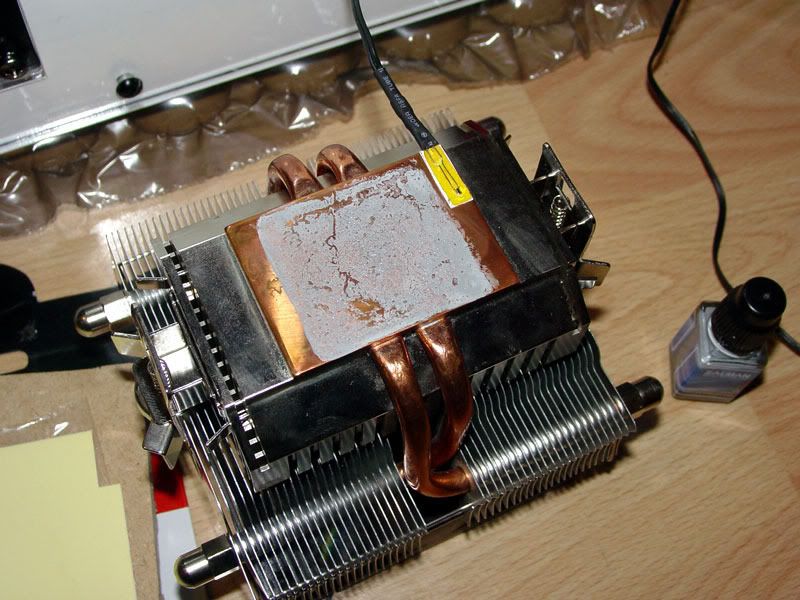
Looking around for the best place to fix a probe I decided to pull the cooler off.
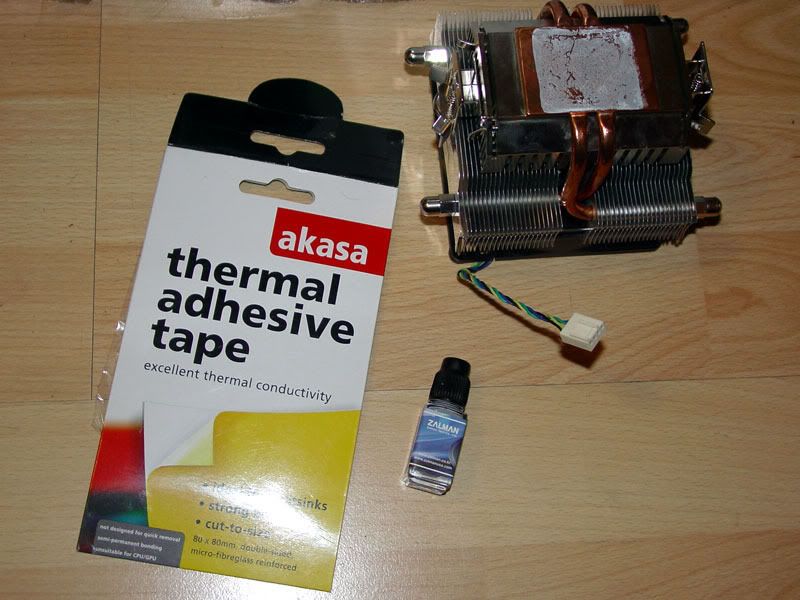
See all that nice bare copper on the cooler plate, that looks like a great place to stick a probe.
Some Akasa Thermal tape to stick it down for maximum heat absorption by the probe.
And the Zalman thermal grease ZM-STG1 I'm using, it's not the best of thermal pastes, but it is soooo easy to apply and get a nice thin even layer, it's like a little bottle of nail varnish, complete with a brush on the cap and you just paint on a layer.
One probe attached.
The Akasa stuff comes in a big square and you just cut it to size with a knife or scissors, it seems to be the same sort of stuff that used on stock GPU coolers for the memory chips but far thinner (0.3mm) and double sided.
The 2nd probe I just wedged between the PSU and frame to get a general case temperature at the top of the case.
And that's still the old paste, as it's not been on there that long I just did a quick wipe off and re-paste, not a full Isopropanol clean and re-paste.
Put the panels on and began testing.
You can also see the lovely Saitek keyboard I've got, but not my custom kensington mouse (where did I put that?I have got it, I didn't find it at the time but I have since)
I've found a couple of interesting things.
Room temp 22c from probe, before I closed up the case
Case temp 23.5c from probe
idle cpu temp 31c from probe, 35c from Uguru & bios, 17c from coretemp (something tells me core temp cannot read it correctly)
Stress tested with Burn-in2008 after 30min, 52c from Uguru, 48c from probe
The probe seems to be 4degrees off, I also played around with the PWM fan settings, the shuttle fan I'm using on the cooler runs at 3600rpm at full speed and boy is that loud.
I also noticed something else, at full speed the probe temp was now a full 11degrees off so even though it's stuck to the underside of the cooler it's still getting a good chunk or air flow over it, I may have to try to cover the back of the probe to get the readings more accurate.
At the current settings cpu fan 30% (1100rpm) rear fan 7v (1200rpm) front fan 7v (860rpm) the rear scythe is currently the loudest, I've got the PWM setting set up to 50c with a 3 degree tolerance, so the cpu fan is going to rarely get off that base 30%.
Debating if I should overclock it or just leave it as stock, mainly because does a basic use pc need overclocking?
[rem IMG]https://i69.photobucket.com/albums/i45/pob_aka_robg/Spork/project_spork.jpg[rem /IMG] [rem IMG]https://i69.photobucket.com/albums/i45/pob_aka_robg/dichotomy/dichotomy_footer_zps1c040519.jpg[rem /IMG]
Pob's new mod, Soviet Pob Propaganda style Laptop.
"Are you suggesting that I can't punch an entire dimension into submission?" - Flying squirrel - The Red Panda Adventures
Sorry photobucket links broken
There are currently 1 users browsing this thread. (0 members and 1 guests)
 Posting Permissions

 Reply With Quote