Page 1 of 3 123 LastLast
Results 1 to 16 of 34

Thread: Project: Lian Li PC7²

  1. #1
    Buzz Lightyear Azza's Avatar
    Join Date
    Jul 2006
    Location
    Buckley / Birmingham
    Posts
    1,374
    Thanks
    27
    Thanked
    39 times in 33 posts

    Project: Lian Li PC7²

    So im going watercooling again and I thought I would make a log of how everything goes, with lots and lots of pics inc my very special case thats in the works.

    Any way onto business.


    PC Hardware:


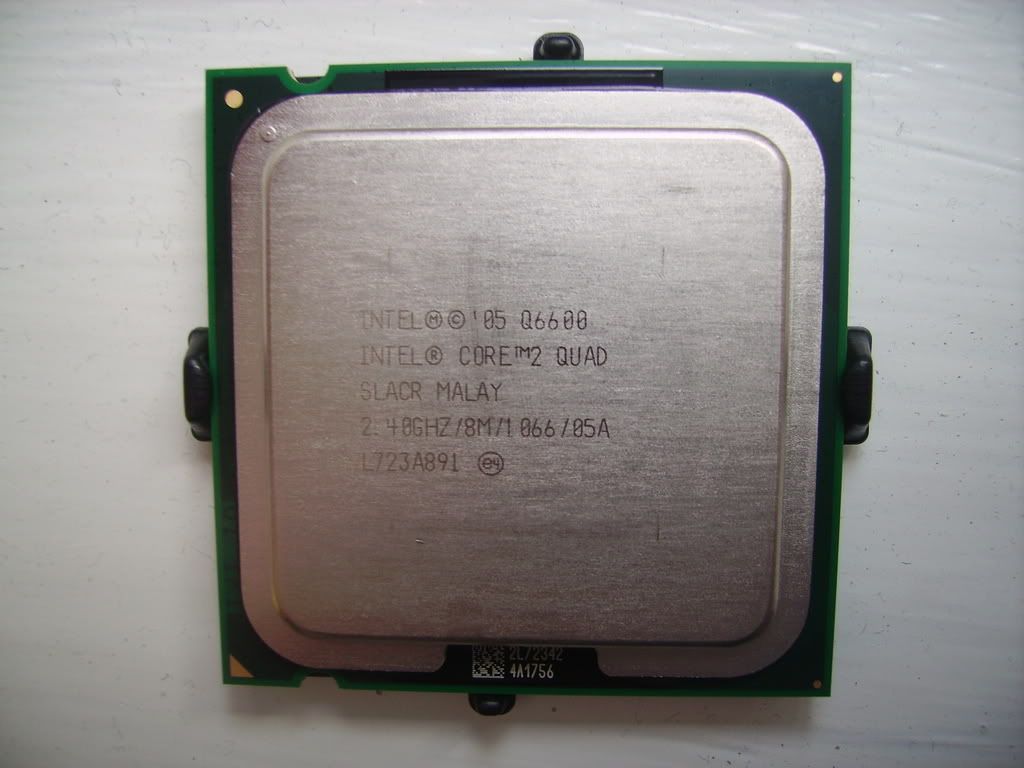
    CPU - Intel Q6600 G0


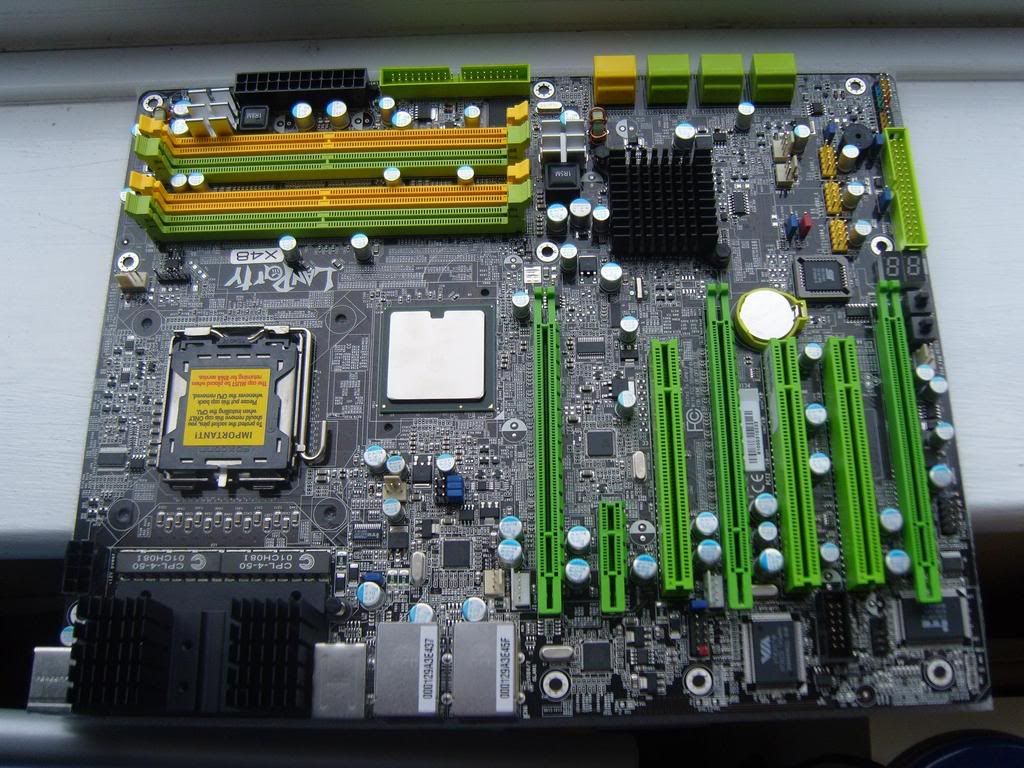
    Motherboard - DFI Lanparty LT X48-T2R


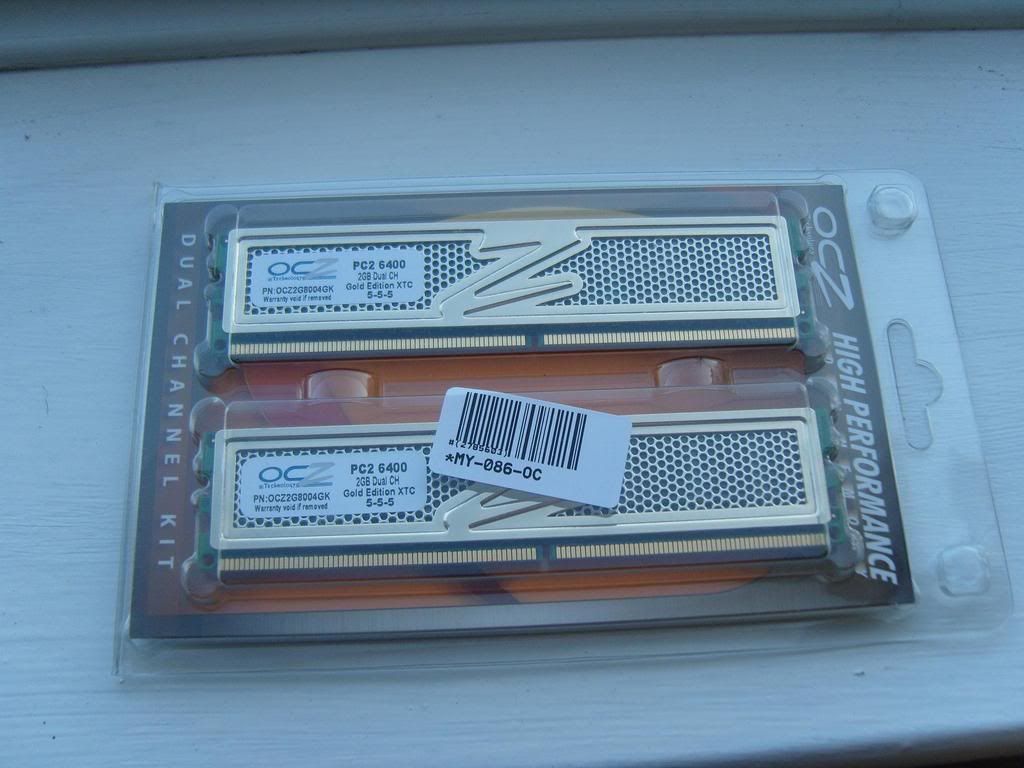
    RAM - 4Gb OCZ 6400


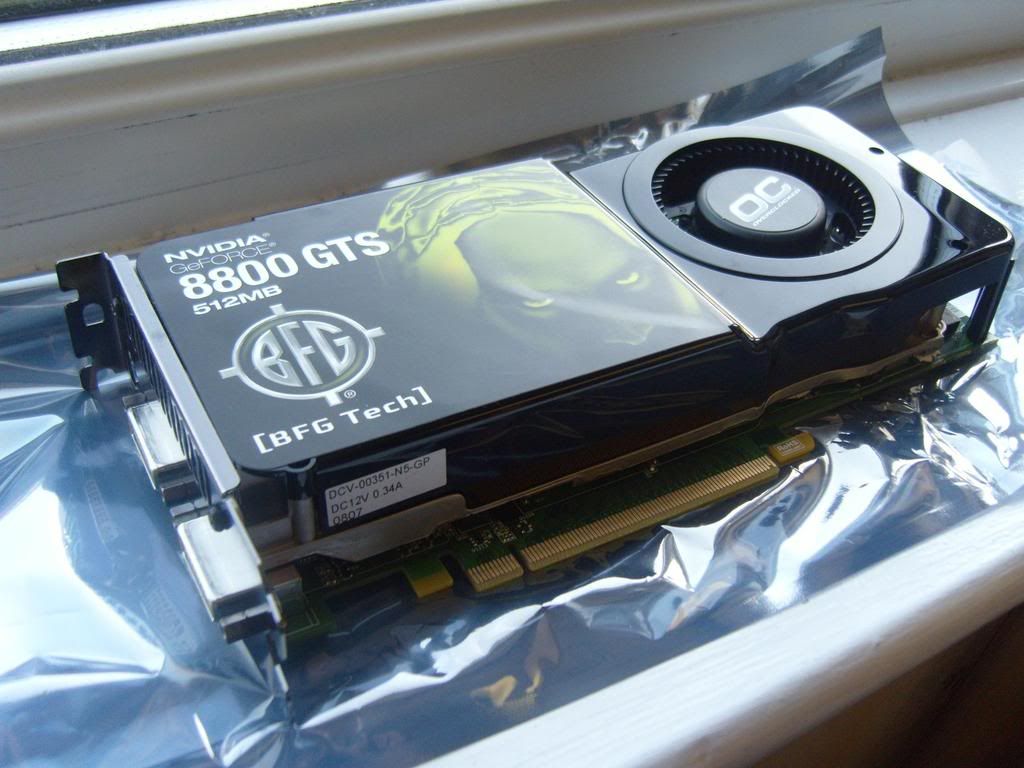
    Graphics card - BFG 8800 GTS 512mb OC (may be changed to a PNY 9800GTX soon)


    Hard drives - 250Gb Seagate, 500Gb Samsung, 2 x 60gb 2.5inch (Fujitsu & Seagate)


    PSU - Corsair 620W


    Watercooling gear:


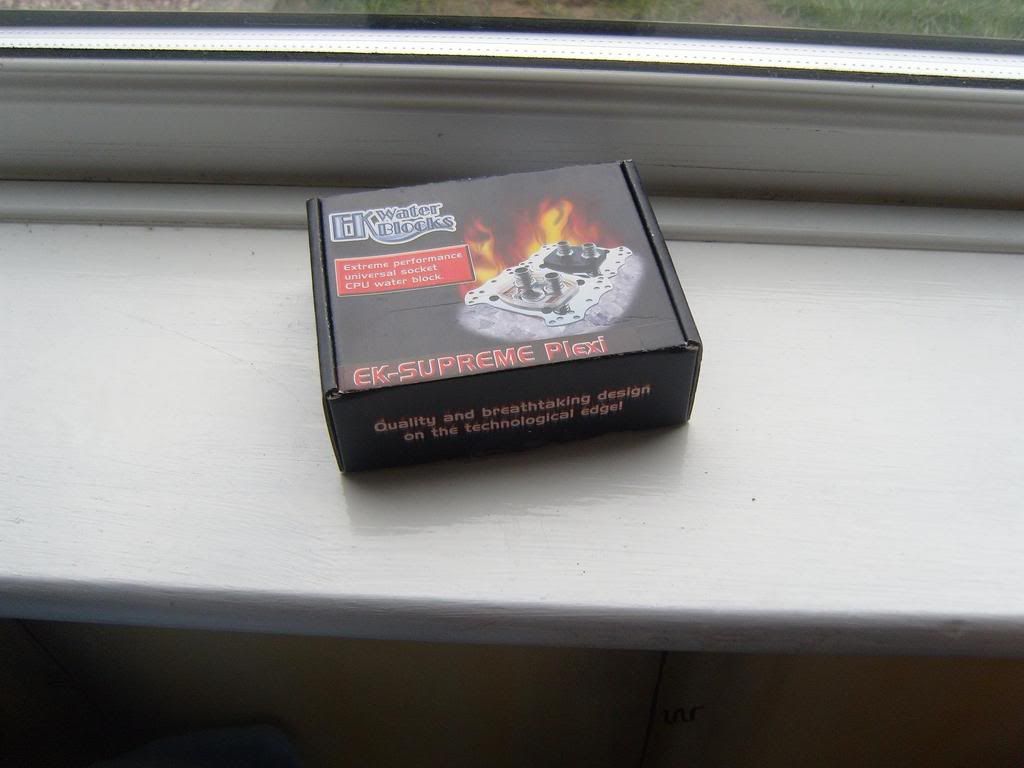
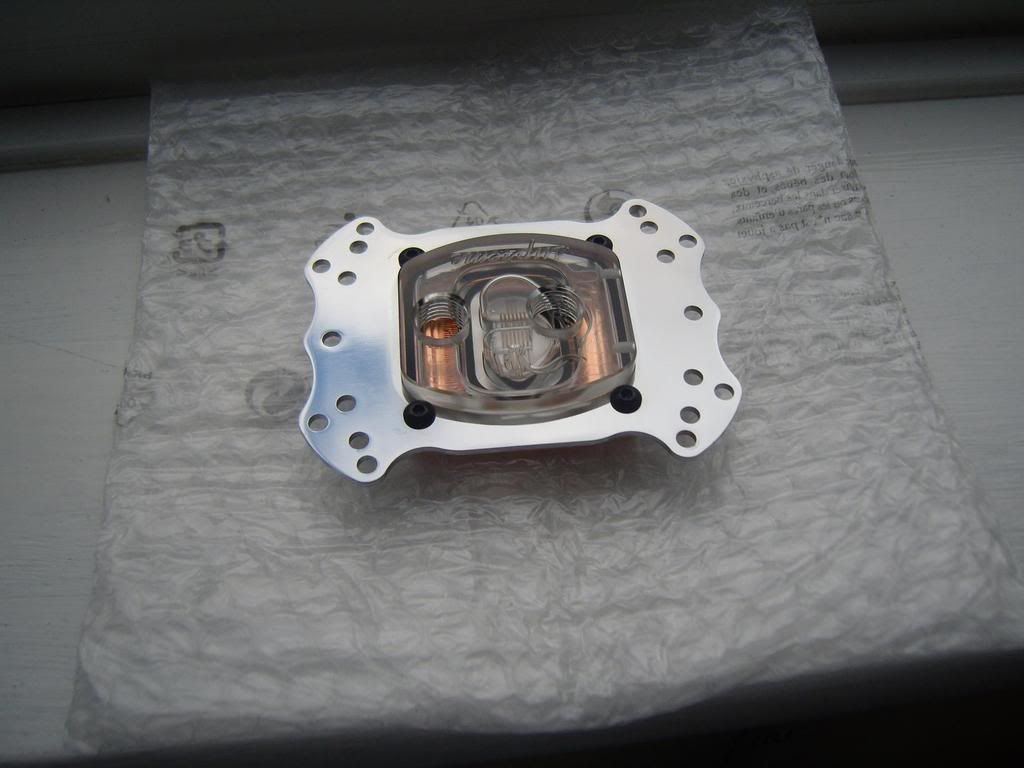
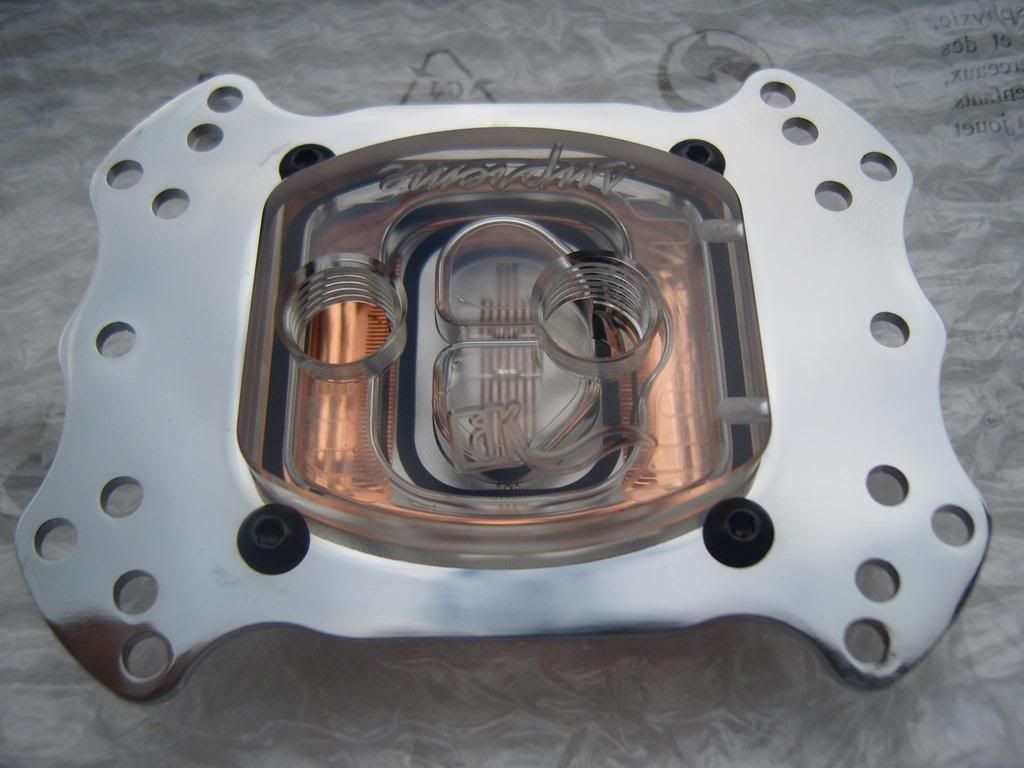
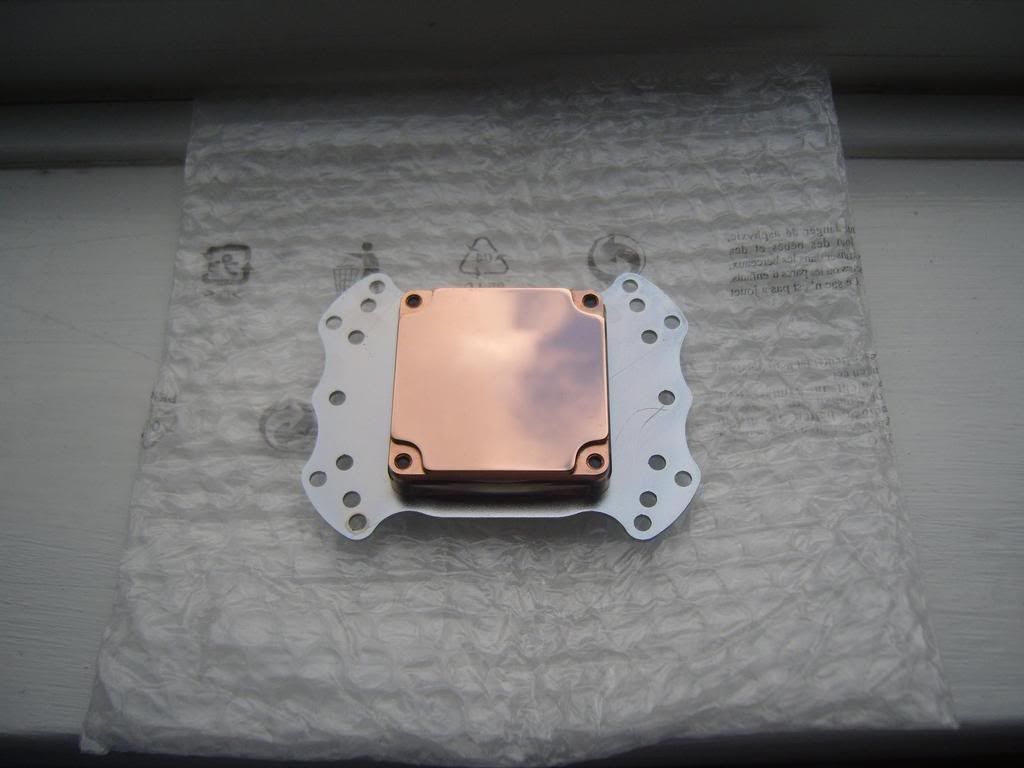
    CPU block - EK Supreme Acrylic


    Pumps - D5 Vario, D-Tek dB-1


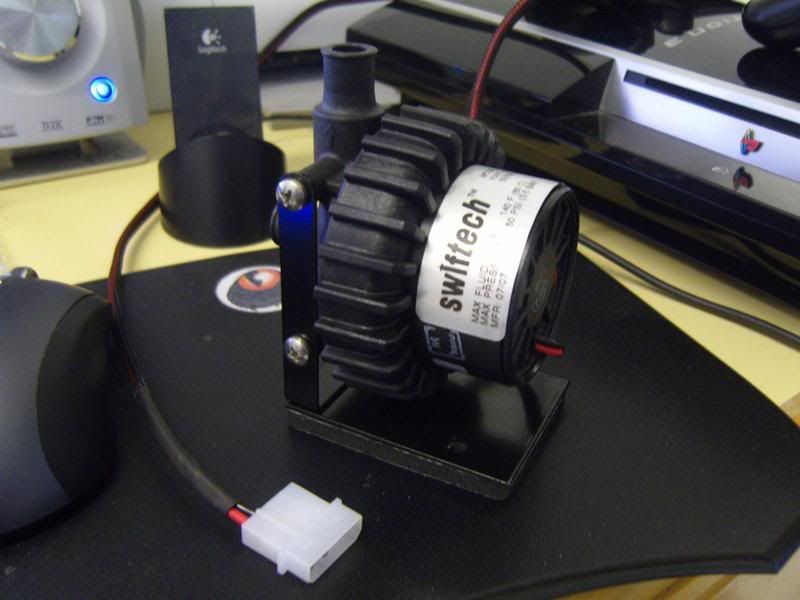
    Rads - 1 * Thermochill PA120.2 & 1 * Thermochill PA120.3


    Res - 2 * Swiftech MCRES-Micro

    The bottom of the res have been modded so the out let of the res is at the bottom. Can then put the pumps directly below the res, makes everything alot easier.


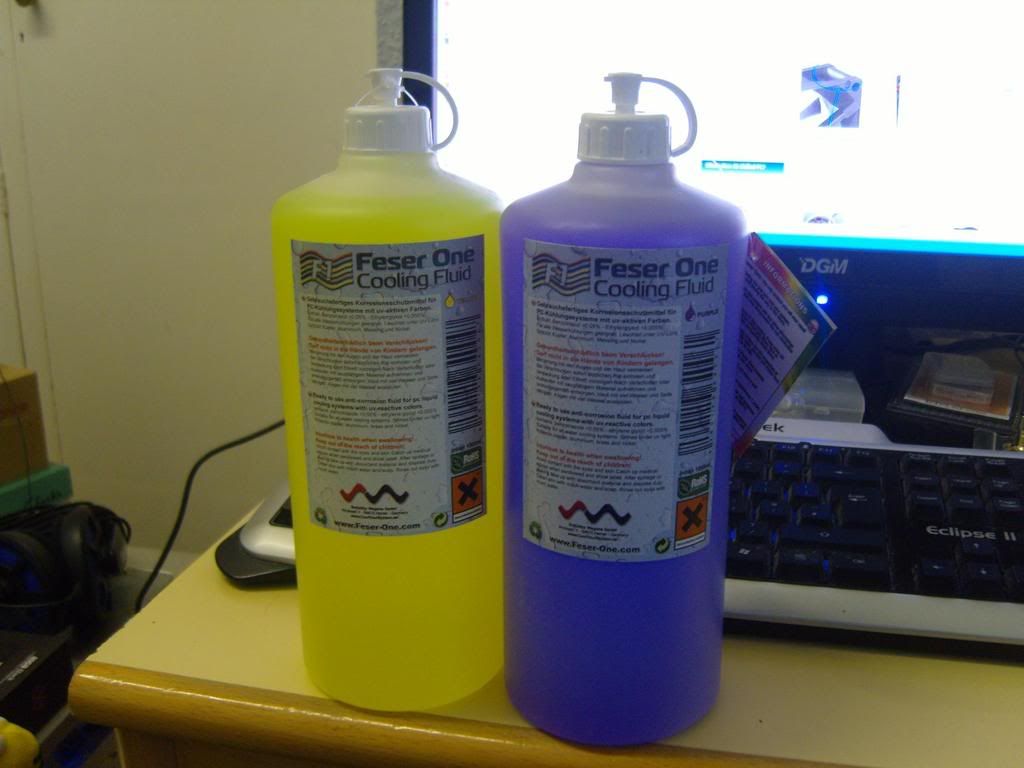
    Coolant - Feser One (Yellow & Purple)


    Case - Lian Li PC7²


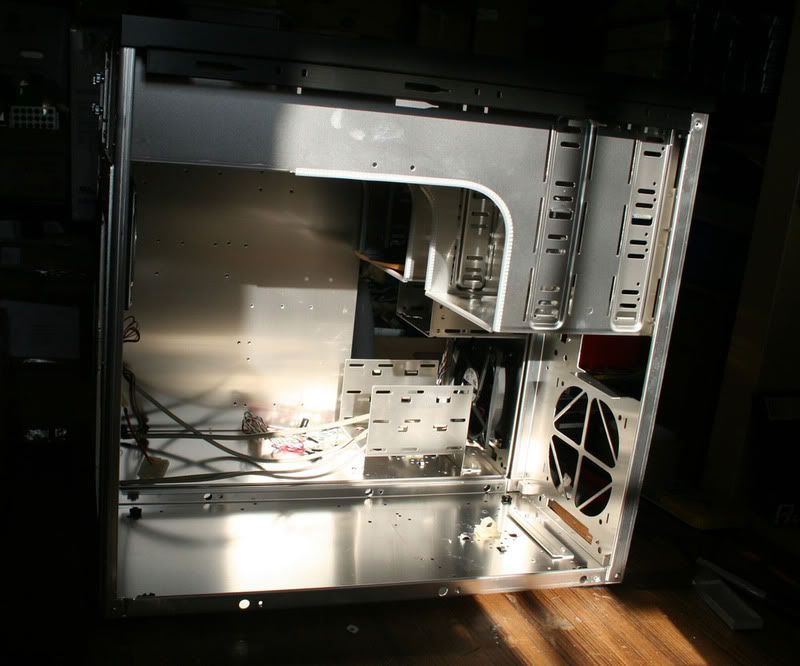
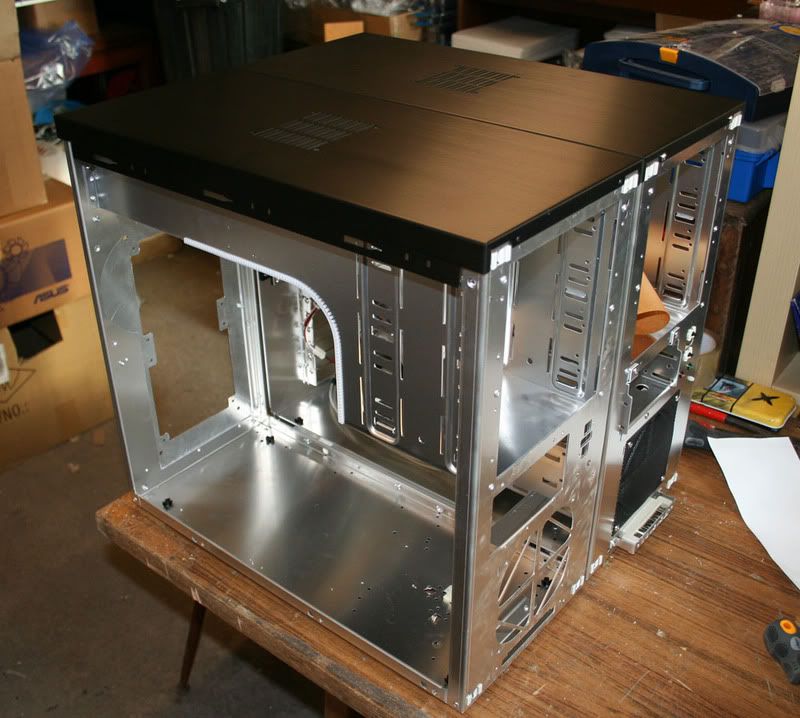
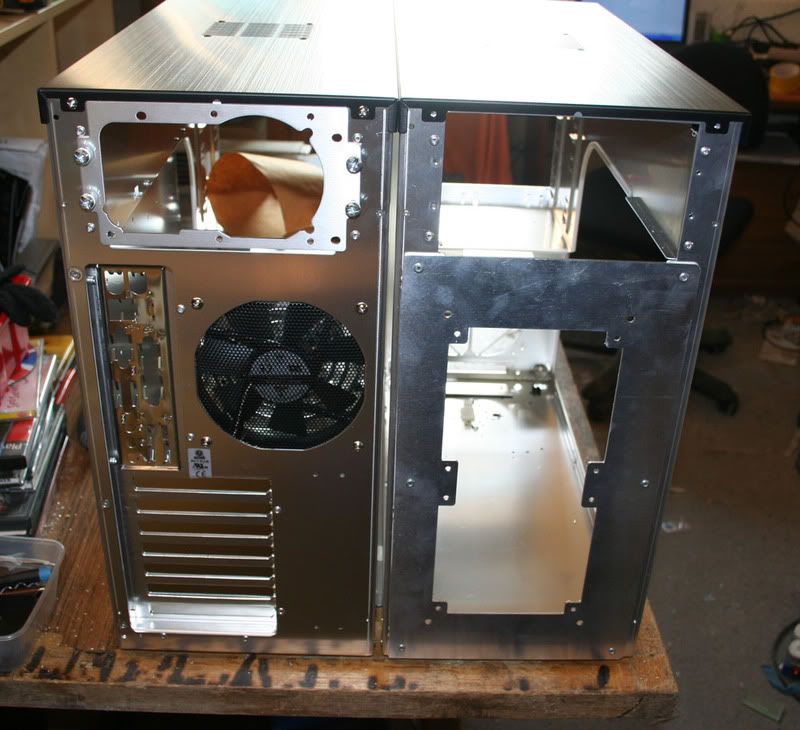
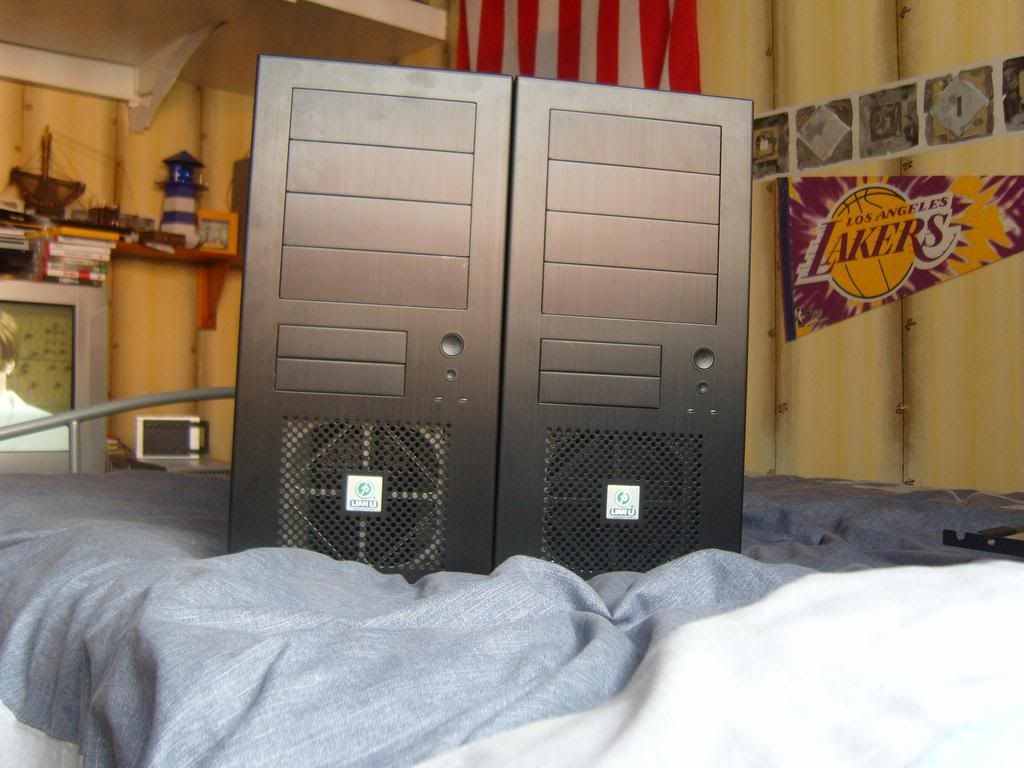
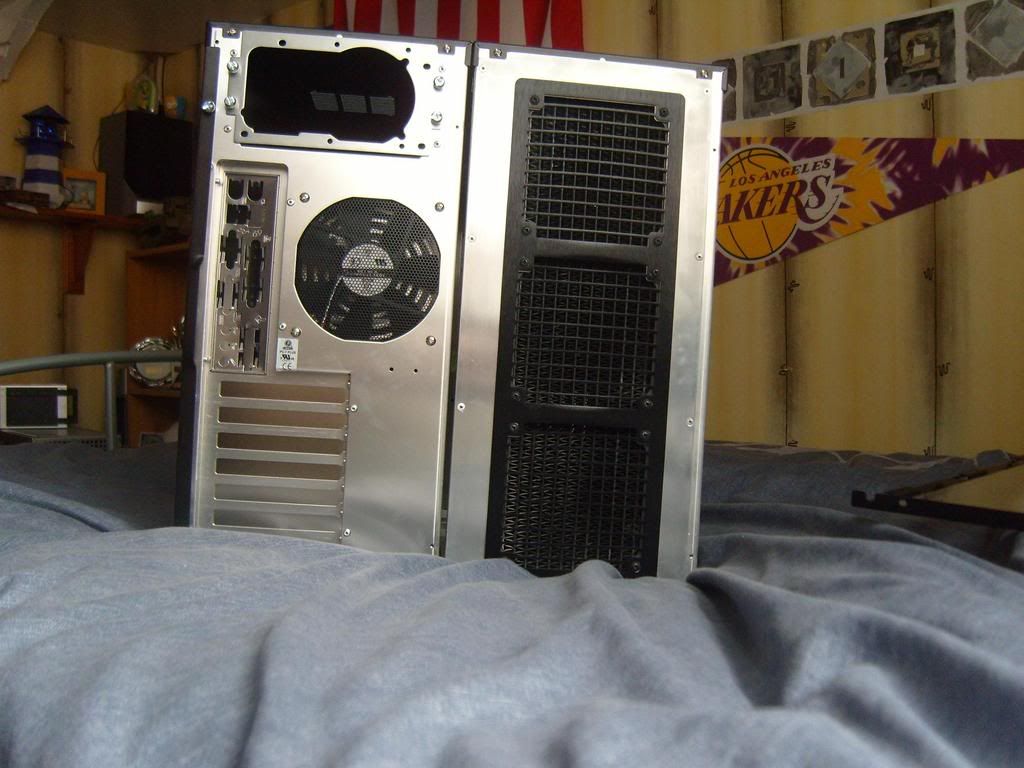
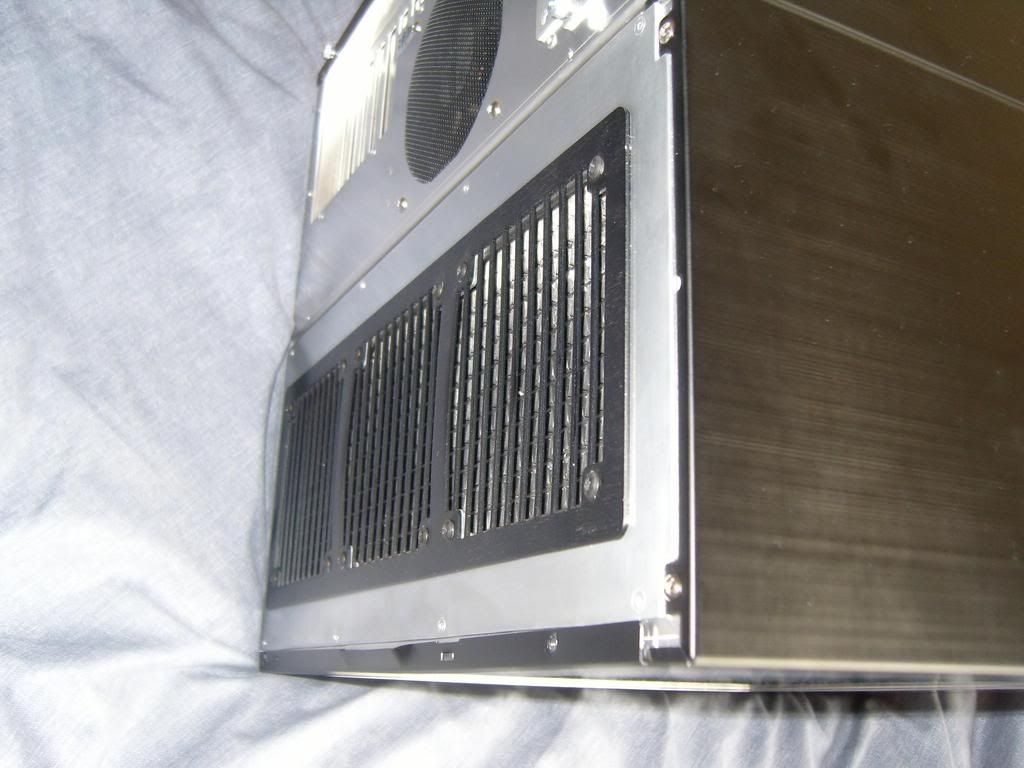
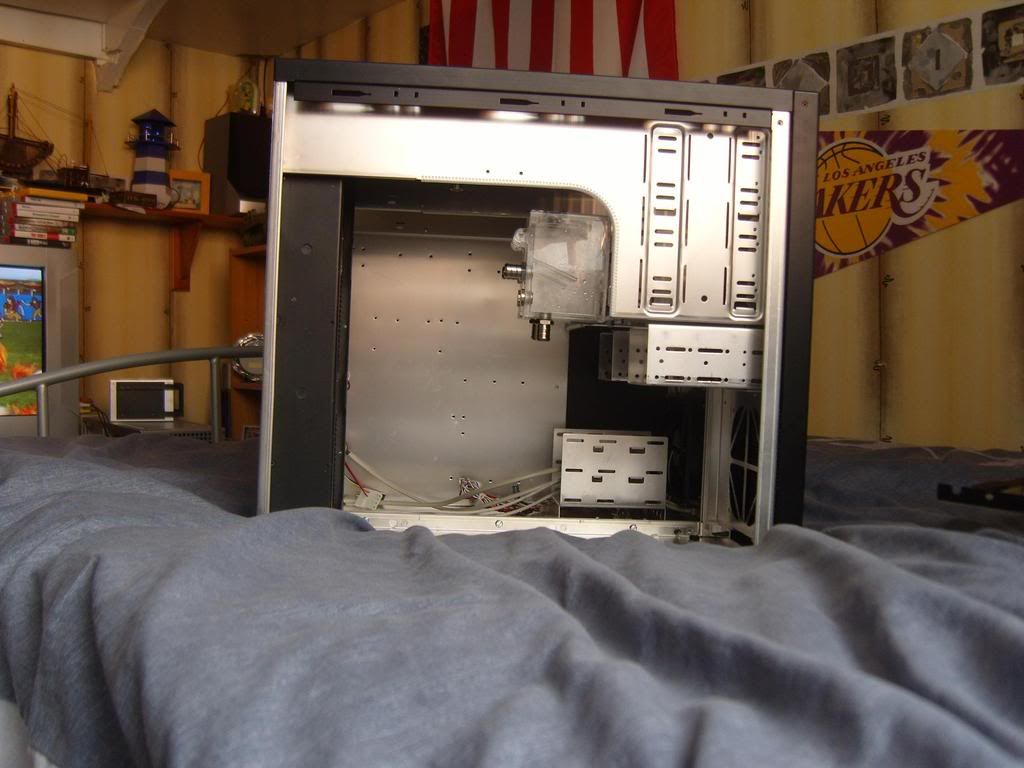
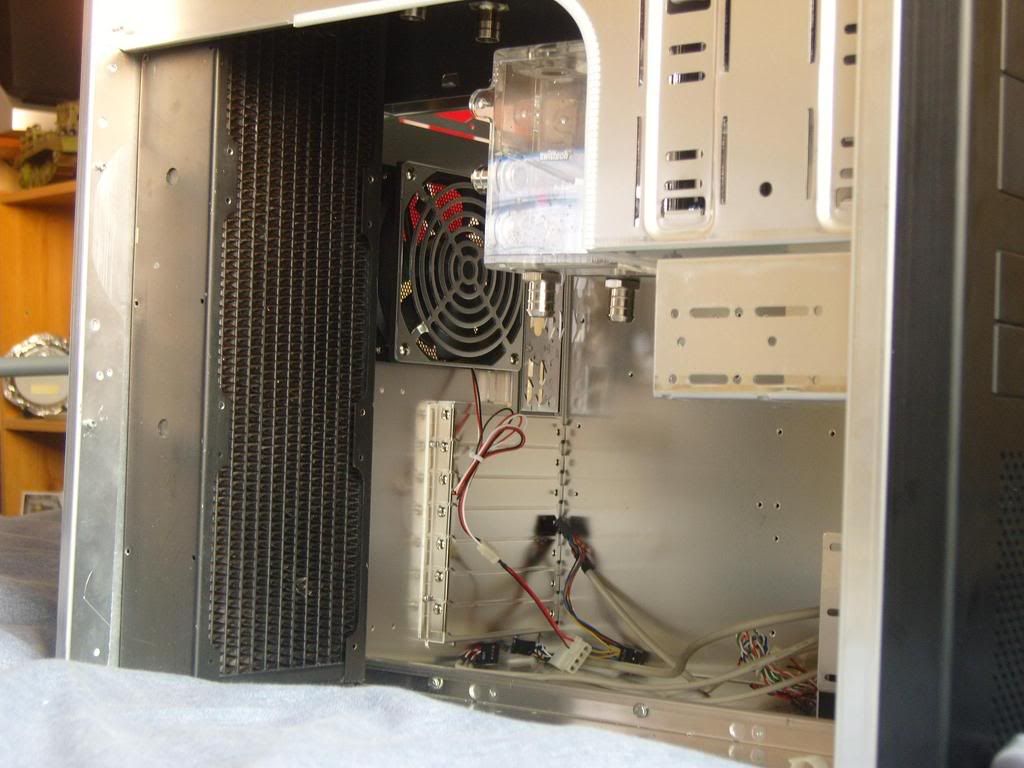
    Some latest pics of the case...


    Custom ChilledPC PA120.2 backplate goodness.


    Second rad will go in the top panel of case.


    Right case for PC and left for watercooling etc.


    Cases are attached together using some metal spacers so that both front panels can still fit on.


    Thats all for now folks.
    Last edited by Azza; 04-04-2008 at 05:58 PM.
    www | F | T | @

  2. Received thanks from:

    RedPutty (13-04-2008)

  3. #2
    Senior Member
    Join Date
    Apr 2006
    Posts
    1,244
    Thanks
    3
    Thanked
    43 times in 41 posts

    Re: Project: Lian Li PC7²

    Have fun
    Deo Adjuvante non Timendum

  4. #3
    Chillie in here j.o.s.h.1408's Avatar
    Join Date
    Dec 2005
    Location
    a place called home
    Posts
    8,545
    Thanks
    757
    Thanked
    256 times in 193 posts
    • j.o.s.h.1408's system
      • Motherboard:
      • ASUS P6T Delux
      • CPU:
      • Intel core i7 920 @ 3ghz
      • Memory:
      • 3GB DDR RAM
      • Storage:
      • 1TB Samsung F1, 500GB Seagate baracuda + 320gb Seagate PATA +150GB WD PATA
      • Graphics card(s):
      • EVGA 480GTX SC edition
      • PSU:
      • Seasonic M12 600W Module PSU FTW
      • Case:
      • Lian Li PC-A7010B (the rolls royce of pc cases)
      • Operating System:
      • vista ultimate edition and windows xp
      • Monitor(s):
      • 22inch 2005FPW dell monitor
      • Internet:
      • 24mb BE There Broadband

    Re: Project: Lian Li PC7²

    you have two cases? wow

  5. #4
    Buzz Lightyear Azza's Avatar
    Join Date
    Jul 2006
    Location
    Buckley / Birmingham
    Posts
    1,374
    Thanks
    27
    Thanked
    39 times in 33 posts

    Re: Project: Lian Li PC7²

    A few changes...

    Going for a PA120.3 (bottom) and a PA120.2 (top) and getting two Swiftech MCRES as it will be easy to find a decent a place them.
    www | F | T | @

  6. #5
    Shisha King
    Join Date
    Feb 2008
    Location
    London, England
    Posts
    500
    Thanks
    28
    Thanked
    11 times in 7 posts
    • shaffaaf27's system
      • Motherboard:
      • DFI P45-T2RS
      • CPU:
      • Intel Q6600 Oced to 3.4GHz
      • Memory:
      • 2x2GB Geil Black Dragon 1066MHz 2.1V C5 @ 1200MHz C5 2.2Vs
      • Storage:
      • Samsung 1TB F3
      • Graphics card(s):
      • Crossfire Sapphire 4870 512MB x2
      • PSU:
      • North-Q Black Magic 850W
      • Case:
      • Silverstone SG03B-F
      • Operating System:
      • Vista 64bit Ultimate
      • Monitor(s):
      • DGM 24", Dell 24" 16:9
      • Internet:
      • 20Mb

    Re: Project: Lian Li PC7²

    how much did the backplate cost?

  7. #6
    Buzz Lightyear Azza's Avatar
    Join Date
    Jul 2006
    Location
    Buckley / Birmingham
    Posts
    1,374
    Thanks
    27
    Thanked
    39 times in 33 posts

    Re: Project: Lian Li PC7²

    Case is all done for the time being.

    Here are some pics.


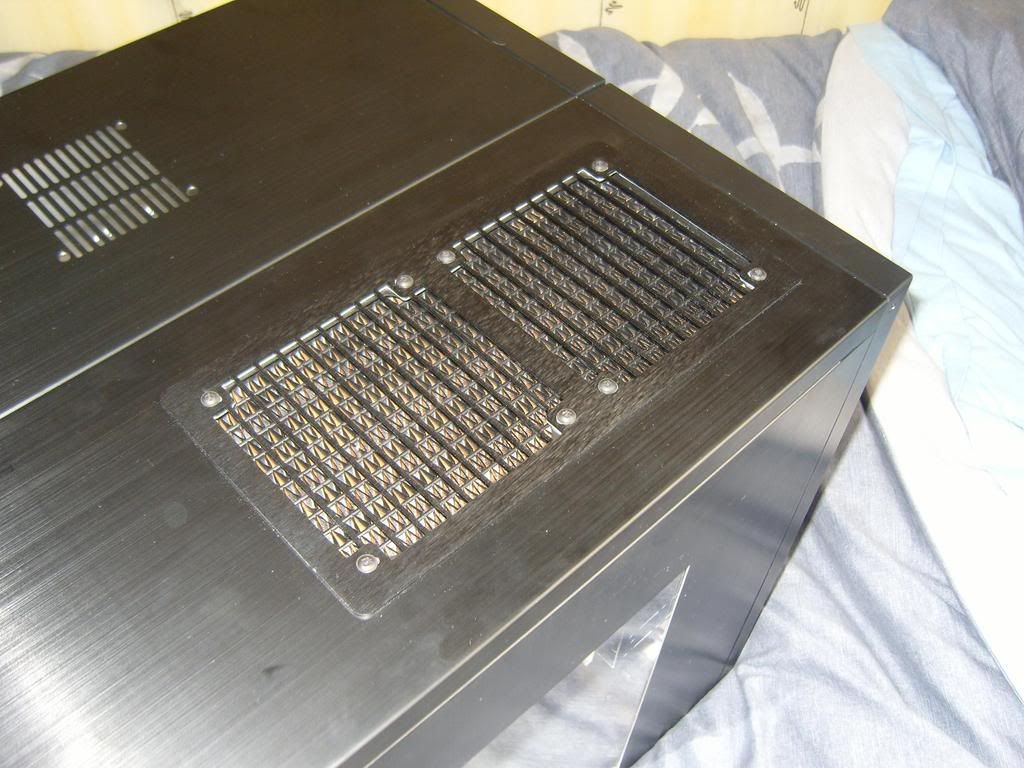
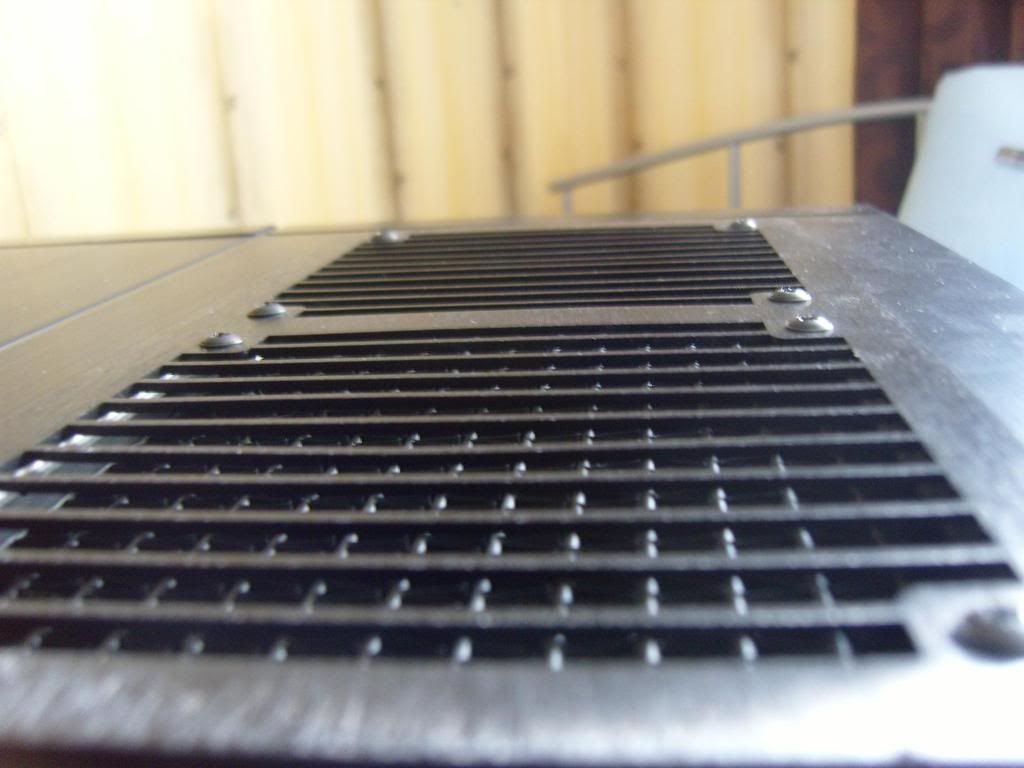
    PA120.3 in the back with a Chilled PC Anodised 120.3 Rad Grill. Custom back plate was made to fit the PA120.3 in the back.


    PA120.2 in the roof with a Chilled PC Anodised 120.2 Rad Grill.


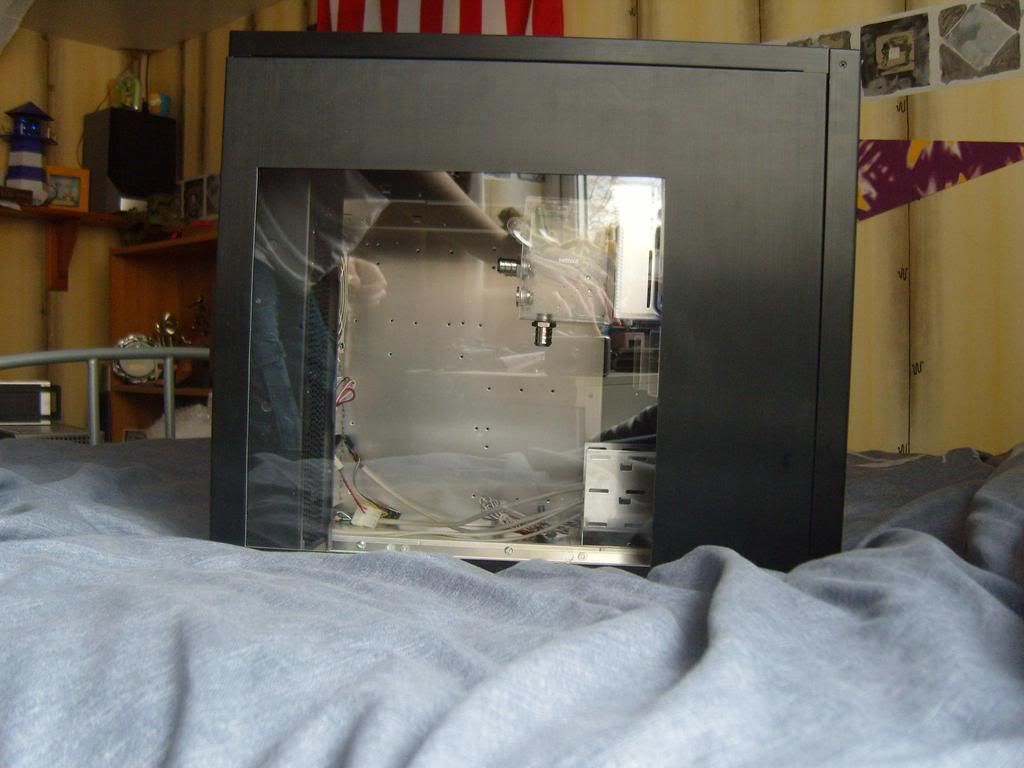
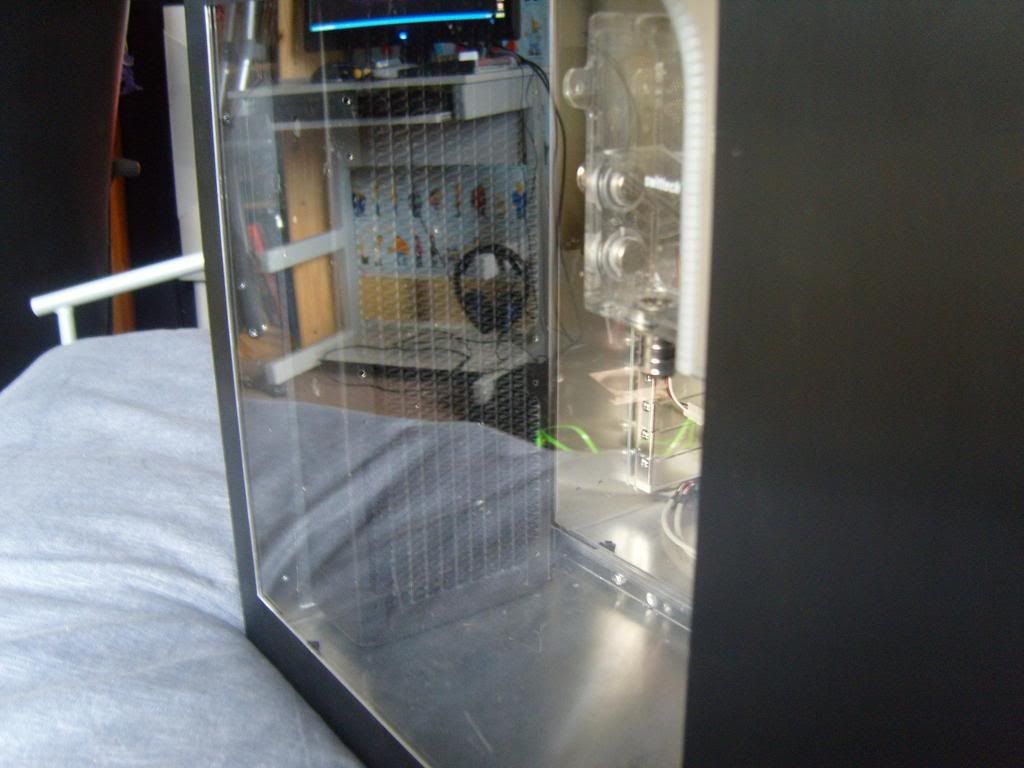
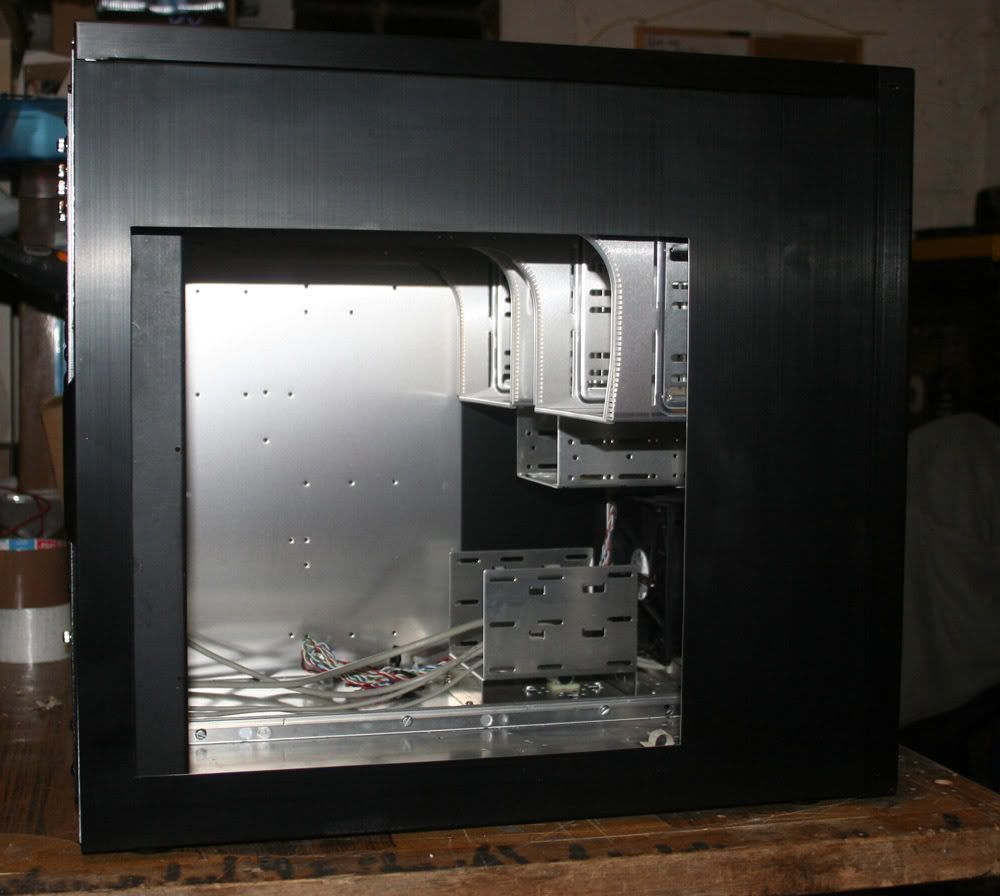
    Custom acrylic window cut into the side panel.


    A couple of shots of the insides. You can see the modifed reservoirs here.


    More pics to come once i start the build.


    Big thanks to Tom at Chilled PC for making all this possible and everything he has done so far and for everything that is still to come with this build. You're a star mate


    More updates soon.
    Last edited by Azza; 04-04-2008 at 05:58 PM.
    www | F | T | @

  8. #7
    Buzz Lightyear Azza's Avatar
    Join Date
    Jul 2006
    Location
    Buckley / Birmingham
    Posts
    1,374
    Thanks
    27
    Thanked
    39 times in 33 posts

    Re: Project: Lian Li PC7²

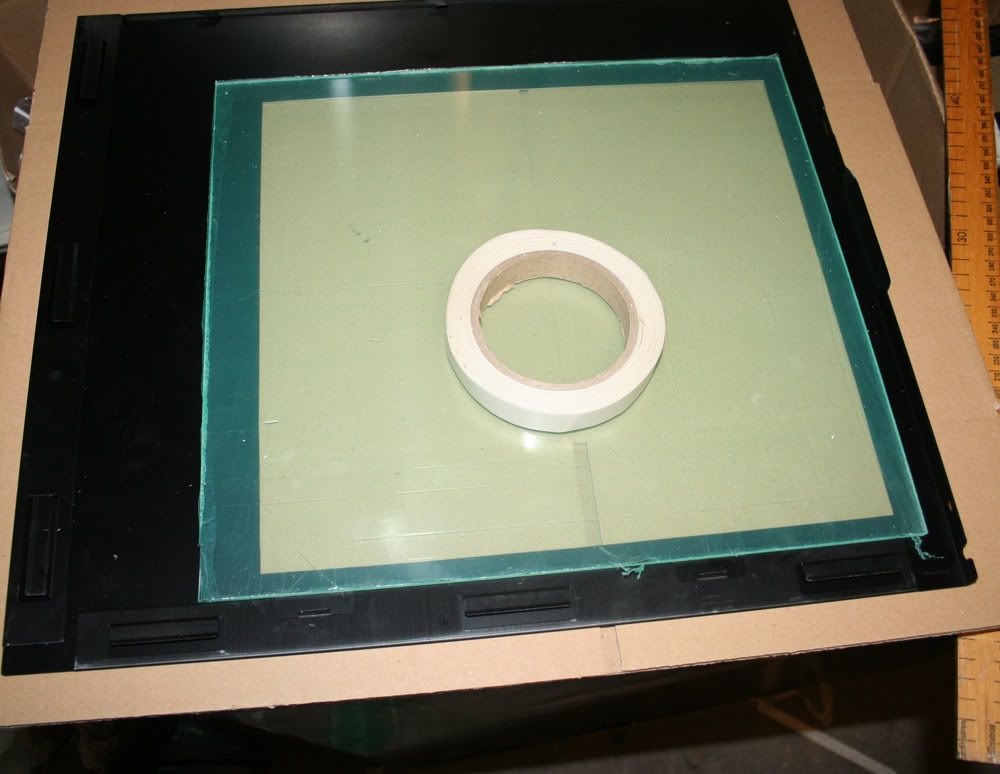
    This is a guide on how the window was done.


    First of all, the tools needed :-

    1) Pen
    2) Masking tape
    3) Ruler
    4) Jigsaw/dremel
    5) Knife
    6) Sandpaper 400 grit will do. upto 2000 is nice to have


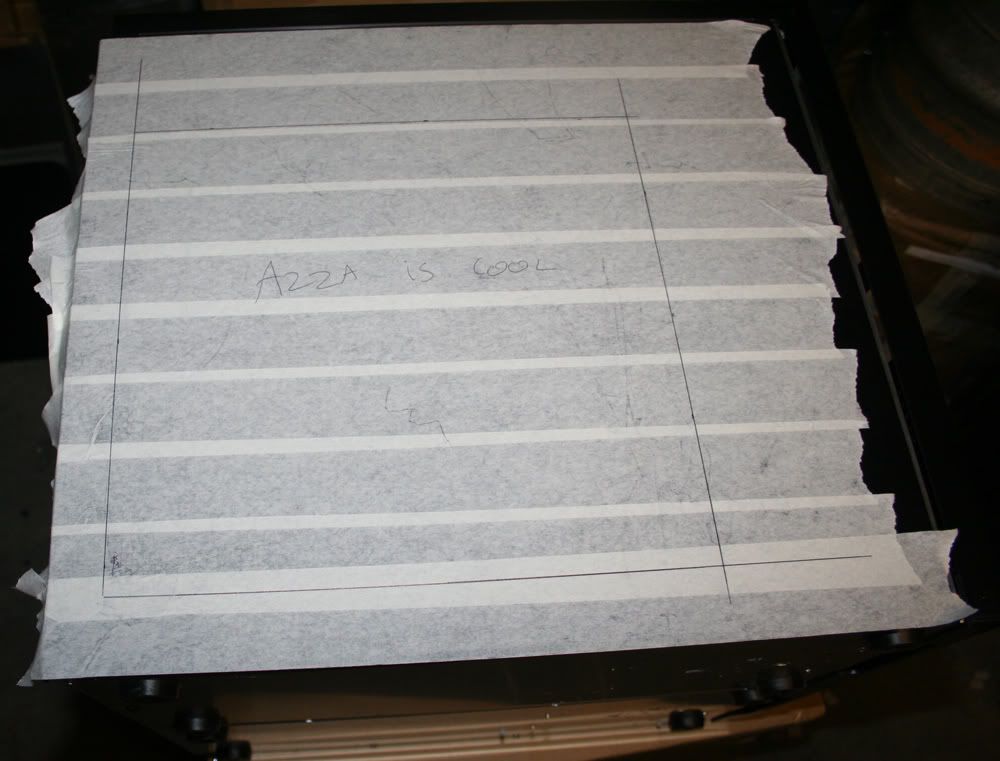
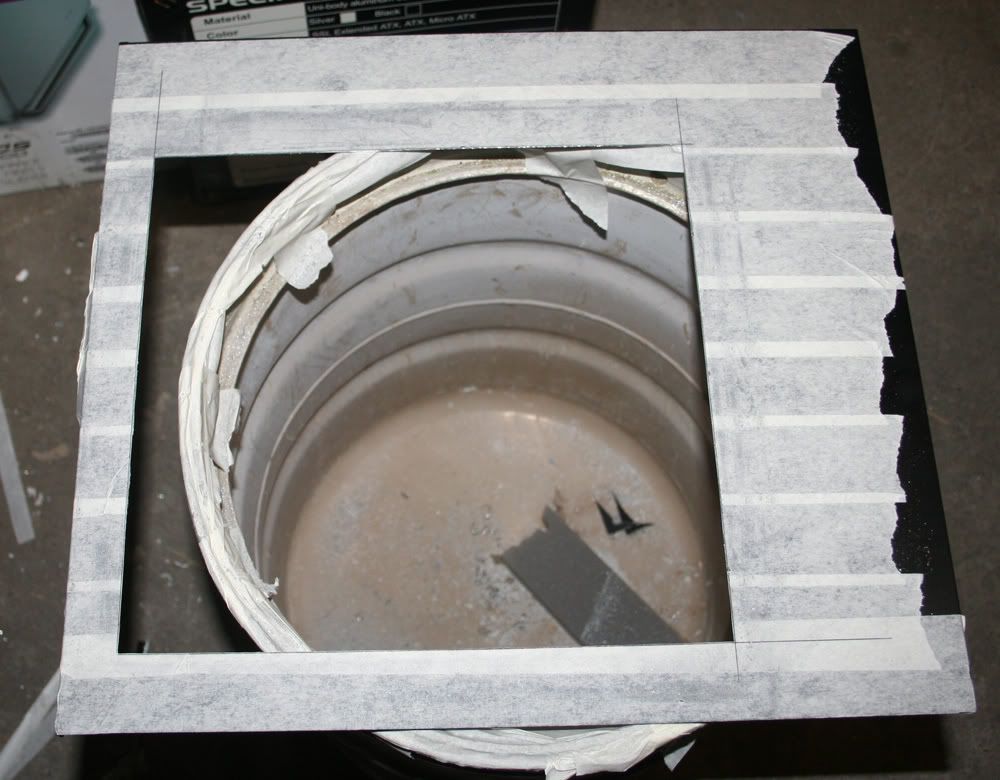
    First of all, mask off your side panel - this will avoid you damaging or scratching your panel and allow you to draw all over it.


    Next, draw your design - keep it simple if you arent experienced with this or want a nice clean look! Be aware of features such as the grills built into Lian Li panels. These may affect where your windows can go.


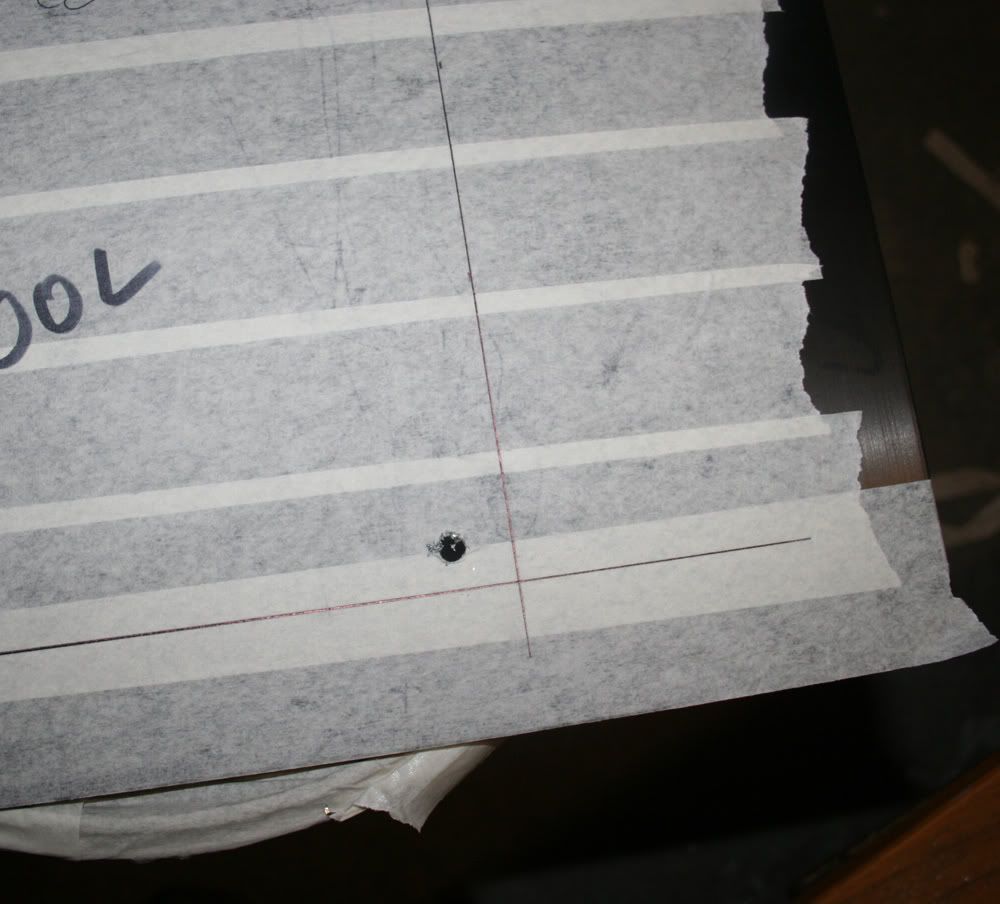
    After you are happy with your design, drill a small pilot hole to start off your cut (this isnt neccessary for dremels).


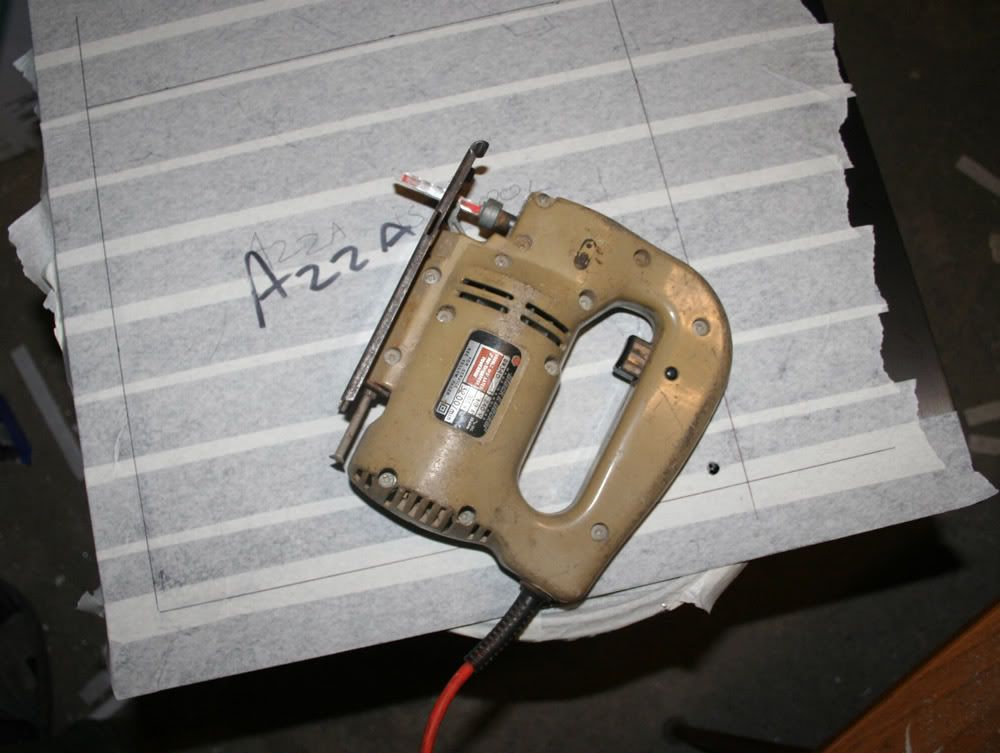
    My weapon of choice everytime. Jigsaws are far superior to dremels in my opinion.


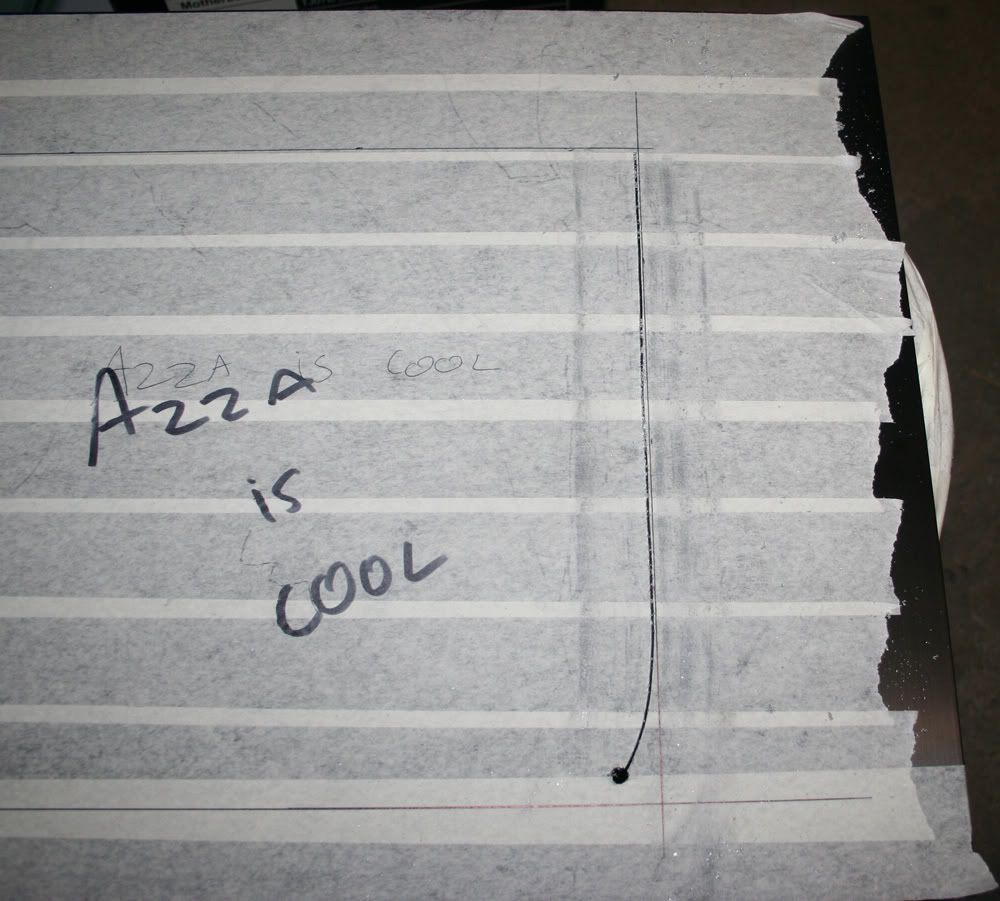
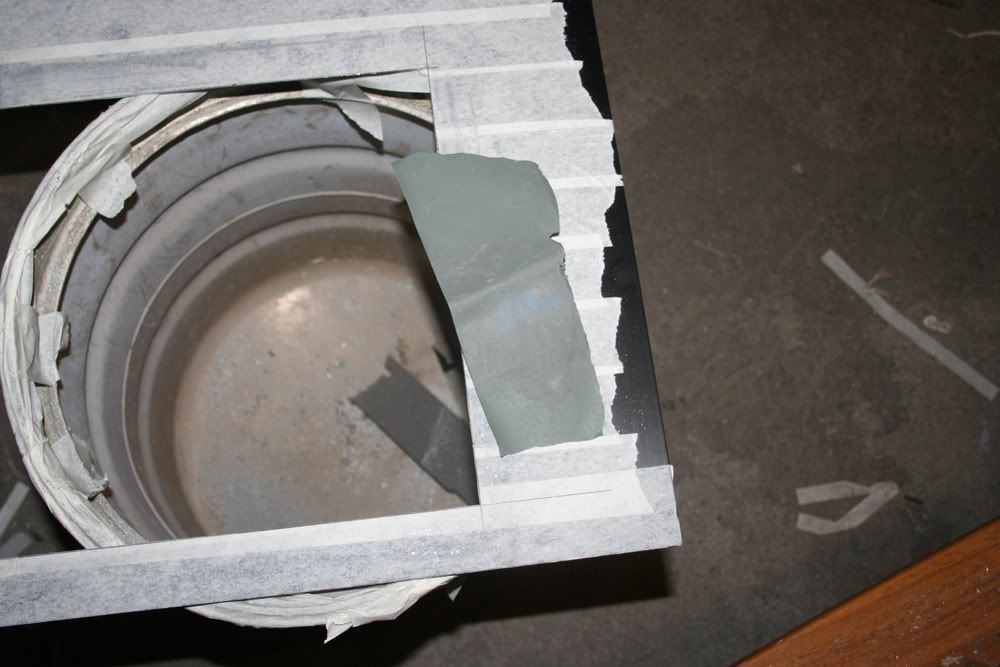
    Cut straight up the line you drew with the dremel :-


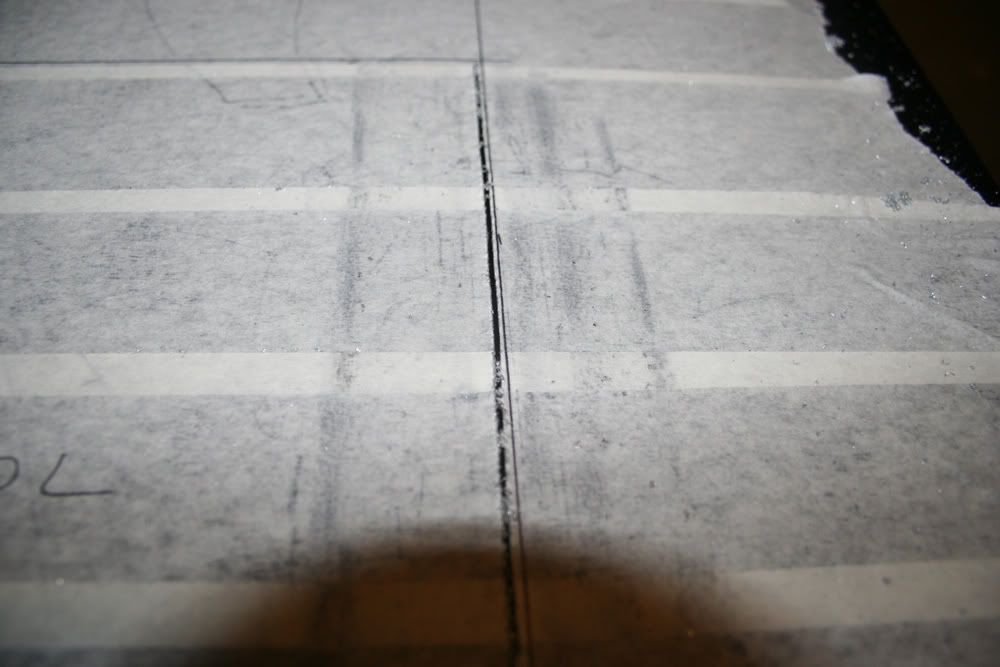
    I like to stick 1 or 2mm away from the line (on the inside of the cut) which allows for small errors and can then be filed down at the end. Going to close to the cut allows for no errors and you will end up adjusting your window and causing grief. The better you are with the jigsaw the closer you can get - this comes with confidence and practise.

    1mm is close enough for me


    Next step is to repeat the process on the opposite corner to where you first drilled so as to do the other two edges.
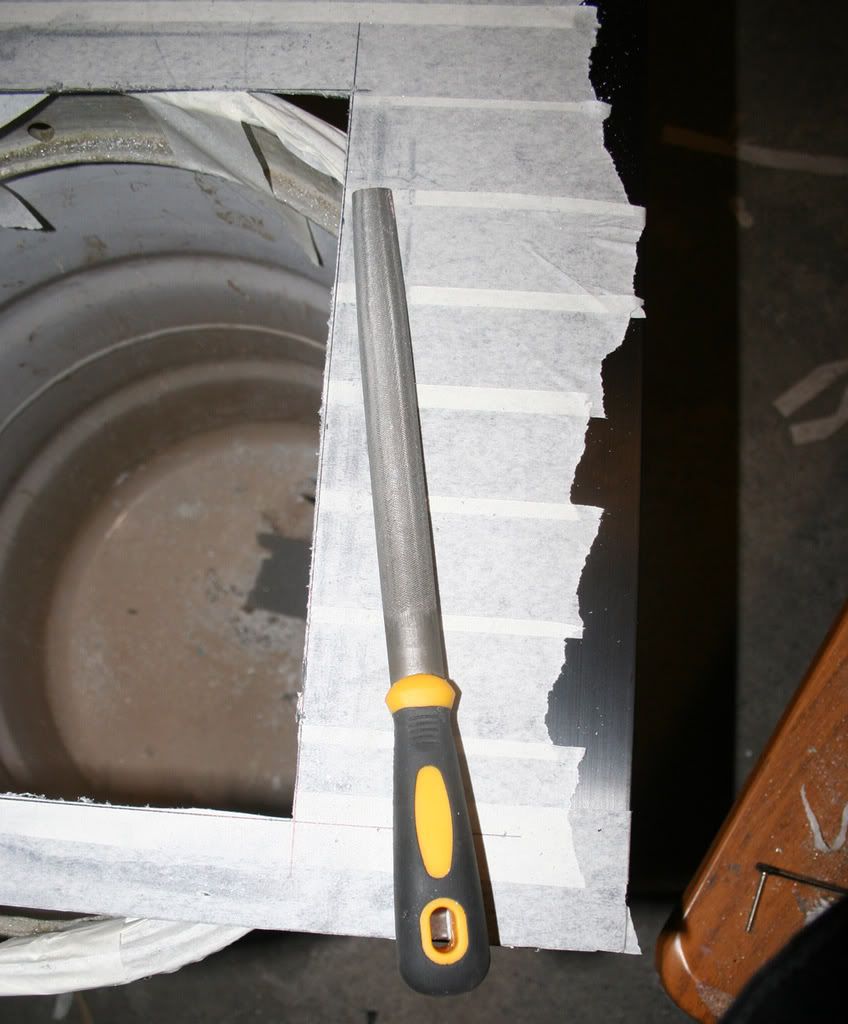
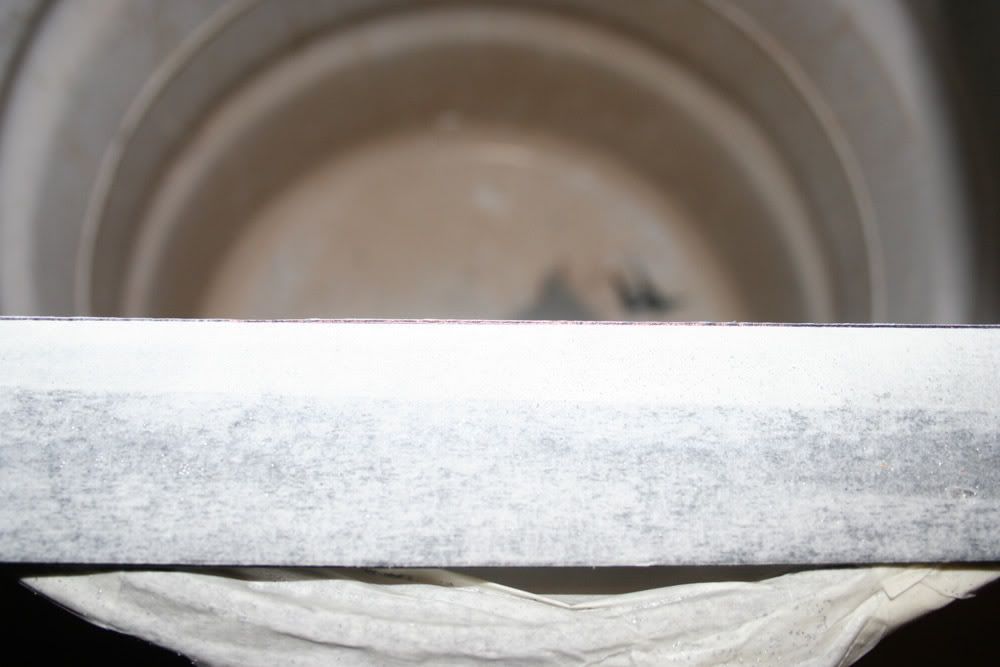
    Once this is done and you have cleaned up all the edges as much as you can with the jigsaw you can start filing. Any file will do. A nice large flat edge will give you a better chance of not messing up.


    Then file down to the line you drew - I tend to file just down to the line so there is a slither of white masking tape visible. This stops you from creating an uneven line. As if you file into the black line you drew you may file into it more in one place than the other as that line is 1mm thick.
    1mm doesnt sound like much, but it may be noticeable and why take that chance?


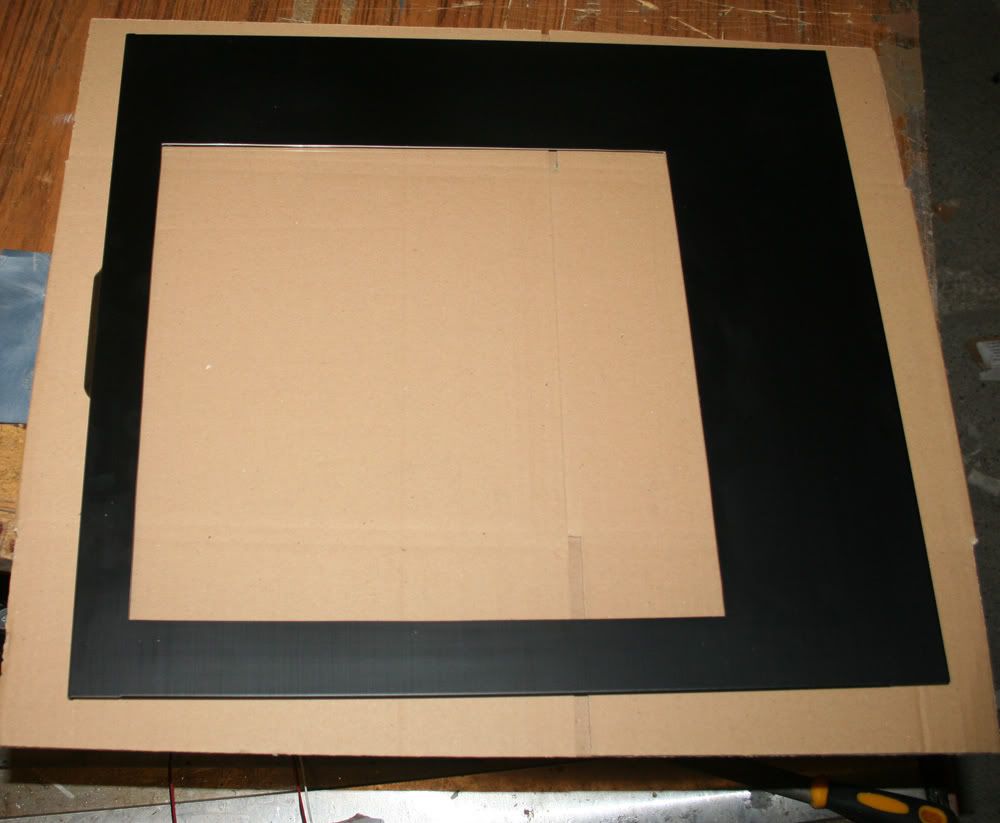
    It should now look something like this :-


    Now I like sand all the edges while the tape is still on, to avoid sanding off the black anodising on the panel. I start with some 400 and then polish up to 1500-2000 just to make it smooth.


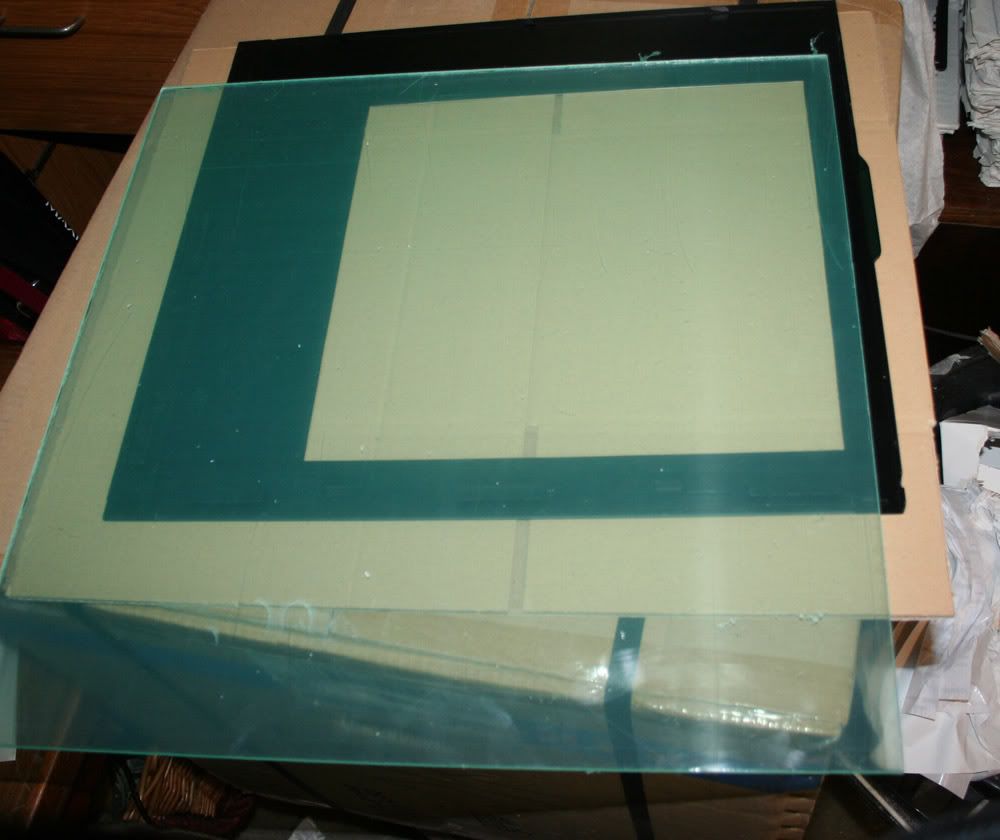
    Once thats done and you are happy with the results, you can start measuring up the perspex. Anything from 2-4mm is ok. I only have 4mm in stock at the moment so that will have to do. The thicker it is the more rigidity it puts back into the panel which is nice to have when a huge chunk of it has been cut out.


    Cut that using a sharp stanley knife and a straight edge. Score a few lines along the edge then the perspex should snap cleanly on the edge of a table. You can sand the edges with a file and paper if you want. Its not going to be seen so it doesnt really matter.


    My choice of fixings is double sided tape. Its strong but not too strong that it cant be removed at a later date. (It will need to be removed in a couple of months )


    Once you have stuck your panel down (remember to peel off the protective backing on the perspex prior to sticking it down), you should then be finished and have something like this :-


    And thats how the window was done.


    Thanks to Tom again for that, god knows how it would of looked if I tried it with my hands on the jigaw.
    www | F | T | @

  9. #8
    Chillie in here j.o.s.h.1408's Avatar
    Join Date
    Dec 2005
    Location
    a place called home
    Posts
    8,545
    Thanks
    757
    Thanked
    256 times in 193 posts
    • j.o.s.h.1408's system
      • Motherboard:
      • ASUS P6T Delux
      • CPU:
      • Intel core i7 920 @ 3ghz
      • Memory:
      • 3GB DDR RAM
      • Storage:
      • 1TB Samsung F1, 500GB Seagate baracuda + 320gb Seagate PATA +150GB WD PATA
      • Graphics card(s):
      • EVGA 480GTX SC edition
      • PSU:
      • Seasonic M12 600W Module PSU FTW
      • Case:
      • Lian Li PC-A7010B (the rolls royce of pc cases)
      • Operating System:
      • vista ultimate edition and windows xp
      • Monitor(s):
      • 22inch 2005FPW dell monitor
      • Internet:
      • 24mb BE There Broadband

    Re: Project: Lian Li PC7²

    i did my own window on a chieftec matrix full tower using a jigsaw like yours when otehrs recomenede a bloody dremel which was next to useless lol.


    other then that you did an impressive job

  10. #9
    Senior Member
    Join Date
    Jul 2007
    Posts
    676
    Thanks
    7
    Thanked
    13 times in 13 posts
    • Ommid's system
      • Motherboard:
      • Mac Pro
      • CPU:
      • Dual Xeon 5130
      • Memory:
      • 4GB (8x512mb) FB DIMM DDR 2
      • Storage:
      • Need to sort this out
      • Graphics card(s):
      • Rubbish
      • PSU:
      • Apple 1000W
      • Case:
      • Mac Pro Case
      • Operating System:
      • OS X
      • Monitor(s):
      • SAMSUNG 2232BW x2
      • Internet:
      • Dual GIGABIT LAN

    Re: Project: Lian Li PC7²

    surely wudda been easier to buy a pc343?

  11. #10
    Buzz Lightyear Azza's Avatar
    Join Date
    Jul 2006
    Location
    Buckley / Birmingham
    Posts
    1,374
    Thanks
    27
    Thanked
    39 times in 33 posts

    Re: Project: Lian Li PC7²

    Quote Originally Posted by Ommid View Post
    surely wudda been easier to buy a pc343?
    Well that would have cost £180+ for the case plus this is like 100x cooler.
    www | F | T | @

  12. #11
    Senior Member
    Join Date
    Aug 2007
    Posts
    316
    Thanks
    24
    Thanked
    35 times in 23 posts

    Re: Project: Lian Li PC7²

    Quote Originally Posted by Azza View Post
    Well that would have cost £180+ for the case plus this is like 100x cooler.
    +1 very cool way of getting the space of one of those cube cases without the massive price hike.
    Nice job so far Look forward to seeing more.

  13. #12
    Senior Member Pob255's Avatar
    Join Date
    Apr 2007
    Location
    The land of Brum
    Posts
    10,143
    Thanks
    608
    Thanked
    1,226 times in 1,123 posts
    • Pob255's system
      • Motherboard:
      • Asus M5A99X EVO
      • CPU:
      • FX8350 & CM Hyper 212+
      • Memory:
      • 4 x 2gb Corsair Vengence 1600mhz cas9
      • Storage:
      • 512gb samsung SSD +1tb Samsung HDD
      • Graphics card(s):
      • EGVA GTX970
      • PSU:
      • Seasonic GX 650W
      • Case:
      • HAF 912+
      • Operating System:
      • W7 Pro
      • Monitor(s):
      • iiyama XB3270QS-B1 32" IPS 1440p

    Re: Project: Lian Li PC7²

    Very nice so far
    Must say I'd agree with you on the jigsaw for cutting window pannels.
    Drimmels are great for cutting small bits and trimming things down to size not for cutting long stright lines. although with the right head they are great for sanding

    Tip for you if you've not done this. to hide the silvery colour of the edge of the hole you just cut.
    Black Marker pen get a fairly chunky one and just run it around the inside edge and it should hide it well.

  14. #13
    Buzz Lightyear Azza's Avatar
    Join Date
    Jul 2006
    Location
    Buckley / Birmingham
    Posts
    1,374
    Thanks
    27
    Thanked
    39 times in 33 posts

    Re: Project: Lian Li PC7²

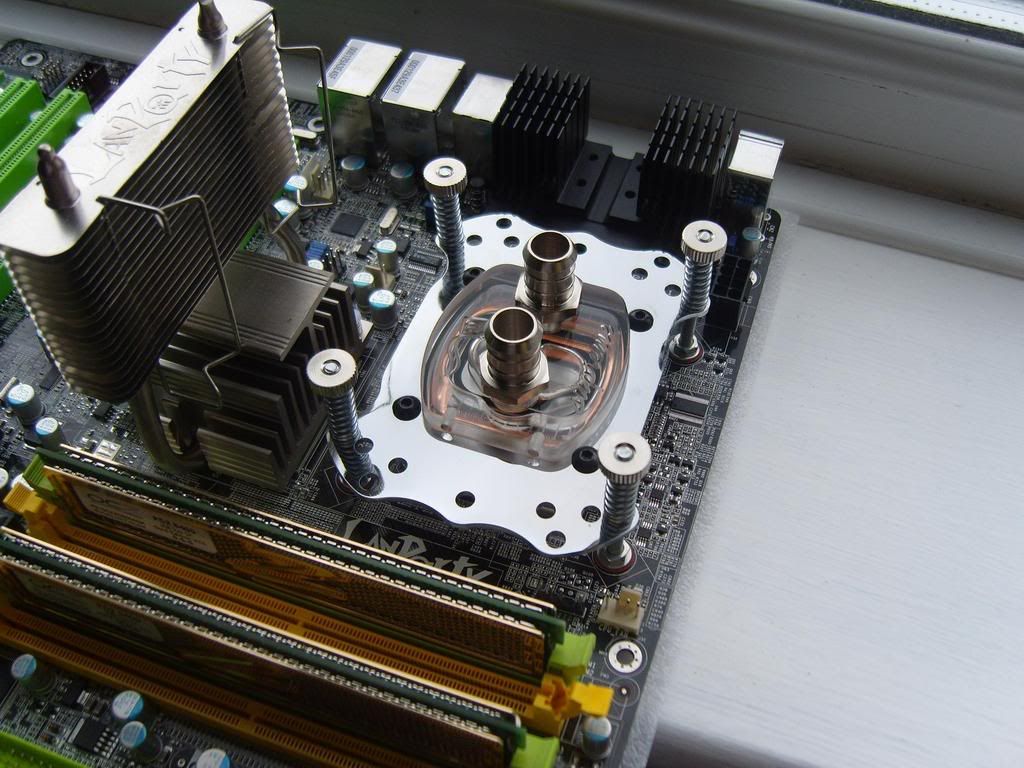
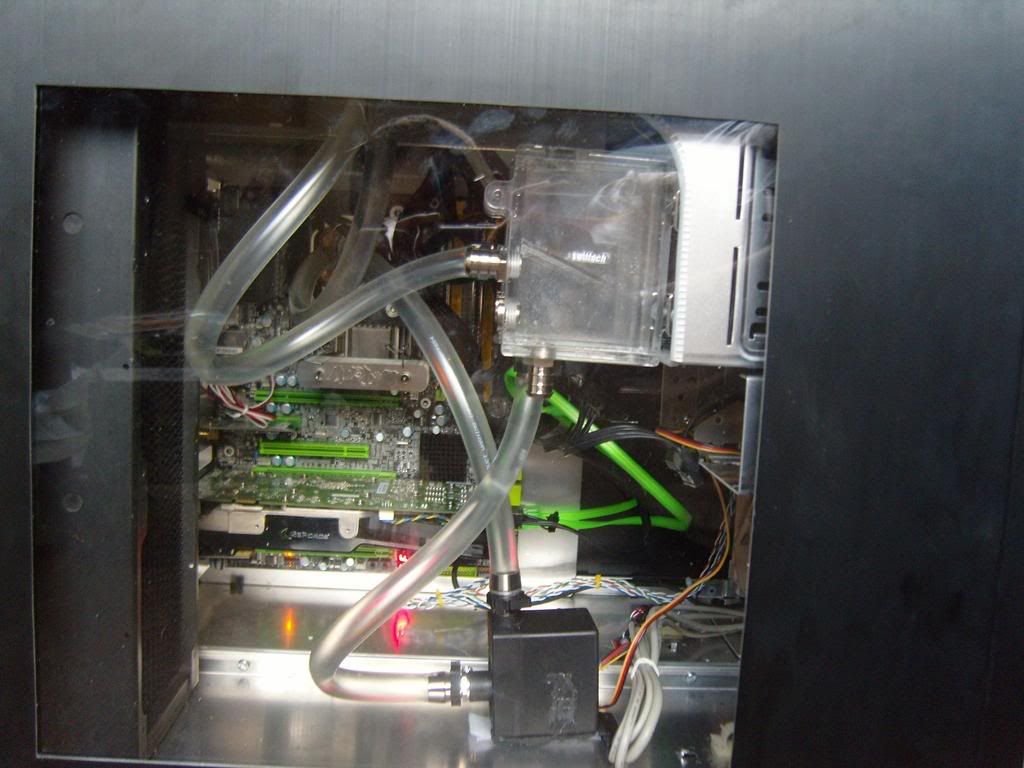
    Decided to put together a loop for the CPU.

    Ek block on board.


    Now dought I will re-route all the tubing once I do the second loop.


    www | F | T | @

  15. #14
    Squirrely tigerboyce's Avatar
    Join Date
    Jan 2007
    Location
    Oxfordshire or Hertfordshire(uni)
    Posts
    2,013
    Thanks
    88
    Thanked
    110 times in 77 posts
    • tigerboyce's system
      • Motherboard:
      • Asus P6T Deluxe/OC Palm
      • CPU:
      • Intel i7 920 D0 @3.8Ghz + Titan Fenrir
      • Memory:
      • 6gb (3x2) OCZ Reapers DDR3
      • Storage:
      • 690gb total WD caviars
      • Graphics card(s):
      • BFG 8800GTS 320mb
      • PSU:
      • Corsair HX 520w
      • Case:
      • Antec 900
      • Operating System:
      • Win7 x64
      • Monitor(s):
      • Dell E228WFP 22"
      • Internet:
      • aol :/

    Re: Project: Lian Li PC7²

    Just noticed this, Its looking real nice. Cant wait to see more!

  16. #15
    Efficiently lazy shadowmaster's Avatar
    Join Date
    Oct 2006
    Location
    London
    Posts
    3,233
    Thanks
    397
    Thanked
    310 times in 208 posts
    • shadowmaster's system
      • Motherboard:
      • Gigabyte GA-890FXA-UD5
      • CPU:
      • AMD Phenom II X4 965 @ 3.6Ghz
      • Memory:
      • 4GB Corsair XMS3
      • Storage:
      • Kingston SSD V series 64GB + Samsung F3 1TB
      • Graphics card(s):
      • XFX 5870 1GB in Crossfire
      • PSU:
      • BeQuiet 1200W Dark Power Pro
      • Case:
      • Coolermaster Stacker 832 SE
      • Operating System:
      • Windows 7 Home Premium 64bit
      • Monitor(s):
      • 3 x BenQ G2222HDL 21.5inch 1080p
      • Internet:
      • BT Infinity 2

    Re: Project: Lian Li PC7²

    This is quite cool Keep up the good work.

    I would love to try something like this one day but I'll probably hurt myself in the process and unfortunately I don’t have the spare time (yet).

  17. #16
    SiM
    SiM is offline
    Senior Member
    Join Date
    Apr 2006
    Location
    London
    Posts
    7,787
    Thanks
    300
    Thanked
    633 times in 422 posts
    • SiM's system
      • Motherboard:
      • P5K Premium
      • CPU:
      • Q6600
      • Memory:
      • 8GB PC2-6400 OCZ ReaperX + Platinum
      • Storage:
      • 3 x 320gb HD322HJ single platter in Raid 0
      • Graphics card(s):
      • PNY GTX285
      • PSU:
      • Corsair TX650W
      • Case:
      • Antec 1200
      • Monitor(s):
      • 2407-HC

    Re: Project: Lian Li PC7²

    hmm, very original PC case... hardcore

    So how much did this all cost you?

Thread Information

Users Browsing this Thread

There are currently 1 users browsing this thread. (0 members and 1 guests)

Similar Threads

  1. Replies: 31
    Last Post: 22-03-2007, 08:43 AM
  2. help needed building a c++ project
    By kasavien in forum Software
    Replies: 5
    Last Post: 08-11-2006, 10:18 AM
  3. Project Mac Cube
    By Gordy in forum Chassis and Mods
    Replies: 23
    Last Post: 15-08-2005, 08:28 PM

Posting Permissions

  • You may not post new threads
  • You may not post replies
  • You may not post attachments
  • You may not edit your posts
  •