Results 1 to 7 of 7

Thread: The Case is dead, long live the Case!

  1. #1
    Senior Member Pob255's Avatar
    Join Date
    Apr 2007
    Location
    The land of Brum
    Posts
    10,143
    Thanks
    608
    Thanked
    1,226 times in 1,123 posts
    • Pob255's system
      • Motherboard:
      • Asus M5A99X EVO
      • CPU:
      • FX8350 & CM Hyper 212+
      • Memory:
      • 4 x 2gb Corsair Vengence 1600mhz cas9
      • Storage:
      • 512gb samsung SSD +1tb Samsung HDD
      • Graphics card(s):
      • EGVA GTX970
      • PSU:
      • Seasonic GX 650W
      • Case:
      • HAF 912+
      • Operating System:
      • W7 Pro
      • Monitor(s):
      • iiyama XB3270QS-B1 32" IPS 1440p

    Talking The Case is dead, long live the Case!

    Well after nearly two years of use my first real modded case is being retired.
    I still like the old girl and i put in quite a bit of time and money, but in the end it was just bugging me.
    For thoes who never saw my old thread, I compleatly gutted an old Digital server case and modded it for ATX
    http://forums.hexus.net/chassis-syst...e-project.html

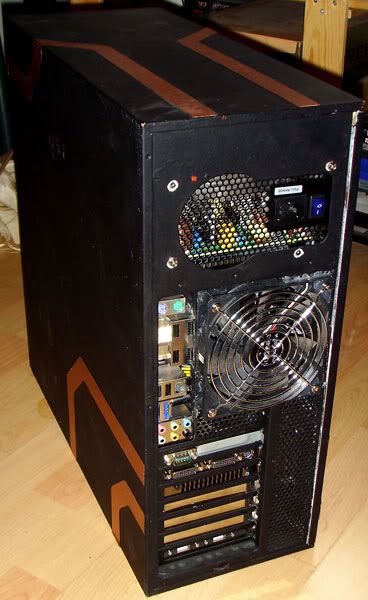
    The side panel is a right so and so to get off, the faceing panel clips are broken so it never stays on, there's no front USB or audio, it's too narrow for a large cpu cooler, I don't have any spare hard drive rails and an IO back plate cannot be fitted because the hole is too small.

    Here's the old girl in all her beauty

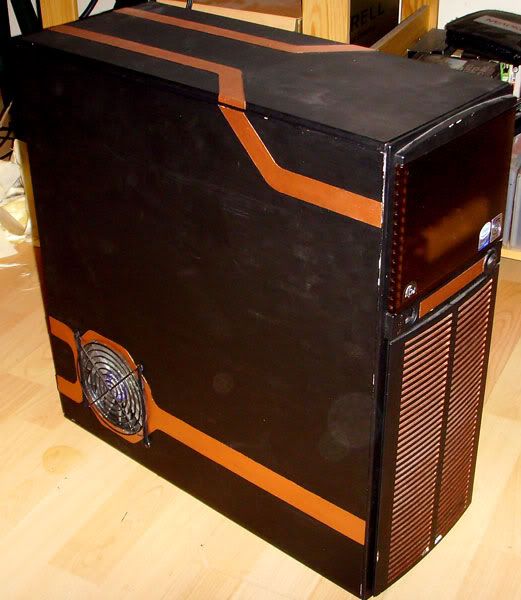
    The Paint has chiped in places but it's very easy to touch being artist acrylic
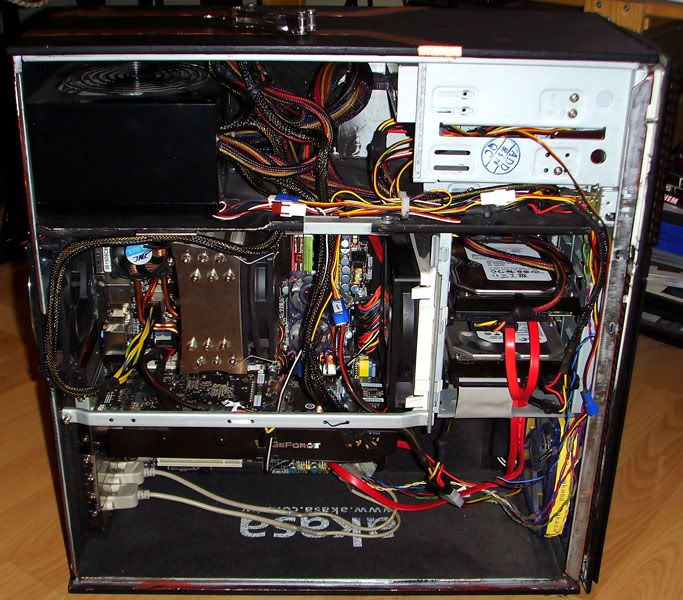
    On the inside

    The cabeling is not quite as bad as it looks as it runs around the sides and isn't in the direct air flow
    Also found a heck of a lot of dust in there as there's no filtering.

    I've been looking at cases for some time but everything that really ticks all my boxes and I like the look of has been just too expensive (main one I've had my eye on for a while is the Silverstone Fortress but at £150ish it's just too much)
    So when a 2nd hand Antec p180 came up for £55 (Thanks again Tak) I took the plunge, it's not quite the case I'd have but for the prices I went for it.

    Didn't take and external shots, it's just a p180 plenty of pic's of it on the web.
    I will mention it's the one with brushed/dull metal panels not the black, mirrored or funky paint job version.

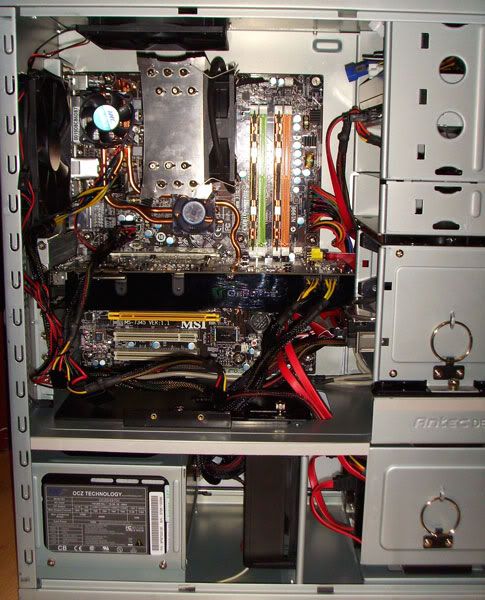
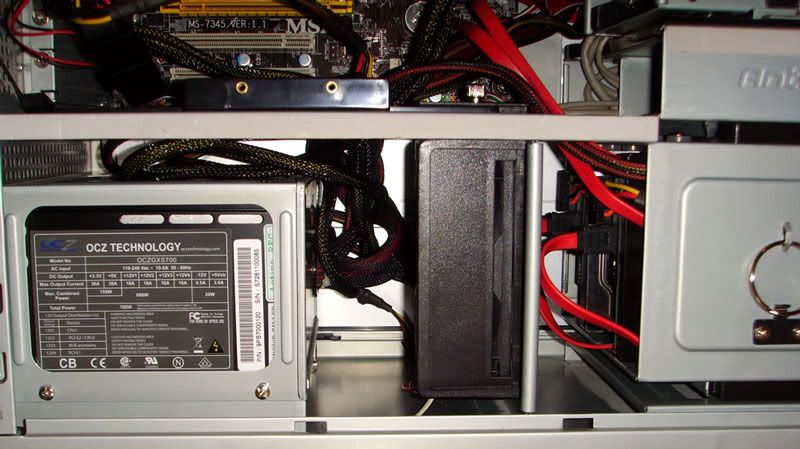
    So far I've just shifted all my bits, after a good dusting into it to make sure I can get it in there and give me an idea of what I'll need to consider to fully cable tidy it.


    As you can see the non-modular PSU was a bit of a git but I got there in the end.


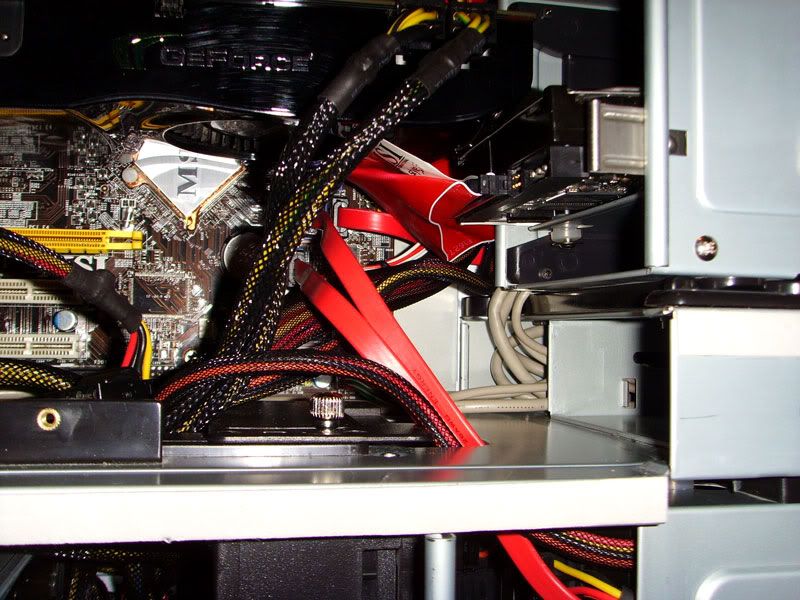
    One major problem I hit was the 9800gtx and IDE hard drive, I had to remove the top of the two trays to get the 9800gtx in there and it still touches the hard drive in the lower tray.

    Also as you can see quite a few of the wires run through that point so it's a bit of a mess/awarkard.

    All told I like the case, although I'm already looking at possible mods I can make to it.
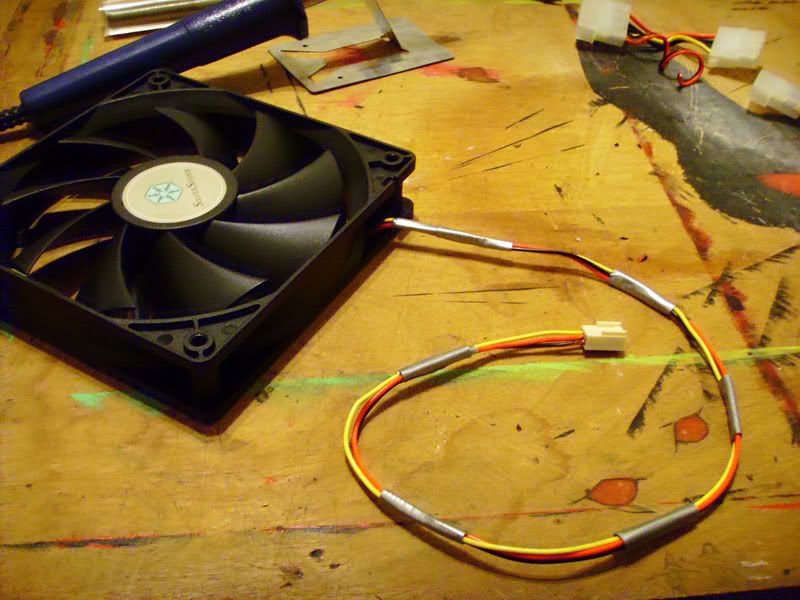
    But the biggest let down of it is the fans, I really don't like thoes antec tri-cools, while they are quite quiet on low, they don't move enough air and being 4pin molex only means I cannot hook them up to my fan controller.
    Already got some new fans and a couple of other bits on order from scan.

    More to come . . .

  2. #2
    Senior Member Pob255's Avatar
    Join Date
    Apr 2007
    Location
    The land of Brum
    Posts
    10,143
    Thanks
    608
    Thanked
    1,226 times in 1,123 posts
    • Pob255's system
      • Motherboard:
      • Asus M5A99X EVO
      • CPU:
      • FX8350 & CM Hyper 212+
      • Memory:
      • 4 x 2gb Corsair Vengence 1600mhz cas9
      • Storage:
      • 512gb samsung SSD +1tb Samsung HDD
      • Graphics card(s):
      • EGVA GTX970
      • PSU:
      • Seasonic GX 650W
      • Case:
      • HAF 912+
      • Operating System:
      • W7 Pro
      • Monitor(s):
      • iiyama XB3270QS-B1 32" IPS 1440p

    Re: The Case is dead, long live the Case!

    Well my bits from Scan turned up today I didn't expect them until tomorrow.

    Two Sharkoon System fans mid range
    http://www.scan.co.uk/Products/120mm...1dB(A)-574-cfm
    Two Silverstone FN121 fans
    http://www.scan.co.uk/Products/120mm...se-Fan-1200rpm
    Both just over £5 each

    I've plugged them into my old Qtec PSU to test them, Ill run some more comprehensive tests later and fully compare them to the Antec Tri-cool.
    The Sharkoon is pretty much what I expected, I've used both the Power and slient versions before and I know how well they perform. Not what I'd call slient, about as loud as the tri-cools on high, however they push out far more air.

    Now I'll admit I made a mistake on the Silverstone fans 
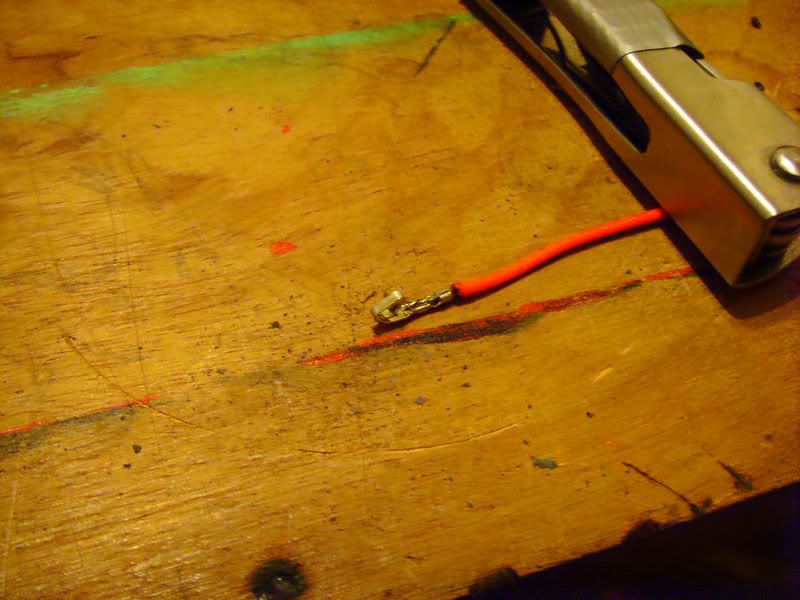
I knew there was a reason I didn't buy them before and on opening the box I remembered why, they are not 3pin.
    They connect to a Molex and have a separate 3pin lead that only carries the yellow speed monitoring wire.
    Now considering I wanted new fans with 3pin connectors to connect to my fan controller it was a bit of a boob, however I cannot see any reason why they wouldn't work on a 3pin header (only 0.23amp) so I'm going to cut of the molex and solider it up to a 3pin plug to see if it works.
    On the plus side they come with 4screws and a fan guard which is very nice.
    With a quick test they seem very good, not as loud as the Sharkoon midrange, doesn't move as much air but still a good amount. Rough guess I'd say as much as the Tri-cool on high but not as noisy.

    Both Fans are closed corner and well made, not quite as heavy and solid as a Scythe S-FLEX but more solid than any glossy plastic fan I've used.
    At £5 these are really good value for money.

    Other thing I picked up was the Sharkoon Silencer kit
    http://www.scan.co.uk/Products/Shark...PC-components)
    Initial impressions, it's smaller than I thought it would be.
    It's a nice box and will be great for keeping screws and such in later on.
    The 12 long bolts are a nice soft rubber as are the 8 medium bolts.
    The 6 short bolts are different, they seem to be harder (but not hard) plastic and use a pin system, ie you push the bolt in and fit the fan to it as normal, then you push a pin into the middle to lock it (think of it like a plastic wall plug you use when putting a screw into a wall)
    The screws&grommits are very nice and soft.
    The washers are 1mm foam sticky backed (3M on the backing, so we know where that originates or at least the sticky stuff)
    The rubber case feet, look very nice but they are a bit too small for my liking, about 20mm diameter and again 3M on the sticky stuff.
    £10 not a bad buy.

  3. #3
    Senior Member Pob255's Avatar
    Join Date
    Apr 2007
    Location
    The land of Brum
    Posts
    10,143
    Thanks
    608
    Thanked
    1,226 times in 1,123 posts
    • Pob255's system
      • Motherboard:
      • Asus M5A99X EVO
      • CPU:
      • FX8350 & CM Hyper 212+
      • Memory:
      • 4 x 2gb Corsair Vengence 1600mhz cas9
      • Storage:
      • 512gb samsung SSD +1tb Samsung HDD
      • Graphics card(s):
      • EGVA GTX970
      • PSU:
      • Seasonic GX 650W
      • Case:
      • HAF 912+
      • Operating System:
      • W7 Pro
      • Monitor(s):
      • iiyama XB3270QS-B1 32" IPS 1440p

    Re: The Case is dead, long live the Case!

    Resoildering the Silverstone FN121 fans
    http://www.silverstonetek.com/produc....php?pno=fn121
    This fan has a fixed molex plug for the +12v (red) and earth wires (black) and a seperate 3pin plug for the fan speed monitoring wire (yellow), the plan was simple, cut off the molex and re-wire it to only use the 3pin plug

    Requirements:
    1 Fan for re-connecting
    1 Soildering Iron and soilder
    1 pair of wirecutters
    1 Craft/stanley knife
    1 Work surface (I don't have space for a work bench so I use a cutting board ontop of the coffee table )
    1 roll of Electrial Tape
    1+ Source of connectors & plug (Easy source is old fans, I butchered a couple of rubbish Xcilo fans, although you may be able to buy them at a electrial specialists)

    Now I have to start by appoligising I forgot to take a photo before I started.

    First step was to cut off the molex through plug, out came the trusty wire cutters.

    This is the bit I cut off.

    Removeing connectors from a 3pin plug is easy, there a little hole in the side and you can see the connector in it, that part of the connector is actually a tiny raised up bit that acts as a catch.
    To remove the connector you really need three hands which makes it a little tricky.
    What you need to do is poke the knife point in the hole, press down on the catch and gently pull the wire out, while still holding on to the plug and not slipping with the knife and stabbing your own fingures.

    Moogle did a great guide as to how to remove the fan connectors Here as part of his cable sleeving guide. I don't have a special tool for the job, which is why I carefully use a knife.

    Luckly for me the two wires that ran to the molex where longer than the yellow wire so it was easy to cut to length.
    Stripping the wires was not so easy, would of been better if I had a proper wire stirpping tool but I don't
    the problem is the insulation (ie outter plastic) is fairly thick and the wires are very fine so it's easy to cut too deep or simple snap the wires when pulling off the insulation.
    On my first try I decided to try to not remove the existing wire from the doner connector (more on this shortly) and instead leave a short length and soilder wire to wire.
    SO it cut them to the correct length and tried to strip them . . . after a few bodged attempts I ended up with the wires ready but now they were all different lengths (I'm not showing you a pic of that, it's a mess, I re-cut the whole thing and tried a different methord.

    This involves cutting all the wire to the same length then useing the soildering iron to melt off the insulation. It does not totally melt off but is soft enough that some gentle scrapeing with the knife removes the remaining insulation without snapping the wires.

    This is the resault.

    Next comes a very tricky part of getting the connectors off the doner plugs.
    If you look closely they are double crimped onto the wires.
    The first section is cripmed (ie folded around) the insulation, the 2nd is crimped around the actual wires.
    Trying the un-crimp the 2nd section is next to impossible as it's just too small and tight, however you can un-crimp the the first section.

    This is very fidely so be very careful, First cut the wire off the doner connector right at the end of the connector, so all that is left on it is crimped on.
    Now to uncrimp basically involves using the knife point to get under the crimped metal and bending it up slightly, enough to losen it so you can pull the insulation off.
    Don't worry about the wires still attached it'll all get soildered shortly.
    Again this is fidley and invovles a sharp knife so be careful of the old fingers.

    Next we put it together ready for soildering, carefully insert your stripped wire into the connector then position it on your surface ready for soildering so that the wire is lying flush on top the the 2nd crimp, I found that placeing my something ontop of the wire to hold it inplace helped here.


    And now commence soildering.


    The end resault


    Next insert the connectors back into the 3pin plug, makeing sure they are in the right order.
    Finally a few bits of electrial tape to turn 3 seperate wires into one. (a neater idea is to use cable sleeving but I don't have any )

    The end resault, one fan with 3pin connector

  4. #4
    Senior Member Pob255's Avatar
    Join Date
    Apr 2007
    Location
    The land of Brum
    Posts
    10,143
    Thanks
    608
    Thanked
    1,226 times in 1,123 posts
    • Pob255's system
      • Motherboard:
      • Asus M5A99X EVO
      • CPU:
      • FX8350 & CM Hyper 212+
      • Memory:
      • 4 x 2gb Corsair Vengence 1600mhz cas9
      • Storage:
      • 512gb samsung SSD +1tb Samsung HDD
      • Graphics card(s):
      • EGVA GTX970
      • PSU:
      • Seasonic GX 650W
      • Case:
      • HAF 912+
      • Operating System:
      • W7 Pro
      • Monitor(s):
      • iiyama XB3270QS-B1 32" IPS 1440p

    Re: The Case is dead, long live the Case!

    Fan testing:

    I decided to do some full fan testing, I did this mainly by ear/feel as I have no actual air flow or sound level measureing tools, I did however build a simple rigg to try to see if I could show the difference.

    Here's my rigg

    A bit of cotten thread with a small piece of loo roll tied to it, after my first test I decided it didn't have enough mass as it got blown about quite a bit on low speeds so I added a empty 3pin plug for added mass. (I had considered dropping fixed measures of flour into the air flow but decided it would be too messy and the otherhalf would kill me for making that much mess in the living room )
    Using the pattern of the laminate flooring I could get all the fans in the same place each time.

    Ok I must admit the pictures don't really show it that well as the cotten was whipping about a bit esp on the higher air flow test, but here's the pic's any way.

    Antec Tri-Cool Low setting


    Antec Tri-Cool Medium setting


    Antec Tri-Cool High setting


    Sharkoon System medium Fan, 12v


    Sharkoon System medium Fan, 5v


    SilverStone FN121 12v


    SliverStone FN121 5v


    Xcilo (worst fan i've ever owned) 12v


    Xcilo (worst fan i've ever owned) 5v


    I also tested fan vs fan by holding them a fixed distance from my face and "feeling" the amount of air blow into my face.

    Also holding the fans and lissening to the sound levels.

    Reasults, Highest to lowest
    Air flow:
    Sharkoon system medium fan 12v
    Antec Tri-cool high
    Silverstone FN121 12v
    Antec Tri-cool medium
    Antec Tri-cool low - Sharkoon system medium fan 5v (neck and neck)
    Silverstone FN121 5v
    Xcilo 12v
    Xcilo 5v

    Sound levels
    Xcilo 12v
    Antec Tri-cool high
    Sharkoon system medium fan 12v
    Xcilo 5v
    Silverstone FN121 12v - Antec Tri-cool medium (neck and neck)
    From here on I had to stop the 80mm fan in the PSU I was useing for testing, because even though I muffled it it was still louder than the fans I was testing
    Sharkoon system medium fan 5v - Antec Tri-cool low (neck and neck)
    Silverstone FN121 5v

    Altold thoes Xcilo fans are utter rubbish and if it wasn't for the fact that I stripped the 3pin plugs off them for the SilverStone fans they were a waste of £3 each.
    The noise they make is not the wosh of air, but a hidious buzzing as the unballanced blades lead to a lot of vibration and soft plastic frame means it can see the fan hub wobbleing when it's screwed into a case and the buzzing gets worse.

    Must admit the Tri-cool's are not quite as bad as I initally though they were and I noticed two major differences between it and both the Sliverstone & Sharkoon.
    1 Air cone, the air cone of the Tri-cool is noticeably wider.
    2 The sound pitch is slightly deeper.

    So in closeing I must say the Tri-cool is not as bad as I though it is, however the combination of 4pin and speed selector makes these very unadjustable.
    Once I get the Sharkoon and silverstone fans set up I'll tweek them viva the knobs on my fan controller, to change the setting on the Tri-cools I would have to pull the case out from under my desk, open up the side panel, flick the switches and then put the case back under the desk, which is far too much hassle.

  5. #5
    Member
    Join Date
    Jan 2009
    Posts
    140
    Thanks
    0
    Thanked
    6 times in 6 posts

    Re: The Case is dead, long live the Case!

    Nice upgrade.
    As a p180 owner myself I would advise modding in some cable mangement in a p182 style.

  6. #6
    Senior Member Pob255's Avatar
    Join Date
    Apr 2007
    Location
    The land of Brum
    Posts
    10,143
    Thanks
    608
    Thanked
    1,226 times in 1,123 posts
    • Pob255's system
      • Motherboard:
      • Asus M5A99X EVO
      • CPU:
      • FX8350 & CM Hyper 212+
      • Memory:
      • 4 x 2gb Corsair Vengence 1600mhz cas9
      • Storage:
      • 512gb samsung SSD +1tb Samsung HDD
      • Graphics card(s):
      • EGVA GTX970
      • PSU:
      • Seasonic GX 650W
      • Case:
      • HAF 912+
      • Operating System:
      • W7 Pro
      • Monitor(s):
      • iiyama XB3270QS-B1 32" IPS 1440p

    Re: The Case is dead, long live the Case!

    Got a couple of missing bits today. Always forget something small when ordering from scan.
    A right angled sata connector
    and a Sata female to molex male connector (ie turns a sata power connector from the psu into a molex power connector.
    The reason for this is my fan controller, I didn't want to have to run another power cable all the way to the top of my case, this way I can run both my sata DVDrw and fan controller off a single psu sata lead.
    Currently considering ordering some cable sleeving to make a really neat job of this.

  7. #7
    Senior Member Pob255's Avatar
    Join Date
    Apr 2007
    Location
    The land of Brum
    Posts
    10,143
    Thanks
    608
    Thanked
    1,226 times in 1,123 posts
    • Pob255's system
      • Motherboard:
      • Asus M5A99X EVO
      • CPU:
      • FX8350 & CM Hyper 212+
      • Memory:
      • 4 x 2gb Corsair Vengence 1600mhz cas9
      • Storage:
      • 512gb samsung SSD +1tb Samsung HDD
      • Graphics card(s):
      • EGVA GTX970
      • PSU:
      • Seasonic GX 650W
      • Case:
      • HAF 912+
      • Operating System:
      • W7 Pro
      • Monitor(s):
      • iiyama XB3270QS-B1 32" IPS 1440p

    Re: The Case is dead, long live the Case!

    Just finished haveing another go on the cableing

    I thought the ebay stuff was good untill I tried to plug them in.
    The right angled connector is the wrong direction, so the end pulged into the motherboard is pointing into the center of the board not outwards and the other end pluged into my DVRr/w the cable is pointing up not down

    Went to plug in the sata to molex connector to discover it's not a sata to molex but a molex to sata
    i.e. it lets you plug a molex power cable into a sata device.
    Double checked the auction details, my boob

    I just ran the extra cable up there.


    Recently I had a nasty smell come from my pc not a good sign.
    It only happened once for a very short time and didn't linger, I searched but couldn't find the source, not by nose or eye (no scorch marks, bulging caps or burnt components)
    However I kept getting stinging eyes now and then, which also happened with the smell.

    Dureing my cable tidying I thought found the cause, my graphics card was very hot.
    I was rather worried, I took off the cooler to check for signs of burnt components.
    None, but the gpu was under a mass of paste, most of which was squished out around it and the paste on the gpu it self was rather dry so I cleaned it off and repasted it.

    Still rather toasty. I discovered the cause 180.48 driver and ntune slightly out of date as well, ment the fan was not changeing speed just sitting at 35% (note that's off gpu-z, ntune seems to miss report the fan speeds)
    Updated driver and ntune and it's behaveing correctly again.

    The top of the 9800gtx (the back of the pcb) does get quite warm, so I did an experiment
    Took off the fan I had on the northbridge heatsink so I could rest a 92mm fan on the top of the graphics card and northbridge heatsink (so it wasn't laying flat on the card)
    It's a 92mm Zalman 2800rpm, very loud but high air flow.
    Resaults were 8 degrees lower at idle (52c) and 3.5 degrees lower under load (67.5c) with the card fan on auto.

    It was after the test and I was going to replace my northbridge heatsink fan when I noticed something.
    Black marks, through it was dust at first, did a test of the fan, 2 of the 3 led's have blow.
    But at least i've found the sourch of the intermitant eye stinging. been running it now for 4 hours doing verious tests and all is well again
    (the motherboard is a fanless heat pipe design I added fans too, so no trouble running with out the fan )

    I've currently got the 92mm fan hanging off the bottom of my thermalright Ultima90 (Long bag tie through the fins and screw holes of the fan)
    So the fan is currently hanging beside the garphics card, center of fan level with pcb, not sure how much good it's doing (speed turned down with fan controller)

    Sorry no pic's for now, been too bussy sorting out the cables and testing to take photos.

Thread Information

Users Browsing this Thread

There are currently 1 users browsing this thread. (0 members and 1 guests)

Similar Threads

  1. Need a Case Long but Low
    By Mit321 in forum PC Hardware and Components
    Replies: 8
    Last Post: 27-12-2008, 05:09 PM
  2. Live wire touched case, shorting PC
    By Pleiades in forum Help! Quick Relief From Tech Headaches
    Replies: 19
    Last Post: 24-10-2008, 10:50 PM
  3. Seti is dead, long live Setiboinc!
    By 0iD in forum Software
    Replies: 14
    Last Post: 21-07-2004, 12:24 PM
  4. Removing case scratches....
    By kryptonic in forum Chassis and Mods
    Replies: 1
    Last Post: 28-08-2003, 04:51 PM

Posting Permissions

  • You may not post new threads
  • You may not post replies
  • You may not post attachments
  • You may not edit your posts
  •