Page 2 of 5 FirstFirst 12345 LastLast
Results 17 to 32 of 69

Thread: Pob's laptop mod

  1. #17
    Senior Member Pob255's Avatar
    Join Date
    Apr 2007
    Location
    The land of Brum
    Posts
    10,143
    Thanks
    608
    Thanked
    1,226 times in 1,123 posts
    • Pob255's system
      • Motherboard:
      • Asus M5A99X EVO
      • CPU:
      • FX8350 & CM Hyper 212+
      • Memory:
      • 4 x 2gb Corsair Vengence 1600mhz cas9
      • Storage:
      • 512gb samsung SSD +1tb Samsung HDD
      • Graphics card(s):
      • EGVA GTX970
      • PSU:
      • Seasonic GX 650W
      • Case:
      • HAF 912+
      • Operating System:
      • W7 Pro
      • Monitor(s):
      • iiyama XB3270QS-B1 32" IPS 1440p

    Re: Pob's laptop mod

    Well yesterday was too windy to do any painting, that's the curse of having to do any painting outside.

    Today was much better, bar riots/looting, which was a bit annoying as I went to a local art shop to see if I could pick up some airbrush medium, only to find them shutting up, as apparently the police had warned them of a possible outbreak. there was trouble on bethnal green high street last night (only minor) and up the road in hackney (major).

    However at least Sainsburys was still open at the time so I could still get my food shopping done.

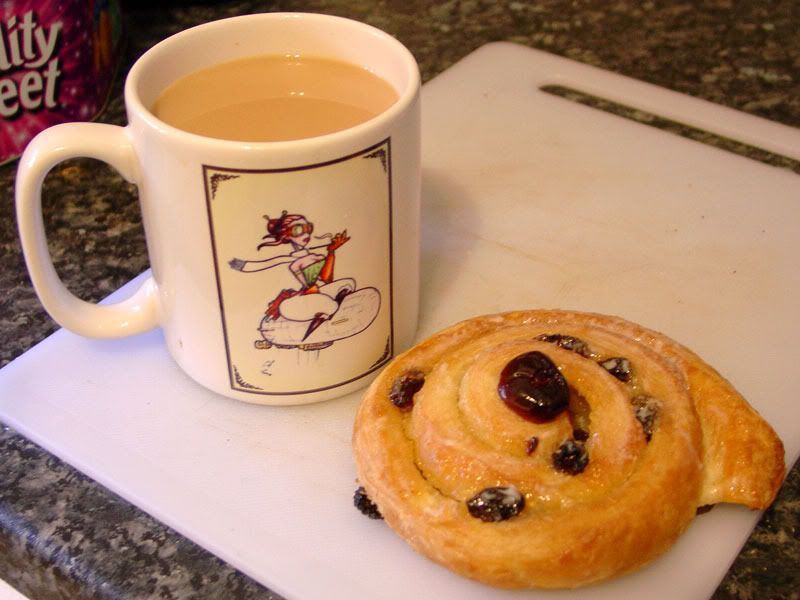
    You know what that means, modding fuel


    And today's modding fuel is raisin pastries and Tea
    That's a mug from Geof the HMZ Beverigible

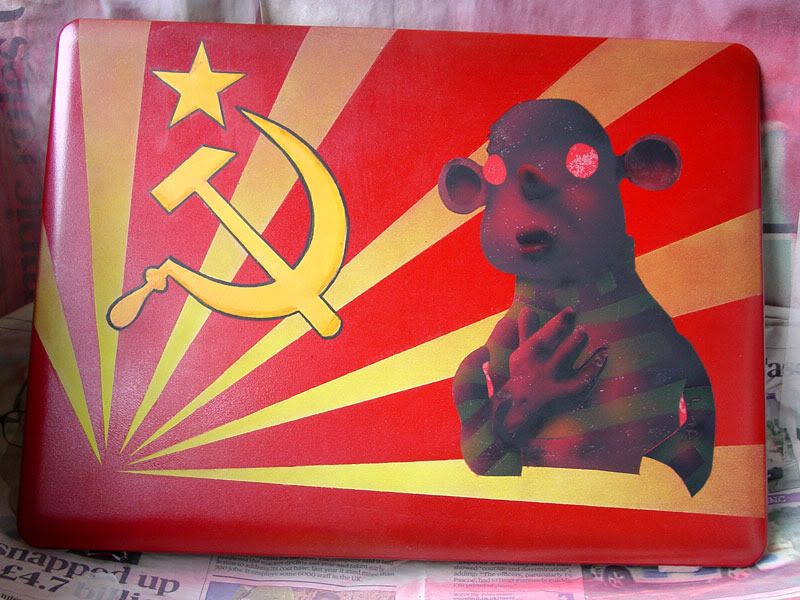
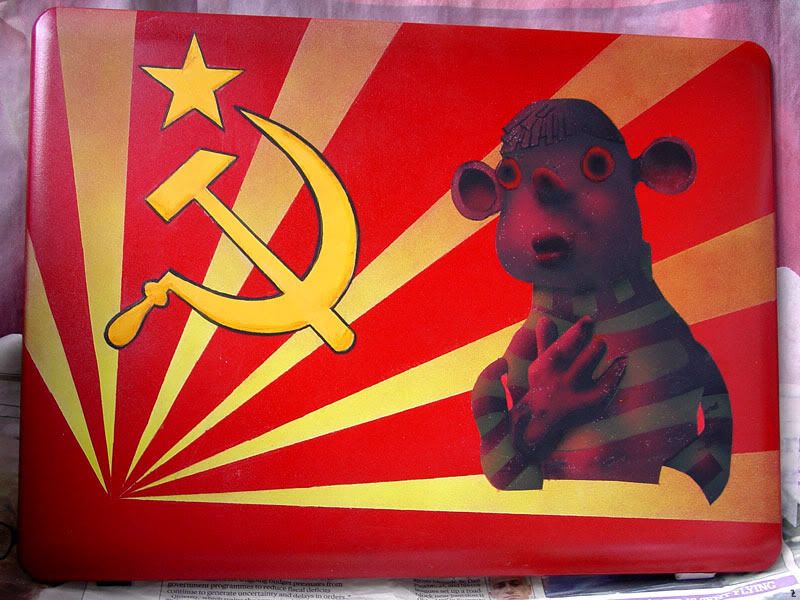
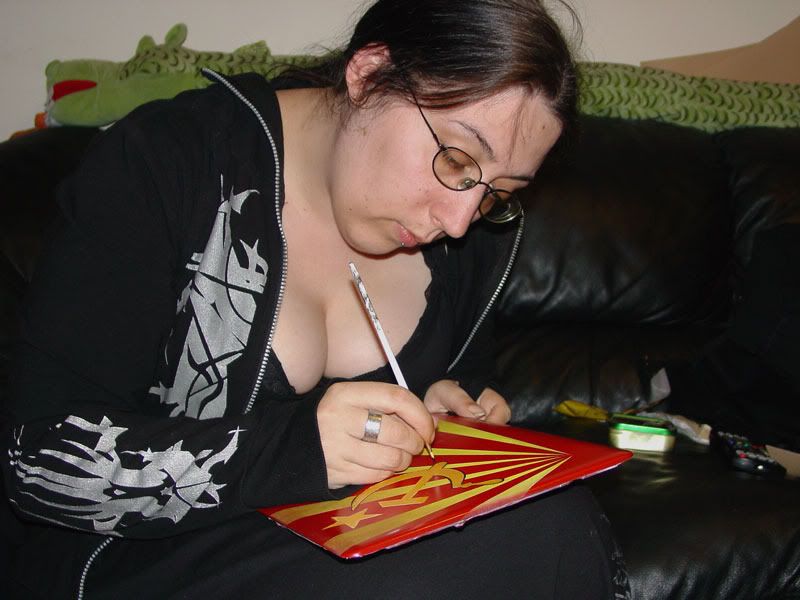
    On with the painting.

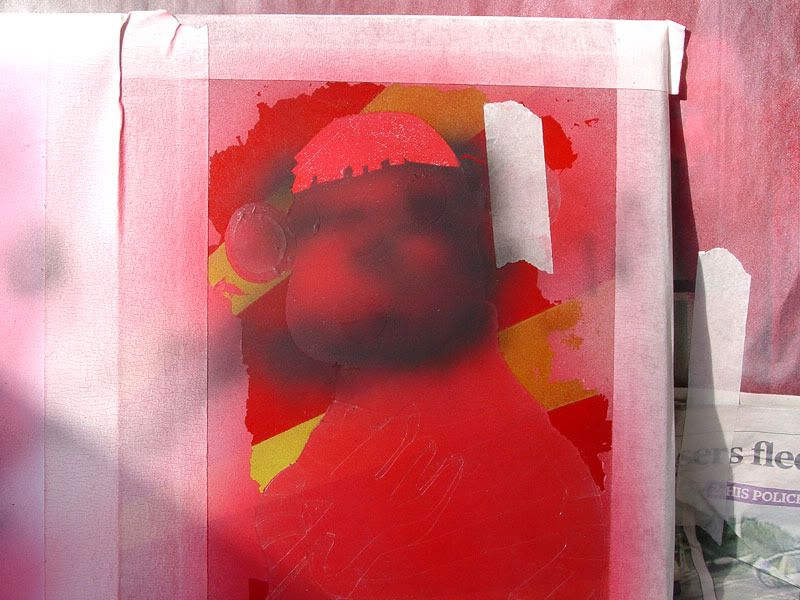
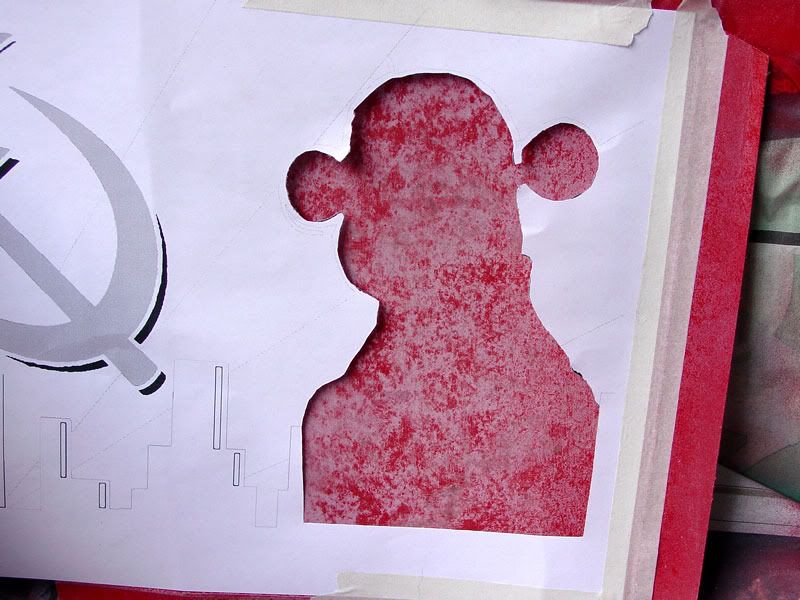
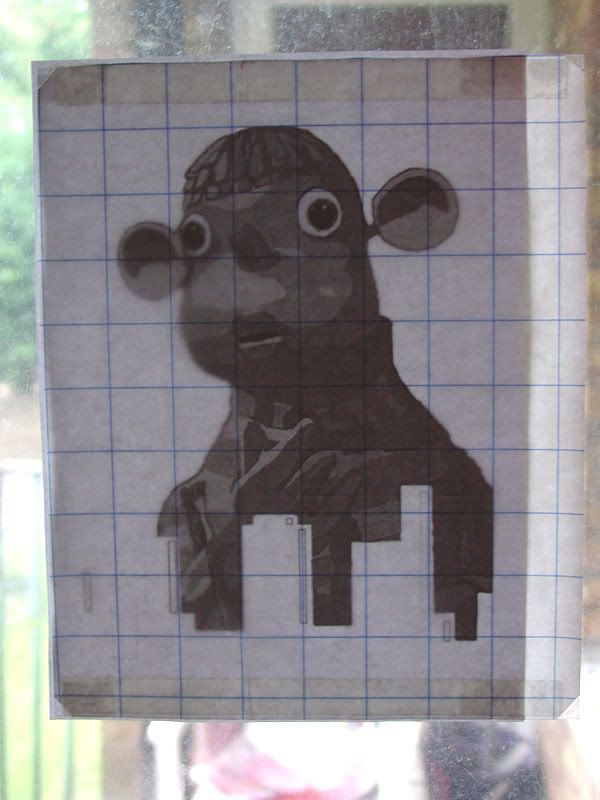
    To start with I printed out a couple of copies of my design, and decided that while I don't have correct air brush medium to thin down my good old artist acrylic I know I can do it with water.
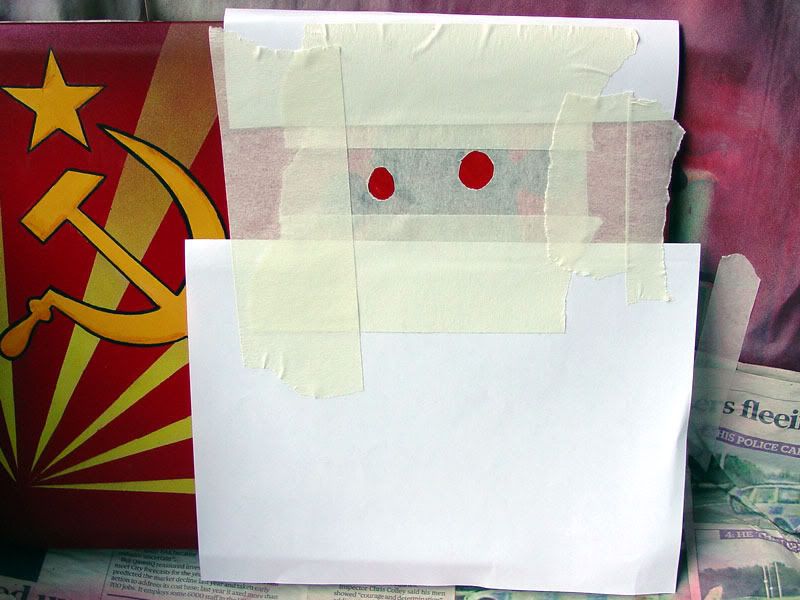
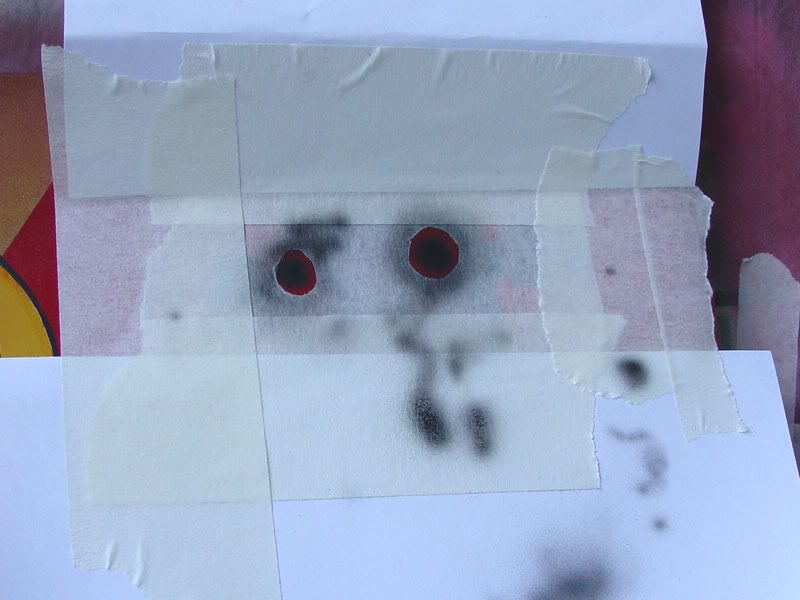
    Si I cut out one of the masks to see how much of my free hand air bushing I remember.

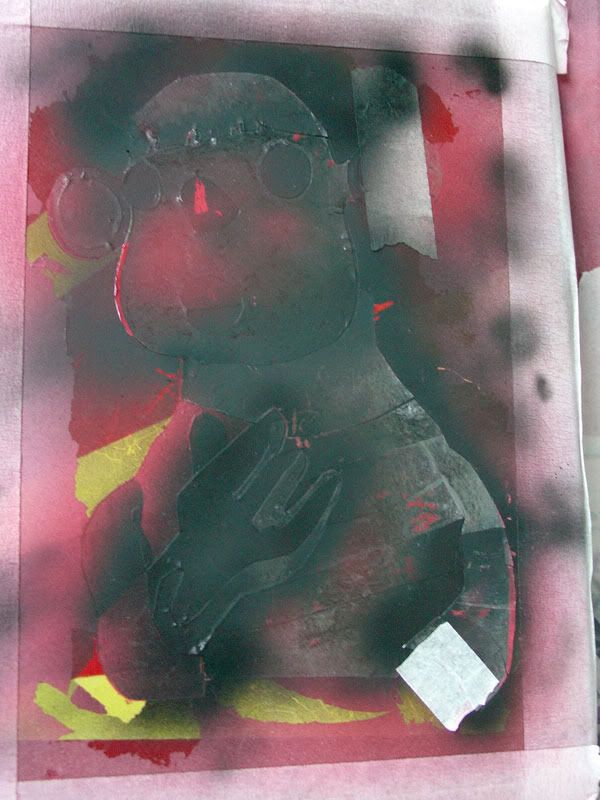
    The backing is a bit of cardboard I used to test the red metalic paint before I used it, interesting effect, looks clumped but what happened was my undercoat wasn't thick enough, so the red paint got sucked up by the cardboard leaving the sliver ontop, except in patches where the undercoat was ticker.

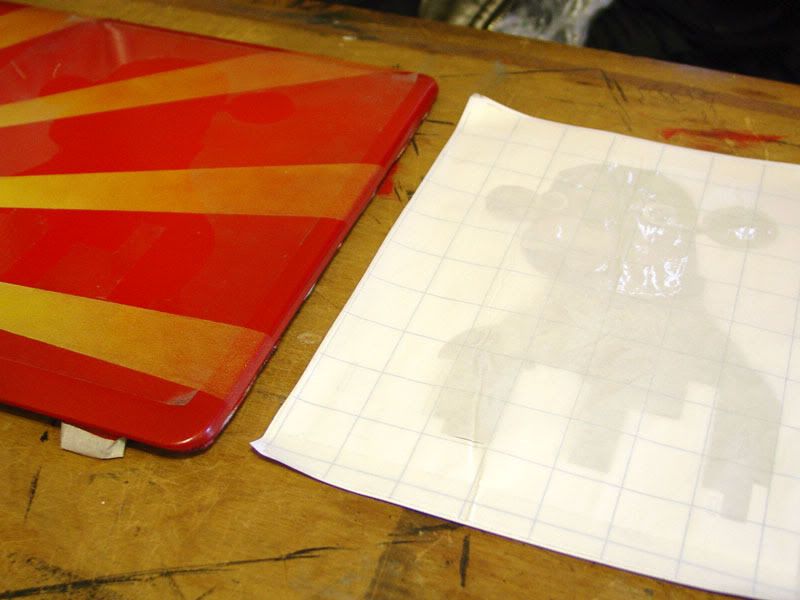
    The results . . . I'm too embarrassed to show you it wasn't good, while the mask is loose it did hold the edge cleanly enough, just my free hand skills are lacking.
    I think I'm going to have to do the final piece with multiple masks.

    However before I can do that I have to do the background rays any way.
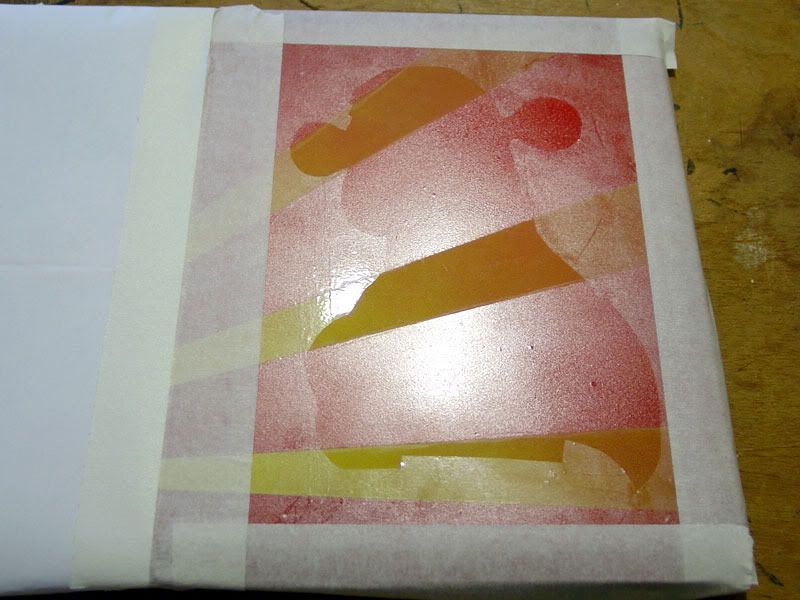
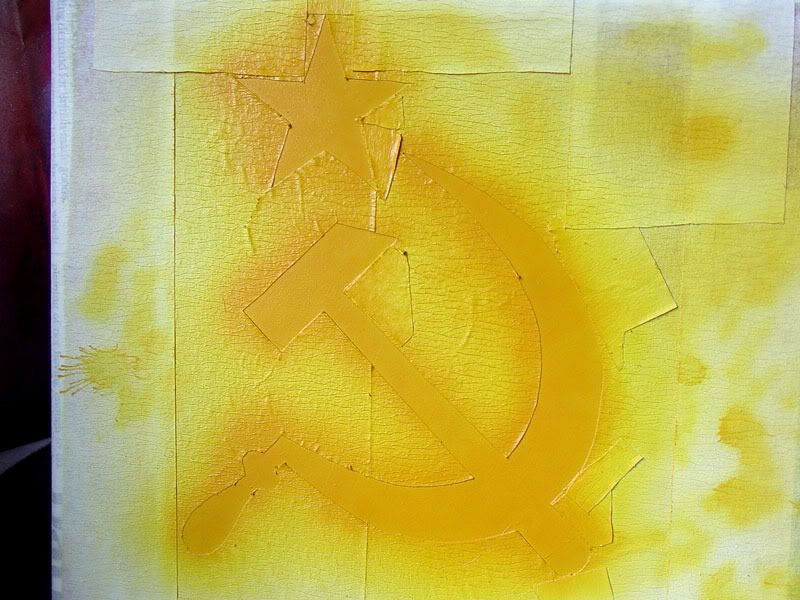
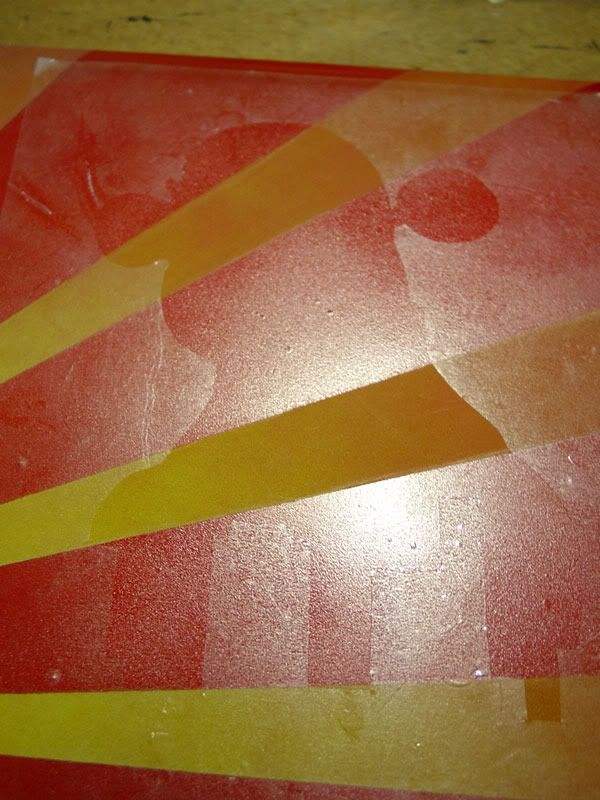
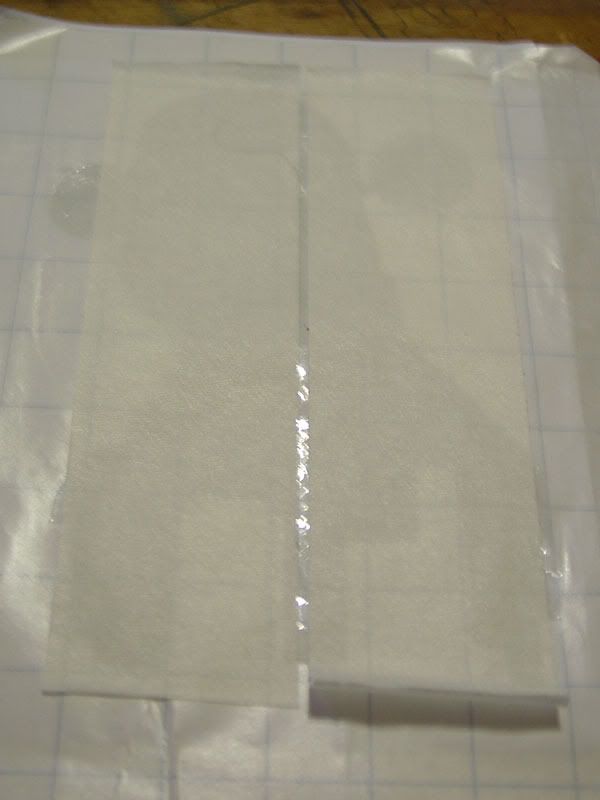
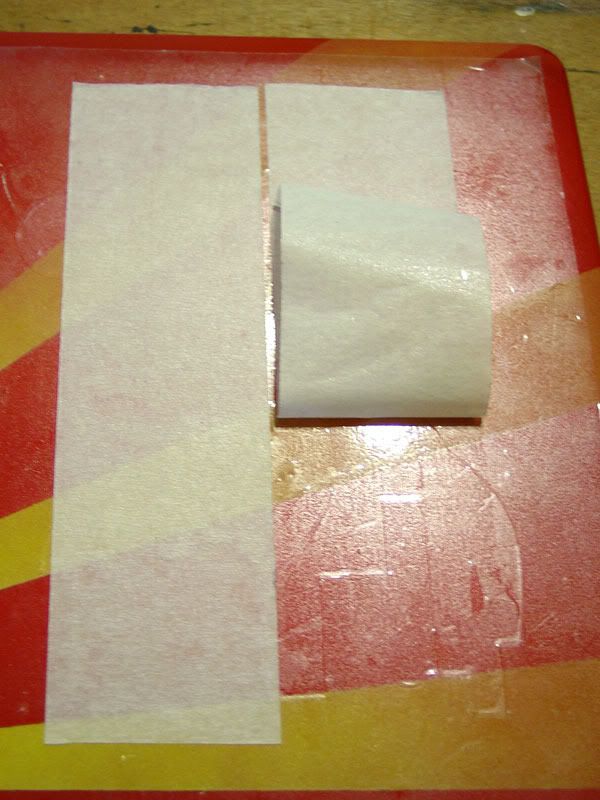
    I started off by laying them out with masking tape


    I then tried to airbrush yellow straight on, it didn't work too well
    Sorry forgot to get a photo of that.

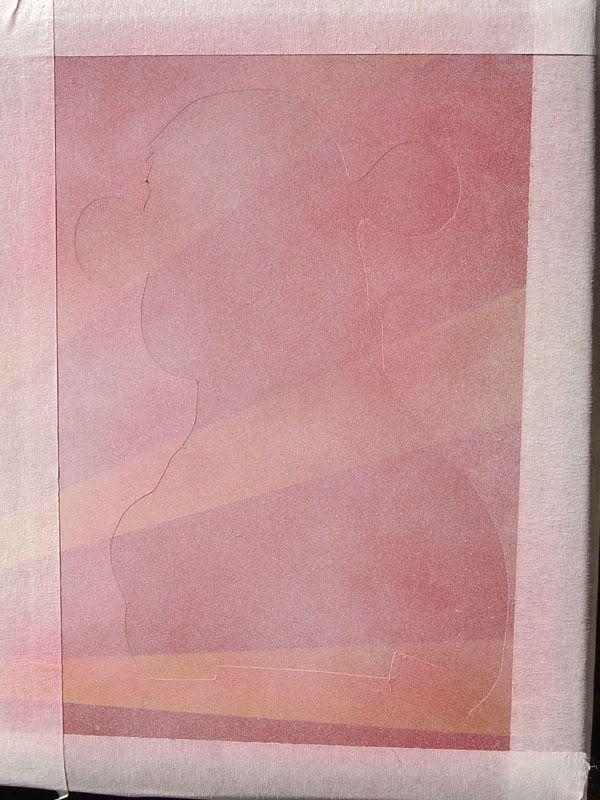
    So I wiped it off, got out my can of undercoat and used that to lay down some faded white


    Left that for an hour to dry, then had another go with the yellow air brushing, which came out much better.

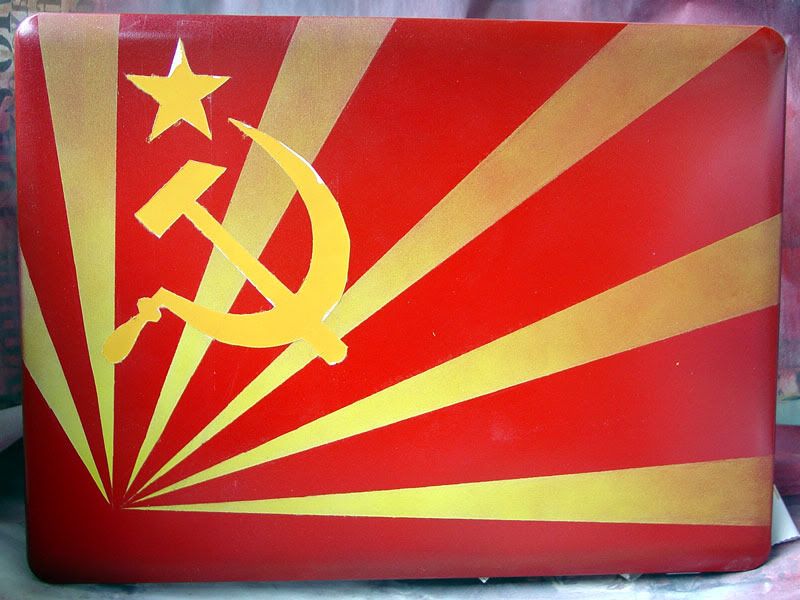
    Tape removed it looks like this
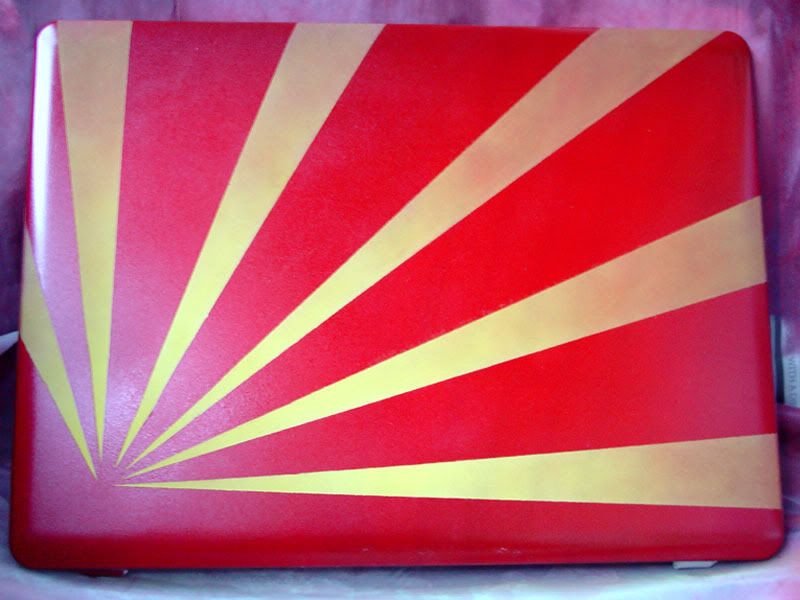

    I'm happy with that and it's more robust than just a thin layer of artist acrylic (as I know from project otherhalf)

    Going to leave that over night, before I do the next part.

  2. #18
    Qualified Eye-Tician Iron Sights's Avatar
    Join Date
    Jun 2009
    Location
    Hiding under a box
    Posts
    1,111
    Thanks
    142
    Thanked
    161 times in 78 posts
    • Iron Sights's system
      • Motherboard:
      • GA-970A-UDP3
      • CPU:
      • FX 8350
      • Memory:
      • 8GB DDR3 1600
      • Storage:
      • not enough
      • Graphics card(s):
      • R9 380
      • PSU:
      • XFX 450w
      • Case:
      • Antec 902
      • Operating System:
      • Win 10
      • Monitor(s):
      • Benq XL2411z 144Hz
      • Internet:
      • Rupert Murdock :(

    Re: Pob's laptop mod

    awesome sauce


  3. #19
    stormrazer razer121's Avatar
    Join Date
    Sep 2009
    Posts
    3,178
    Thanks
    880
    Thanked
    146 times in 128 posts

    Re: Pob's laptop mod

    Im intrested to know how you will remove the raised lines at the side? how?? it does look good btw, just them lines...
    Quote Originally Posted by TAKTAK View Post
    It was so small that mine wouldn't fit into it

  4. #20
    Senior Member Pob255's Avatar
    Join Date
    Apr 2007
    Location
    The land of Brum
    Posts
    10,143
    Thanks
    608
    Thanked
    1,226 times in 1,123 posts
    • Pob255's system
      • Motherboard:
      • Asus M5A99X EVO
      • CPU:
      • FX8350 & CM Hyper 212+
      • Memory:
      • 4 x 2gb Corsair Vengence 1600mhz cas9
      • Storage:
      • 512gb samsung SSD +1tb Samsung HDD
      • Graphics card(s):
      • EGVA GTX970
      • PSU:
      • Seasonic GX 650W
      • Case:
      • HAF 912+
      • Operating System:
      • W7 Pro
      • Monitor(s):
      • iiyama XB3270QS-B1 32" IPS 1440p

    Re: Pob's laptop mod

    Quote Originally Posted by razer121 View Post
    Im intrested to know how you will remove the raised lines at the side? how?? it does look good btw, just them lines...
    Easy actually, first I went over them with my finger nail to remove the last traces of tape and glue.
    Then I rubbed over them with the rounded back end of a craft knife, no more raised edges.
    It wasn't that bad anyway as the paint layers are thin, it was mainly traces of glue from the tap mixed with the paint.

    I also removed some tape glue traces from the bottom edge.

    I'll try and get a better photo tomorrow, it was starting to get dark by the time I took the last photo.

    I need some blue painters tape really.

  5. #21
    WEEEEEEEEEEEEE! MadduckUK's Avatar
    Join Date
    May 2006
    Location
    Lytham St. Annes
    Posts
    17,297
    Thanks
    653
    Thanked
    1,580 times in 1,006 posts
    • MadduckUK's system
      • Motherboard:
      • MSI B450M Mortar
      • CPU:
      • AMD Ryzen 5 3600
      • Memory:
      • 32GB 3200 DDR4
      • Storage:
      • 1x480GB SSD, 1x 2TB Hybrid, 1x 3TB Rust Spinner
      • Graphics card(s):
      • Radeon 5700XT
      • PSU:
      • Corsair TX750w
      • Case:
      • Phanteks Enthoo Evolv mATX
      • Operating System:
      • Windows 10 x64
      • Monitor(s):
      • Samsung SJ55W, DELL S2409W
      • Internet:
      • Plusnet 80

    Re: Pob's laptop mod

    I cant believe you left it so late in the day that you were making templates of other stuff before you decided which one to go for, with them being such different themes.

    looks very nice
    Quote Originally Posted by Ephesians
    Do not be drunk with wine, which will ruin you, but be filled with the Spirit
    Vodka

  6. #22
    Senior Member Pob255's Avatar
    Join Date
    Apr 2007
    Location
    The land of Brum
    Posts
    10,143
    Thanks
    608
    Thanked
    1,226 times in 1,123 posts
    • Pob255's system
      • Motherboard:
      • Asus M5A99X EVO
      • CPU:
      • FX8350 & CM Hyper 212+
      • Memory:
      • 4 x 2gb Corsair Vengence 1600mhz cas9
      • Storage:
      • 512gb samsung SSD +1tb Samsung HDD
      • Graphics card(s):
      • EGVA GTX970
      • PSU:
      • Seasonic GX 650W
      • Case:
      • HAF 912+
      • Operating System:
      • W7 Pro
      • Monitor(s):
      • iiyama XB3270QS-B1 32" IPS 1440p

    Re: Pob's laptop mod

    Umm if you look back at the original design the sun burst is there and has to be done first as the pob image, hammer and sickle and skyline go over the top of it.
    It's far from finished

    The initial pob mask was just done for practise and the only reason the light was failing when I finished up was because my initial air brushing the yellow on failed, so I had to undercoat it with spray can and I had to wait for the undercoat to dry.

  7. #23
    Senior Member Pob255's Avatar
    Join Date
    Apr 2007
    Location
    The land of Brum
    Posts
    10,143
    Thanks
    608
    Thanked
    1,226 times in 1,123 posts
    • Pob255's system
      • Motherboard:
      • Asus M5A99X EVO
      • CPU:
      • FX8350 & CM Hyper 212+
      • Memory:
      • 4 x 2gb Corsair Vengence 1600mhz cas9
      • Storage:
      • 512gb samsung SSD +1tb Samsung HDD
      • Graphics card(s):
      • EGVA GTX970
      • PSU:
      • Seasonic GX 650W
      • Case:
      • HAF 912+
      • Operating System:
      • W7 Pro
      • Monitor(s):
      • iiyama XB3270QS-B1 32" IPS 1440p

    Re: Pob's laptop mod

    Update time.

    Today I went down to Shoreditch as my local art shop, while having some great quality stuff didn't have any airbrush medium, I also picked up some nice liquid acrylics (brand is "Golden" it's a US import)
    The reason for this is the trouble I had with the yellow sunburst stripes, just diluting the paint with water ended up creating clumping (due to surface tension) and the final result losing it's adhesion (you can scrape it off very easily, applying the undercoat did help but really wasn't a solution.
    Airbrush medium is a premix of 3 different additives, a drying retarder (to help prevent clogging), a binder (to keep adhesion) and a flow promoter (to break surface tension) using this to thin down acrylics give a far better result than just with water.
    Using liquid acrylics also helps as the base is already far more fluid.

    (I also picked up a couple of bit for project Otherhalf, yes it's not dead yet expect an update soon™ )

    Now before we start . . . no, not a modding fuel image . . . instead I give you The great enemy of painting.


    Yes we now have cat's and although they are not allowed out onto the balcony the shed fur does follow you, Faust (pictured) is especially bad as he love to jump into your lap, demanding fuss and covering you with hair.
    I have to brush myself off before starting and still the odd one turns up in the paint and has to be carefully removed.

    Today's task is the hammer and sickle, step one is to mask it.

    I made this mask by laying down three strips of my wide masking tape onto the printout, cutting it out then peeling it off, worked fairly well it didn't stick too badly to the paper.
    And just covering the rest with newspaper, after making sure the news print wasn't coming off.

    I started off air brushing the first coat of yellow.

    I was hitting a lot of problems with flow, the paint was still a little too thick, taking the brush apart to clean it I discovered there was still black build up from my practise pob the other day.

    Once the brush was fully cleaned out I thinned the mix out a little more and added a little isopropyl it sprayed much better and stopped clogging.


    After a few coat's, one major difference here is the drying times are far longer than just thinned with water, I carefully removed the mask.

    Well that could of gone better the colour is great but I should of left it longer to dry before removing the mask, then I shouldn't of had the peeling around the edges, live an learn.
    Also a spot of bleeding, easy to clean up, just requires isopropyl and cotton buds.

    To get round the raised edges, I went over them with the rounded back of a craft knife, while the paint is still soft you can press and squeeze it down flat.
    I then had to touch up by hand the areas where the yellow had peeled.
    Still wasn't great so I got my black out and started to hand line it to cover up so of the worst of the issues and neaten it up, however my brush skills are also rather rusty and my lines where a bit wibbly.

    Luckily my otherhalf took pity on me and offered to do it for me.

    Years of comic book work put to use in modding

    And here's the final result

    The thicker lines are my fault, she had to thicken them to clean them up and I still need to do a bit of touch up on the yellow.

    Next is Pob and I'm sort of dreading that, I really don't want to mess it up.

  8. #24
    stormrazer razer121's Avatar
    Join Date
    Sep 2009
    Posts
    3,178
    Thanks
    880
    Thanked
    146 times in 128 posts

    Re: Pob's laptop mod

    wow looks like im not the only one who has a ms who can help out btw she is pretty damn handy huh! looks super sweet man
    Quote Originally Posted by TAKTAK View Post
    It was so small that mine wouldn't fit into it

  9. #25
    Member
    Join Date
    Aug 2003
    Location
    reigate
    Posts
    185
    Thanks
    0
    Thanked
    6 times in 6 posts

    Re: Pob's laptop mod

    Quote Originally Posted by Pob255 View Post
    Or go full colour
    I really like that.
    I used to do stuff on bikes. I used Frisk for the masks?
    Last edited by integerspin; 11-08-2011 at 07:05 PM.
    immer in der Scheiße, ist es nur die Tiefe, die sich verändert.

  10. #26
    Senior Member Pob255's Avatar
    Join Date
    Apr 2007
    Location
    The land of Brum
    Posts
    10,143
    Thanks
    608
    Thanked
    1,226 times in 1,123 posts
    • Pob255's system
      • Motherboard:
      • Asus M5A99X EVO
      • CPU:
      • FX8350 & CM Hyper 212+
      • Memory:
      • 4 x 2gb Corsair Vengence 1600mhz cas9
      • Storage:
      • 512gb samsung SSD +1tb Samsung HDD
      • Graphics card(s):
      • EGVA GTX970
      • PSU:
      • Seasonic GX 650W
      • Case:
      • HAF 912+
      • Operating System:
      • W7 Pro
      • Monitor(s):
      • iiyama XB3270QS-B1 32" IPS 1440p

    Re: Pob's laptop mod

    Update time again . . . this was actually done yesterday but I'm only posting it now for reasons that will become clear.

    I bit the bullet, cannot put it off any longer, it's time to work on the Pob image
    To start with I dug up my roll of masking film to make the mask.
    This stuff has been rolled up for a while so I had to cut a section then put it under a box full of comics (it was handy heavy weight) to press flat, left that over night.

    Then I started on making the mask, as I don't have a light box the easy way to trace the image was to layer the film on top on a printout and tape it to the window.


    This works great and I could directly cut out the mask.

    The first thing I did was to peel off the outer edge and lay it down.


    This didn't go on so well (PS the paint is flat, it looks lumpy because the camera catches the light from the metallic sparkles in the paint)

    You can see the creases in the top corner caused by it getting slightly distorted as I laid it down.
    This got me to thinking how I'd be able to avoid that and get all the bits correctly placed, as the mask is rather complex.

    I was racking my brain when I remembered how to lay masks down, back from when I was at college and did airbrushing as part of my foundation course.

    Masking tape, you lay strips over the mask so you can lift it off in one go, lay it onto your work surface as a single bit.


    laid down and carefully peeling off the tape to leave the mask behind, worked a charm.

    That's when I remembered why I did the outer edge first, I need to put down a new base of red to conceal the sun rays.
    In my enthusiasm I'd laid down the whole mask and there's just no easy way to lift it again.

    I had to strip it all off, make a new mask and start again from scratch.
    Disheartened by this, I gave up for the day, I blame a lack of modding fuel, see those pictures of food I post are not just for show they are a vital modding resource!

  11. Received thanks from:

    razer121 (19-08-2011)

  12. #27
    Registered User
    Join Date
    Jul 2003
    Location
    Cornwall/Weston-Super-Mare
    Posts
    5,337
    Thanks
    438
    Thanked
    309 times in 262 posts
    • Behemoth's system
      • Motherboard:
      • Gigabyte mATX
      • CPU:
      • Phenom 2 X2 555 BE
      • Memory:
      • 8 Gig DDR3 Corsair XMS 3 1600 MHz
      • Storage:
      • 4 TB's Storage
      • Graphics card(s):
      • Gigabyte GTX 460 OC2
      • PSU:
      • OCZ StealthStream 2 600 Watt
      • Case:
      • Silverstone TJ08-E
      • Operating System:
      • Windows 7 64 Bit
      • Monitor(s):
      • HP x23LED
      • Internet:
      • BT Broadband

    Re: Pob's laptop mod

    Good work mate, don't have the guts or the skill to do that to my laptop !

  13. #28
    Senior Member Pob255's Avatar
    Join Date
    Apr 2007
    Location
    The land of Brum
    Posts
    10,143
    Thanks
    608
    Thanked
    1,226 times in 1,123 posts
    • Pob255's system
      • Motherboard:
      • Asus M5A99X EVO
      • CPU:
      • FX8350 & CM Hyper 212+
      • Memory:
      • 4 x 2gb Corsair Vengence 1600mhz cas9
      • Storage:
      • 512gb samsung SSD +1tb Samsung HDD
      • Graphics card(s):
      • EGVA GTX970
      • PSU:
      • Seasonic GX 650W
      • Case:
      • HAF 912+
      • Operating System:
      • W7 Pro
      • Monitor(s):
      • iiyama XB3270QS-B1 32" IPS 1440p

    Re: Pob's laptop mod

    Quote Originally Posted by Behemoth View Post
    Good work mate, don't have the guts or the skill to do that to my laptop !
    It's not that hard it's just painting

    I've not had the guts to do anything major with the internals laptops are too much custom hardware and I don't trust myself to go poking around with a soldering iron in one.
    But stripping one apart and replacing bits is easy, just like a normal pc but smaller and a bit more fiddly.

    Main problem can be trying to remember which bit and screw goes where when you come to put it back together, check online for service manuals, depends on make but most laptops have sets of instructional diagrams showing how to get them apart, which can be a great help.

  14. #29
    Senior Member Pob255's Avatar
    Join Date
    Apr 2007
    Location
    The land of Brum
    Posts
    10,143
    Thanks
    608
    Thanked
    1,226 times in 1,123 posts
    • Pob255's system
      • Motherboard:
      • Asus M5A99X EVO
      • CPU:
      • FX8350 & CM Hyper 212+
      • Memory:
      • 4 x 2gb Corsair Vengence 1600mhz cas9
      • Storage:
      • 512gb samsung SSD +1tb Samsung HDD
      • Graphics card(s):
      • EGVA GTX970
      • PSU:
      • Seasonic GX 650W
      • Case:
      • HAF 912+
      • Operating System:
      • W7 Pro
      • Monitor(s):
      • iiyama XB3270QS-B1 32" IPS 1440p

    Re: Pob's laptop mod

    Update: this actually covers yesterday and today.

    After Thursday's botched up mask attempt, I've learnt my lesson.

    Today's modding fuel is Banoffee muffins

    Correctly fuelled I got on with the pob mask mkII

    To start with I simplified it somewhat

    The lines mark where I'll be cutting, I've decided against the colour blocks and I'm going to do a more standard shaded airbrushing.
    I've also extended the image a bit as the silhouette skyline will be going over it and this way I can make some adjustments.

    I then did a repeat of the day before taping it to the window to act as a poor man's light box, I didn't bother getting a photo of this stage as you've already seen it before.

    This time I transferred the outer edge cleanly and didn't move the middle across.

    I covered up the rest of the lid with tape and paper, ready to lay down a base coat of red.


    Step one a light dusting with the primer, I didn't want this thick so I kept the spray can a good 18 to 24 inches away.
    Once that had dried I went over it with a tack cloth to remove any excess, which is very important to do with this sort of matte undercoat and more so with a light dusting from a distance, the finish is a true matte ie it's dry and powdery, so there's quite a bit of lose surface paint.


    I then used my air brush to lay down a layer of red to form the base coat.

    For those of you interested I'm using Golden brand Liquid Acrylics http://www.goldenpaints.com/products...id/fldcht1.php mixed with Liquitex Airbrush medium http://www.liquitex.com/airbrushmedium/ for this airbrushing, about a 1:2 ratio it's working far better than watered down artist acrylic paint.
    I'm not using neat black but a mix of black and raw umber which is an old favourite of mine from my fine art days, as it gives you a brown black rather than a blue black and is richer and more natural looking.


    This is at the start, I've just done the face, lifted off the mask for the hair and I've spotted my first major mistake, I didn't leave both the undercoat and base colour layer enough time to fully dry, so the mask has picked off spots of paint this has plagued me through this airbrushing.

    Never mind, too late now just had to crack on.

    This is a good chunk in, I've done the face, body, left arm and right hand, recovering as I do each section where I don't want overlaping shading.
    this is a good example of what I mean, the main chunk of the right arm is actually covered here, the right cuff and right shoulder are uncovered as those are the bit's I've just done, to create the feeling of the arm being at an angle I don't want the arm shading blended into the cuff.

    A couple of other things you'll notice, the bits of tae are to keep some sections of mask together so it's easier to lift them as one bit, and the paint really doesn't stick to the masking film and peels off.

    This was about as far as I got, I still had the nose, mouth, ears, eyes and stripes to do.
    The light was failing so I had to call it a day, having to work outdoors on the balcony is a bit of an issue as I've limited by daylight and wind, but I just don't have space in the flat to work indoors.
    And it does help keep the cat hair out of the paint

    Today was another wind free day so I managed to get it all finished


    Not the best of photos, however you can see that to do the stripes I've lightly gone over them with yellow, not enough to give them a solid bright yellow or overwhelm the shading.
    I've lifted off almost all the mask so I can check it for any needed tweaks, touch up's or mistakes, in fact I'd just gone over the edges of the ears because they where too light.
    You can also see some nasty patches of paint lifting on the left arm, I've touched them up slightly by hand with a brush.

    Just the eye's left and I was planning to do them by hand.

    Mask fully removed and my god, the eye's! a lot of lifting there

    However that's ok I'm planning to do them in a creamy off white . . .


    . . . Or maybe not, that's just far too bright and contrasty.
    Once that was dry I re-tinted them with the red, it was better but rather creepy looking (sorry no photo)


    So a quick mask was knocked up out of tape and paper, so I can airbrush them to make them fit in more with the rest.


    Had some light rain and dark clouds at this point, so the camera hasn't picked it up well, they are not solid black honest guv.


    With the mask removed this is what they look like, now I just need to do a few brush touch ups.


    And we're done, I'm rather pleased with the result.
    The lifting was annoying but I've cleaned up the worst of it and I do sort of like the slight roughness it makes.

    Hopefully the rain will hold off tomorrow and I'll be able to make a start on the skyline.

  15. #30
    Oh Crumbs.... Biscuit's Avatar
    Join Date
    Feb 2007
    Location
    N. Yorkshire
    Posts
    11,193
    Thanks
    1,394
    Thanked
    1,091 times in 833 posts
    • Biscuit's system
      • Motherboard:
      • MSI B450M Mortar
      • CPU:
      • AMD 2700X (Be Quiet! Dark Rock 3)
      • Memory:
      • 16GB Patriot Viper 2 @ 3466MHz
      • Storage:
      • 500GB WD Black
      • Graphics card(s):
      • Sapphire R9 290X Vapor-X
      • PSU:
      • Seasonic Focus Gold 750W
      • Case:
      • Lian Li PC-V359
      • Operating System:
      • Windows 10 x64
      • Internet:
      • BT Infinity 80/20

    Re: Pob's laptop mod

    haha, that looks ace!

  16. #31
    stormrazer razer121's Avatar
    Join Date
    Sep 2009
    Posts
    3,178
    Thanks
    880
    Thanked
    146 times in 128 posts

    Re: Pob's laptop mod

    wow that is some impressive air brushing! you have skill chap nice work!
    Quote Originally Posted by TAKTAK View Post
    It was so small that mine wouldn't fit into it

  17. #32
    Registered User
    Join Date
    Jul 2003
    Location
    Cornwall/Weston-Super-Mare
    Posts
    5,337
    Thanks
    438
    Thanked
    309 times in 262 posts
    • Behemoth's system
      • Motherboard:
      • Gigabyte mATX
      • CPU:
      • Phenom 2 X2 555 BE
      • Memory:
      • 8 Gig DDR3 Corsair XMS 3 1600 MHz
      • Storage:
      • 4 TB's Storage
      • Graphics card(s):
      • Gigabyte GTX 460 OC2
      • PSU:
      • OCZ StealthStream 2 600 Watt
      • Case:
      • Silverstone TJ08-E
      • Operating System:
      • Windows 7 64 Bit
      • Monitor(s):
      • HP x23LED
      • Internet:
      • BT Broadband

    Re: Pob's laptop mod

    Nice work, do you do commissions ?

Thread Information

Users Browsing this Thread

There are currently 1 users browsing this thread. (0 members and 1 guests)

Similar Threads

  1. New Laptop for my Girlfriend.
    By Rookie1986 in forum SHOPPING AND CLASSIFIEDS
    Replies: 10
    Last Post: 13-08-2010, 10:02 AM
  2. Nvidia Laptop issues?
    By mercyground in forum PC Hardware and Components
    Replies: 22
    Last Post: 19-08-2008, 02:56 PM
  3. Laptop Dual Screen...
    By streetster in forum Graphics Cards
    Replies: 4
    Last Post: 22-09-2004, 09:55 PM
  4. Value Laptop @ £799?
    By aeonf242 in forum Retail Therapy and Bargains
    Replies: 5
    Last Post: 11-09-2004, 09:41 PM

Posting Permissions

  • You may not post new threads
  • You may not post replies
  • You may not post attachments
  • You may not edit your posts
  •