• HEXUS
  • HEXUS.tv
  • channel
  • gaming
  • lifestyle
  • trust
  • community
  • ESReality
  • HEXUS.community discussion forums

    Welcome to the HEXUS.community discussion forums forums.

    You are currently viewing our boards as a guest which gives you limited access to view most discussions and other features. By joining our free community you will have access to post topics, respond to polls and access many other special features. Registration is fast, simple and absolutely free so please, join our community today!

    Go Back   HEXUS.community discussion forums > HEXUS.help - buying advice & technical queries > HEXUS.hardware > Chassis & system 'modding' > Project Logs

    Project Logs Run a thread in this forum about your latest project.

    Reply
     
    LinkBack Thread Tools
    Old 02-09-2009, 11:31 AM   #1 (permalink)
    disMember
     
    M0nkeyb0Y's Avatar
     
    Join Date: Apr 2005
    Location: Kent
    Posts: 856
    Thanks: 154
    Thanked 28 Times in 22 Posts
    M0nkeyb0Y's system
    M0nkeyb0Y's Tinderbox

    disclaimer: I am fully aware that placing a few hundred watts of electrical components inside an old wooden desk may appear a touch fool-hardy to some... I am also aware that the level of workmanship and planning that went into this project are 'light' at best; however I would love to have some feedback!

    I've always wanted to build a PC into an old pedestal desk but have been put off in the past by three factors:
    1 - the prohibitive cost of a decent looking pedestal desk
    2 - justifying taking a jigsaw to a piece of old furniture
    3 - fire

    I dealt with the first two factors by finding a pretty beaten up desk on eBay for 81 squids (the cost of a half decent case, I mused); and I managed to bury the third factor deep enough in the back of my mind for it to no longer be an issue.

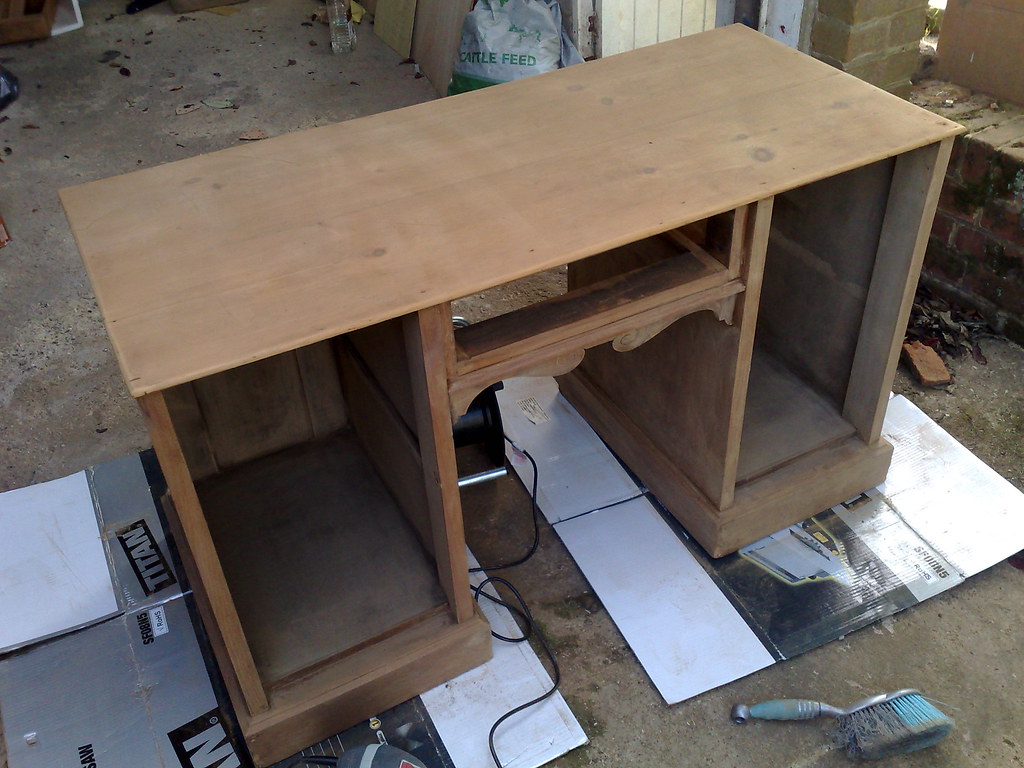
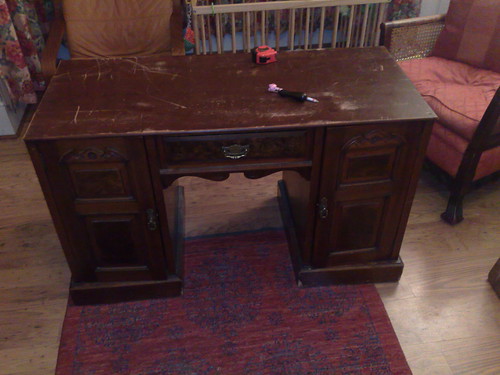
    Here's the desk; it has a large marble top which isn't pictured:


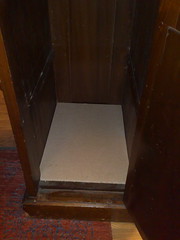
    If I removed the central shelf I could, I guess, just put a tower in one of the cupboards:


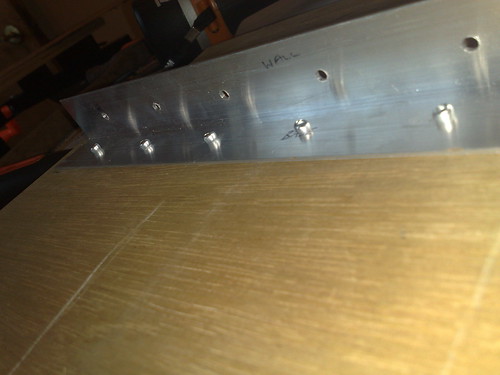
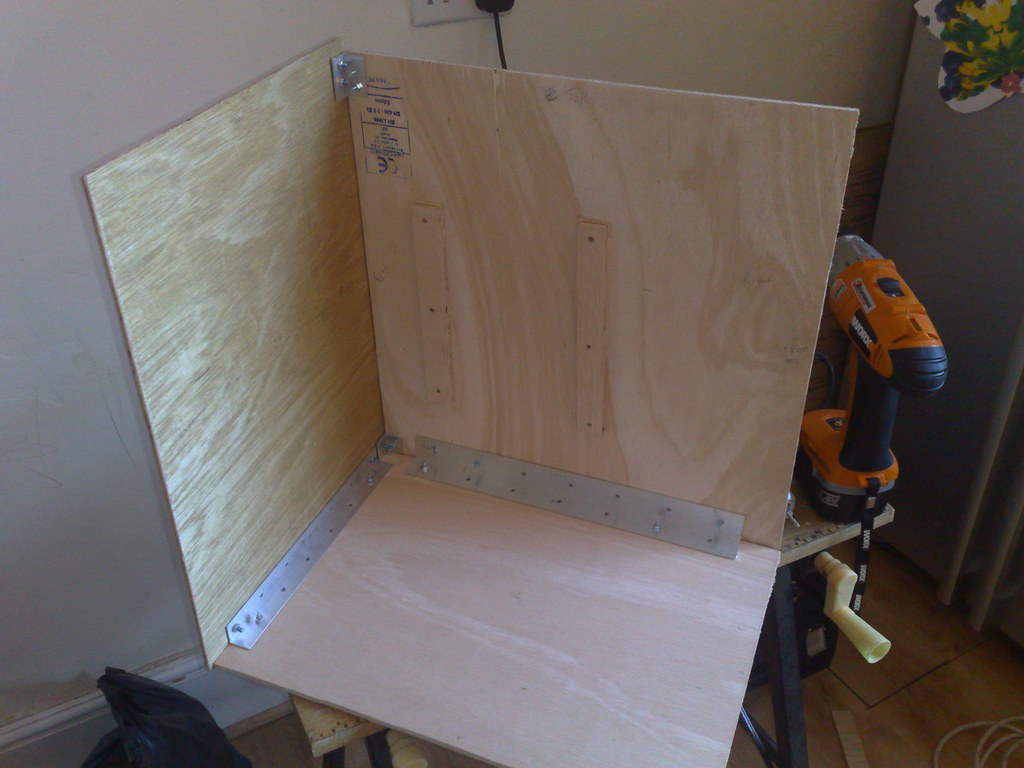
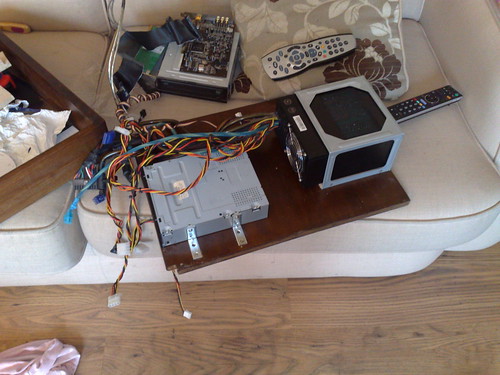
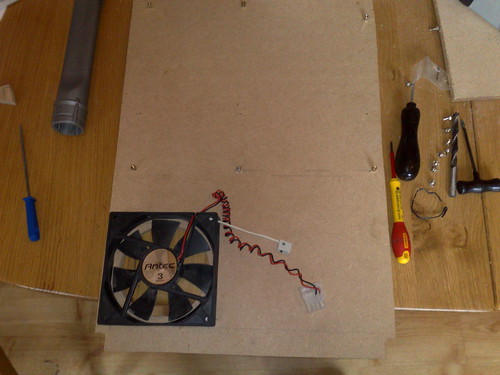
    Where's the fun in that?, right I'll cannibalise my Antec 180 for cages etc, but first I need a motherboard tray:


    fixed
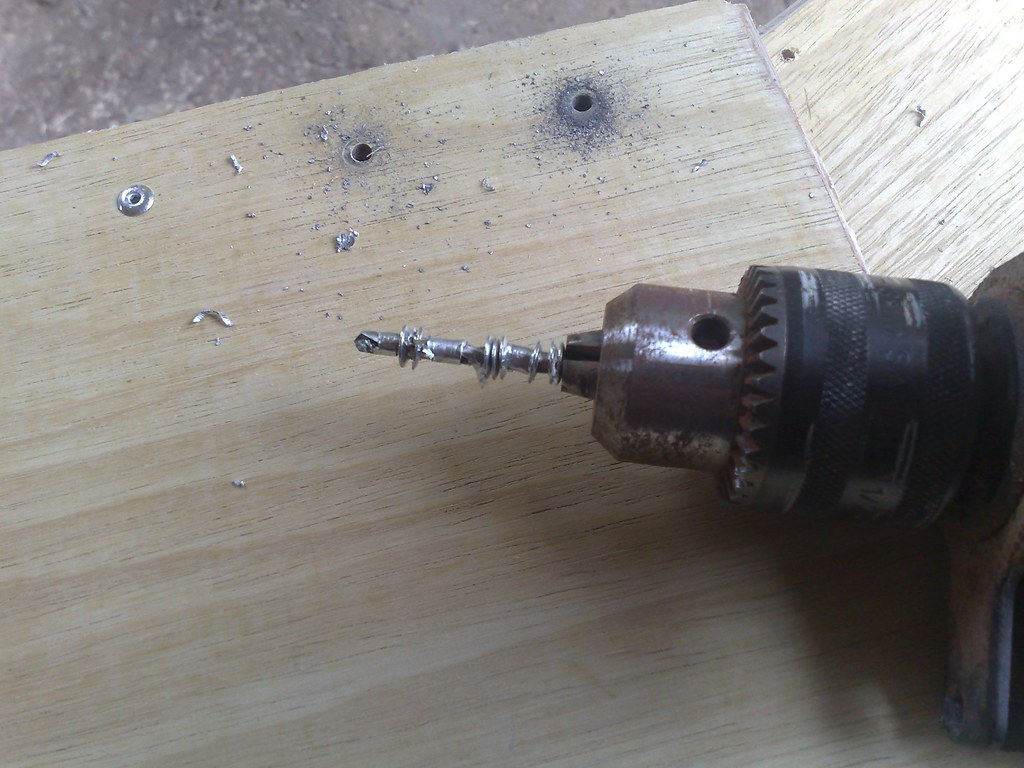
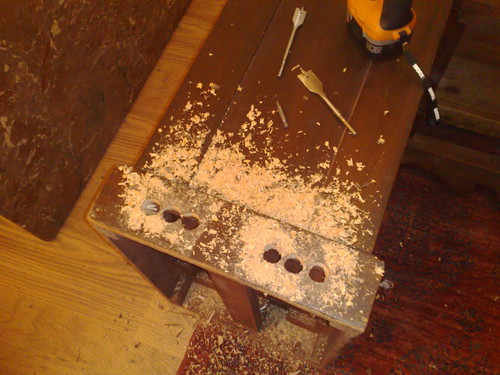
    Right, let’s get some airflow on the scene, flip the desk over, hole-saw-tastic:


    a little rougher than I would have liked, hey ho it's at the back though.


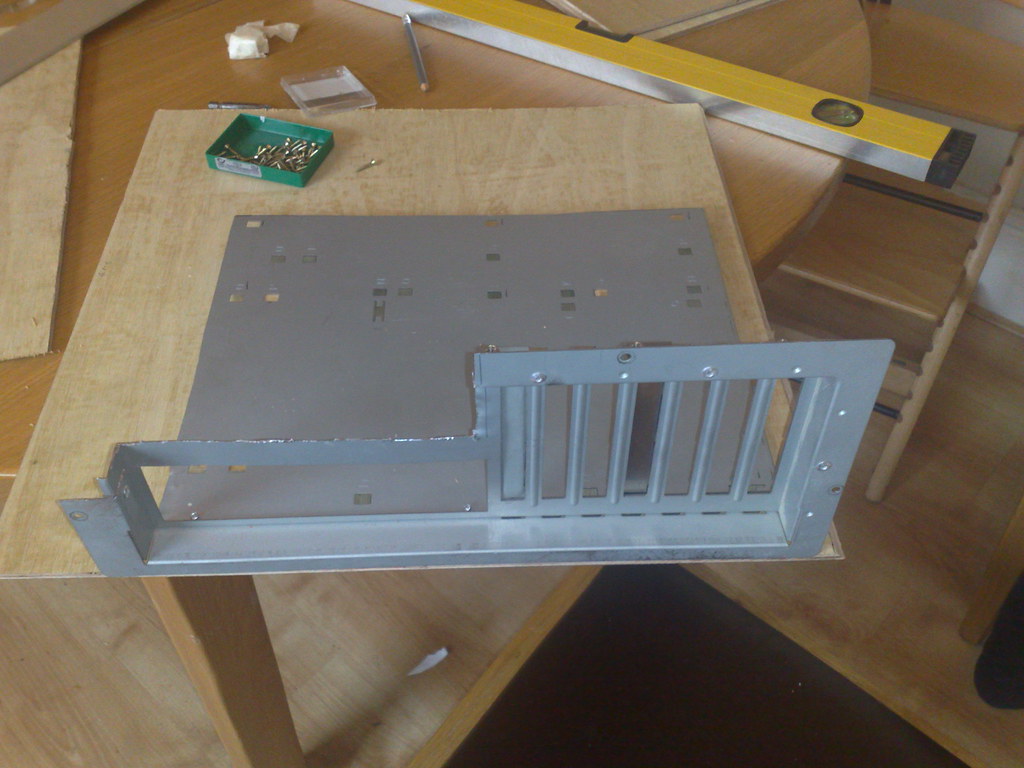
    that'll do for the mobo, hard drive cage and fan; now I need somewhere for the PSU and DVDR...

    thank you Antec


    the brackets for the drive are just small galvanised L brackets from B&Q/Homebase etc, fit perfectly.

    OK - those are all the pics I can find; after this stage I added a power button and jigged out appropriate holes at the rear - then it was done. When I get home I'll take a couple of pictures of it in its "completed" state, and post on where I feel I went wrong and what I'll be changing.

    Hope you like it.

    M0nkeyb0Y is offline   Reply With Quote
    Received thanks from:
    mycarsavw (02-09-2009), oolon (02-09-2009), Pob255 (02-09-2009), pollaxe (02-09-2009), UseItNow (02-09-2009)
    Old 02-09-2009, 01:05 PM   #2 (permalink)
    You Stupid Bi..atch! FIN
     
    Join Date: Aug 2007
    Location: Brum
    Posts: 1,077
    Thanks: 110
    Thanked 34 Times in 31 Posts
    UseItNow's system
    Re: M0nkeyb0Y's Tinderbox

    Looking good mate, I've always wanted to do something for a media centre, so even more compact.

    Will be keeping an eye on this project.

    Thanks!

    UseItNow is offline   Reply With Quote
    Old 02-09-2009, 02:12 PM   #3 (permalink)
    Senior Member
     
    Pob255's Avatar
     
    Join Date: Apr 2007
    Location: London
    Posts: 4,096
    Thanks: 155
    Thanked 334 Times in 311 Posts
    Pob255's system
    Re: M0nkeyb0Y's Tinderbox

    Looking good so far.

    Wow this section of the forum was always pritty dead, now we've got a few on going builds.
    Maybe I'm self-conceited, but I wonder if I've kicked off something good with my log

    Back to the build at hand.

    Did you see MoonPig's desk pc? Show Us Your Workspace/Desk
    It's basically the same thing you're trying to build.

    I loved his layout of the motherboard at the top then a glass window in the top of the desk so you can see the motherboard through it.

    Here's an idea for you, if you're going for it totally concealed in the desk.
    • Get some big assed 200mm+ fans, cut holes in the back of the desk at the bottom for them.
    • Mount PSU vertically, i.e. cut a hole in the bottom of the desk so the psu is drawing in air from inside and pushing the air out of the desk through the hole in the bottom.
    • Make a front panel for the cupboard or a latch to keep the door closed and some methord of sealing the edges. (some PaxMate around the edges of the door or cupboard should work well )
    • Cut a good sized hole in the front of the middle shelf for air flow
    • Cut a large hole in the upper section of the back of the cupboard, possibly fit another 2x 200mm+ fans
    This layout should mean that air is drawn in at the bottom half of the back of the cupboard, flow through the lower section, up through the deviding hole at the front of the shelf, flow through the upper section and finally out at the upper half of the back of the cupboard.
    Thanks to the 220mm fans that should give you plenty of air flow while keeping the noise level very low.
    Oh and you'd probably need to make some form of dust filter and the intake fans.

    These are the sort of fans I'm talking about
    http://www.scan.co.uk/Products/220mm...LUE-LED-lights
    I've also seen a non-LED version of that Akasa fan.

    And you could try asking on the Antec section to see if they could supply you with the top fan from the 1200, as that has both speed switches and led on/off switch.
    Or the top fan from the 900, as that has no LED's, just speed switch.

    If the wood is decent then it should be easy enough to sand down and re-varnish it to make it look less battered.

    Pob255 is offline   Reply With Quote
    Received thanks from:
    M0nkeyb0Y (02-09-2009)
    Old 02-09-2009, 02:24 PM   #4 (permalink)
    11-11-1918 > 11-11-2009
     
    mycarsavw's Avatar
     
    Join Date: Feb 2007
    Posts: 2,898
    Thanks: 448
    Thanked 229 Times in 190 Posts
    mycarsavw's system
    Re: M0nkeyb0Y's Tinderbox

    Damn you!!

    I was planning this sort of thing ages ago (when you posted here about it) and I still haven't done it.

    So jealous

    Originally Posted by TAKTAK View Post
    [...] just incase people had stopped playing silly buggers and made offers via PM

    Let me know which way you prefer
    Fnar!
    mycarsavw is offline   Reply With Quote
    Received thanks from:
    M0nkeyb0Y (02-09-2009)
    Old 02-09-2009, 02:42 PM   #5 (permalink)
    Senior Member
     
    Join Date: Mar 2007
    Location: London
    Posts: 410
    Thanks: 22
    Thanked 29 Times in 27 Posts
    oolon's system
    Re: M0nkeyb0Y's Tinderbox

    Very nice! I look forward to seeing it completed, I don't think you should worry to much about fire I think your computer will start complaining long before your desk has a problem. Combustion happens about 500-800 degrees C, and bad things only start happening (gassing) about 300. The main problem with wood is it is a good insulator, it will not radiate any of the heat so do need a good air flow which you are doing. If that is not enough, water cool the things and mount those on the back of the desk. You have a lot of space so you could even duct/box the area so the flow comes in from the back and is vented out the back and never comes near the rest of the computer!
    oolon is offline   Reply With Quote
    Received thanks from:
    M0nkeyb0Y (02-09-2009)
    Old 02-09-2009, 03:11 PM   #6 (permalink)
    Senior Member
     
    Pob255's Avatar
     
    Join Date: Apr 2007
    Location: London
    Posts: 4,096
    Thanks: 155
    Thanked 334 Times in 311 Posts
    Pob255's system
    Re: M0nkeyb0Y's Tinderbox

    As oolon said, I doubt it'll get hot enough to burn the wood, just make sure there's no sawdust left in there

    Heat build up, which could probably damage hard drives and other components would be a bigger issue without air flow.
    Which is why I posted that 200mm+ fan ventalation idea

    Pob255 is offline   Reply With Quote
    Old 05-09-2009, 11:29 PM   #7 (permalink)
    Member
     
    Join Date: Jul 2009
    Location: Datchworth, Herts
    Posts: 128
    Thanks: 3
    Thanked 4 Times in 3 Posts
    laywill's system
    Re: M0nkeyb0Y's Tinderbox

    Looks good, but remember to keep the airflow high so as to avoid "server disease" i.e. trying to cram too much into too small a space and overheating the lot.

    Last edited by laywill; 14-09-2009 at 06:01 PM..
    laywill is offline   Reply With Quote
    Old 08-09-2009, 08:08 PM   #8 (permalink)
    Registered+
     
    Join Date: Sep 2009
    Posts: 35
    Thanks: 0
    Thanked 2 Times in 2 Posts
    woody_294's system
    Re: M0nkeyb0Y's Tinderbox

    Looks to be interesting! Just out of interest what kinda spec is going in it?
    woody_294 is offline   Reply With Quote
    Old 09-09-2009, 04:14 PM   #9 (permalink)
    disMember
     
    M0nkeyb0Y's Avatar
     
    Join Date: Apr 2005
    Location: Kent
    Posts: 856
    Thanks: 154
    Thanked 28 Times in 22 Posts
    M0nkeyb0Y's system
    Re: M0nkeyb0Y's Tinderbox

    Originally Posted by woody_294 View Post
    Looks to be interesting! Just out of interest what kinda spec is going in it?
    My system in the "my system" tag under my avatar. Nothing special, but want to make sure the idea and execution are solid before spending any dollar on a new one

    M0nkeyb0Y is offline   Reply With Quote
    Old 15-09-2009, 12:43 AM   #10 (permalink)
    Senior Member
     
    Join Date: Sep 2009
    Posts: 217
    Thanks: 7
    Thanked 4 Times in 4 Posts
    Re: M0nkeyb0Y's Tinderbox

    this is a great project mate, where you gonna have the power on switch? on the outside of the door?
    vti_786 is offline   Reply With Quote
    Old 15-09-2009, 01:08 AM   #11 (permalink)
    Senior Member
     
    Pob255's Avatar
     
    Join Date: Apr 2007
    Location: London
    Posts: 4,096
    Thanks: 155
    Thanked 334 Times in 311 Posts
    Pob255's system
    Re: M0nkeyb0Y's Tinderbox

    Originally Posted by M0nkeyb0Y View Post
    My system in the "my system" tag under my avatar. Nothing special, but want to make sure the idea and execution are solid before spending any dollar on a new one
    The funny thing is, looking at your specs if you did an upgrade the main thing I'd carry over would be the p180 which is the thing your replaceing with your desk.

    p.s. keep it up, we're waiting for more

    Pob255 is offline   Reply With Quote
    Old 15-09-2009, 12:55 PM   #12 (permalink)
    disMember
     
    M0nkeyb0Y's Avatar
     
    Join Date: Apr 2005
    Location: Kent
    Posts: 856
    Thanks: 154
    Thanked 28 Times in 22 Posts
    M0nkeyb0Y's system
    Re: M0nkeyb0Y's Tinderbox

    Originally Posted by Pob255 View Post
    The funny thing is, looking at your specs if you did an upgrade the main thing I'd carry over would be the p180 which is the thing your replaceing with your desk.

    p.s. keep it up, we're waiting for more
    Ha! it was a good case and served me well, but that time came to an end when I took my drill to it!

    I'm waiting for more too , but I only get time to work on it at the weekends, and with my kids running to and fro that makes it a little hard. I basically had this built as a dry run (the above pics were from that build), but it wasn't really fit for purpose, so I set about finding a motherboard to base a proper build around, and start again.

    Oolon very kind gave his old tray to me after seeing my thread in the 'wanted' section. I'll be giving him kudos in this thread next time I post pics, as that was certainly 'above and beyond'.

    M0nkeyb0Y is offline   Reply With Quote
    Old 15-09-2009, 12:56 PM   #13 (permalink)
    disMember
     
    M0nkeyb0Y's Avatar
     
    Join Date: Apr 2005
    Location: Kent
    Posts: 856
    Thanks: 154
    Thanked 28 Times in 22 Posts
    M0nkeyb0Y's system
    Re: M0nkeyb0Y's Tinderbox

    Originally Posted by vti View Post
    this is a great project mate, where you gonna have the power on switch? on the outside of the door?
    It's currently on the top of the middle shelf. I'll probably keep it there. will post more pic hopefully after the weekend.

    M0nkeyb0Y is offline   Reply With Quote
    Old 19-10-2009, 04:31 PM   #14 (permalink)
    disMember
     
    M0nkeyb0Y's Avatar
     
    Join Date: Apr 2005
    Location: Kent
    Posts: 856
    Thanks: 154
    Thanked 28 Times in 22 Posts
    M0nkeyb0Y's system
    Re: M0nkeyb0Y's Tinderbox

    Ok - update time is overdue...

    After the original post I decided that a more systematic and thought-out approach was needed to the design. I have now removed the rear of the pedestal cupboard and am building a 'flight case' to house my components; this will, in theory, give me a sealed unit in which I can determine airflow with some degree of accuracy. It'll also make the whole thing a little more upgrade-friendly if I can slide the box out and work on it.

    Now because the job has suddenly become a much larger project I've decided to 'do it properly', which involved some google sketch-ups that I'm too embarassed to show here, and a lot of sanding...


    a fair amount of riveting


    Which went wrong


    I love drilling rivets

    After a while things were starting to take shape, and I had the base of a case that would hopefully fit snugly into the pedestal.


    right, now some credit (as mentioned above in not big enough font): many thanks to oolon!! for providing me with a motherboard tray free of charge.

    I have no dremel so I got to work on it with a hacksaw and jig...


    add a little electric tape and who's to know?


    Right, I made those washers so I could attach the motherboard tray to the batons on the inside of the case using grommets to absorb any vibration...

    Anyway that's all the pictures I have at the moment, but there will be more to come, probably next week.

    M0nkeyb0Y is offline   Reply With Quote
    Received thanks from:
    Pob255 (20-10-2009)
    Old 19-10-2009, 04:57 PM   #15 (permalink)
    Senior Member
     
    Pob255's Avatar
     
    Join Date: Apr 2007
    Location: London
    Posts: 4,096
    Thanks: 155
    Thanked 334 Times in 311 Posts
    Pob255's system
    Re: M0nkeyb0Y's Tinderbox

    fter the original post I decided that a more systematic and thought-out approach was needed to the design.

    Half assed and bodget FTW!

    Although electrical tape says you've not truely given up on that approach

    Plan and plot but never put it on paper, although flattened out fag packets or chocolate bar wrappers are allowed

    Keep up the good work

    Pob255 is offline   Reply With Quote
    Old 20-10-2009, 10:13 AM   #16 (permalink)
    disMember
     
    M0nkeyb0Y's Avatar
     
    Join Date: Apr 2005
    Location: Kent
    Posts: 856
    Thanks: 154
    Thanked 28 Times in 22 Posts
    M0nkeyb0Y's system
    Re: M0nkeyb0Y's Tinderbox

    Originally Posted by Pob255 View Post

    Half assed and bodget FTW! Although electrical tape says you've not truely given up on that approach
    Ha! Go easy! I thought the electrical tape was a stroke of genius.

    Unfortunately these are just the pics I got on my phone, I was also using my wife's 'proper' camera but that's not available at the moment; otherwise I would have had some more/better pictures.

    I've re-sanded (240grit) and stained the desk, and need to oil and polish it. I'll stain the case the same colour so it doesn't look out of place.

    The case is coming along nicely, the motherboard tray is in and appropriate air holes are being cut into the base and rear.

    M0nkeyb0Y is offline   Reply With Quote
    Reply

    Breadcrumb
    Go Back   HEXUS.community discussion forums > HEXUS.help - buying advice & technical queries > HEXUS.hardware > Chassis & system 'modding' > Project Logs


    Currently Active Users Viewing This Thread: 1 (0 members and 1 guests)
     
    Thread Tools

    Posting Rules
    You may not post new threads
    You may not post replies
    You may not post attachments
    You may not edit your posts

    BB code is On
    Smilies are On
    [IMG] code is On
    HTML code is Off
    Trackbacks are On
    Pingbacks are On
    Refbacks are On


    All times are GMT. The time now is 10:44 AM.

    Any representations/statements made on the HEXUS.community discussion forums are the representations/statements of the author i.e. the person/organisation making them. If any such representations/statements are disputed they are a matter between the parties concerned.
    HEXUS Limited accepts no responsibility for any misrepresentations, inaccurate or false statements made by any person/organisation other than HEXUS Limited employees.
    For more information please read HEXUS Limited's terms, conditions and privacy policy.

    Hosted Exchange

    Powered by vBulletin® Version 3.8.4
    Copyright ©2000 - 2009, Jelsoft Enterprises Ltd.
    Content Relevant URLs by vBSEO 3.3.2
    © Copyright 2009 HEXUS® Limited. All rights reserved. Unauthorised reproduction strictly prohibited.